Tooth spacing, Blade welding, J~—d – Craftsman 351.214300 User Manual
Page 10
Attention! The text in this document has been recognized automatically. To view the original document, you can use the "Original mode".
Incorrect - Blades Clamped At Angle
j~—D
Incorrect - Blades Not Ground Square
Incorrect - Blades Overlap
Correct - Grind Blades Square and Clamp Straight
Correct - Clamp Blades Flat with no Overlap
Figure 10 - Blade Mounting and Clamping
TOOTH SPACING
Refer to Figure
11
.
* Approximately Vs” of blade will be consumed during
the welding process. This blade loss must be taken
into account.
• All blades must have some of the teeth ground off so
that the tooth spacing will be uniform after welding.
V4 Tooth -
'/4
Tooth
4TPI
Vs Tooth -
6TPI
V4 Tooth -
12TPI
V4 Tooth
- V
b
Tooth
V4Tooth_:^j:y^j'/^ Tooth
16
TPI
’/2
Tooth
1V4Tooth_^^^^;j^ ■ 1V4Tooth
20TPI<
V
b
Tooth -
8TPI
Vs Tooth - TiF
10TPI <
I
Figure 11 -Tooth Spacing (TPI = Teeth per Inch)
- Ve Tooth
• Tooth grinding procedure must be done carefully In
order to grind the proper number of teeth and not to
grind below gullet which would weaken the blade.
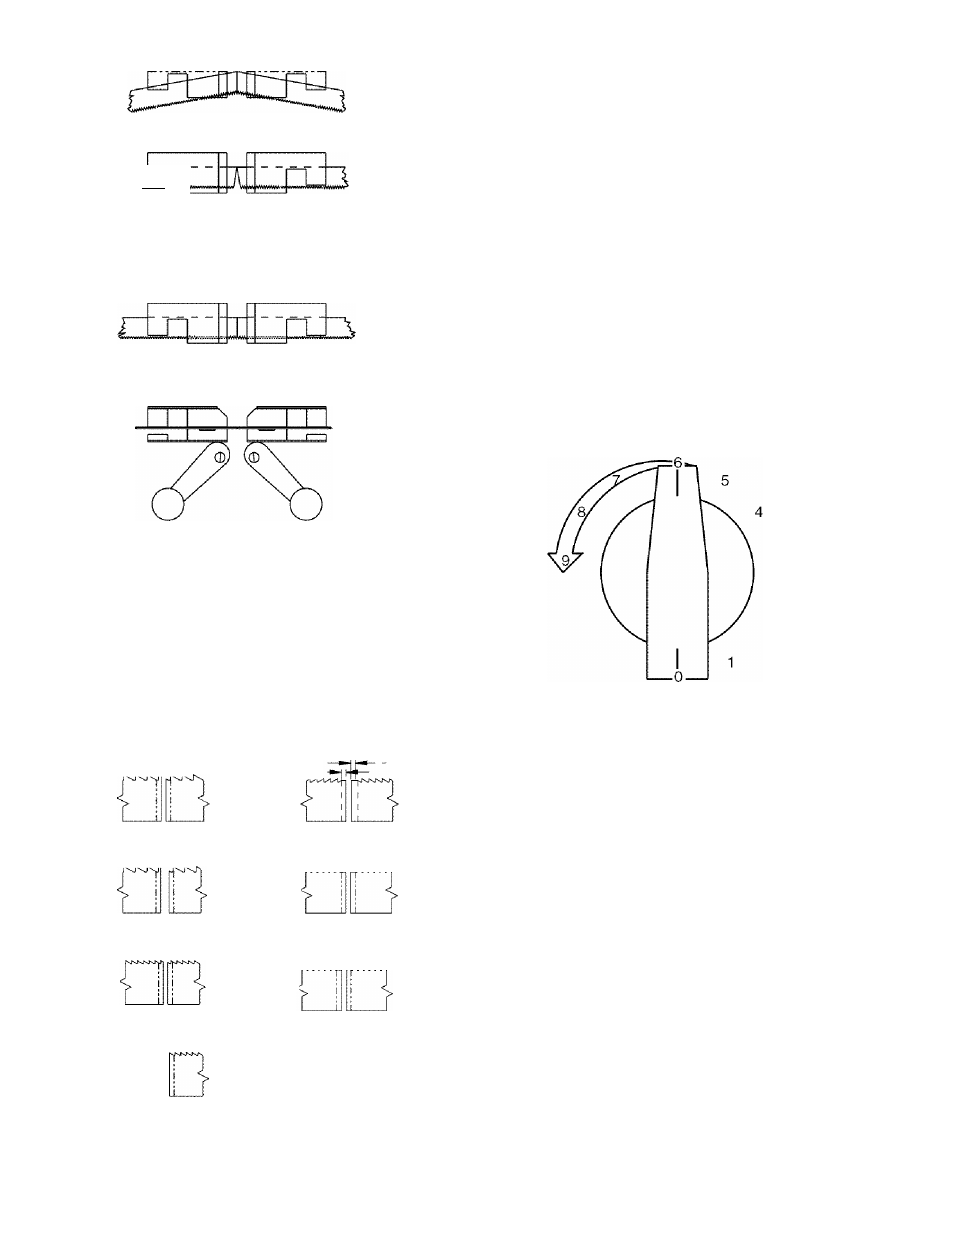
BLADE WELDING
Refer to Figures 7 and
12
.
• To set weld pressure adjustment knob, turn the knob
counterclockwise to Increase the pressure. The pres
sure adjustment knob controls force applied to the
movable jaw.
NOTE: Weld pressure adjustment knob must be reset
to “
0
” after each welding.
• Wider blades and thicker blades need more weld
pressure to force the blade ends together during
welding. If too little pressure is applied, the blade
ends will melt. Too much pressure may cause the
blades to overlap.
For example, for V
2
” wide blades, turn the pressure
adjustment knob counterclockwise until the pointer
is at
6
(See Figure 12).
Figure 12 - Weld Pressure Adjustment
• If blade melts, increase pressure. If there are “blow
holes” In the weld, increase pressure.
• If blade overlaps, decrease pressure.
• Wider blades need more pressure and thinner
blades need less pressure. Weld pressure is also
affected by blade material.
WARNING; Welding operation produces sparks at
blade intersection. Step away to left side of welder
during welding operation.
WARNING: Always wear ANSI approved safety
glasses during welding. Sparks from welder can
cause serious injury to eyes.
• Press weld button and hold down. The blade ends
will become red hot and soft. The movable jaw will
force the blade ends together creating a bead of
metal and the limit switch will automatically cut
power to jaws.
• Release weld button and wait 10 seconds to allow
blade to cool.
• Reset weld pressure adjustment to “
0
”.
1 0