Before starting the engine, Operation – Craftsman 580.747100 User Manual
Page 9
Attention! The text in this document has been recognized automatically. To view the original document, you can use the "Original mode".
OPERATION
PRESSURE WASHING/RINSING
A
WARNING: BE EXTREMELY CAREFUL IF YOU
MUST USE PRESSURE WASHER FROM A LAD
DER OR SCAFFOLDING OR FROM ANY OTHER
RELATIVELY UNSTABLE LOCATION, PRESSURE
IN A RUNNING WASHER BUILDS IN THE WAND AS
YOU CLIMB. WHEN YOU PRESS THE TRIGGER,
THE RECOIL FROM THE INITIAL SPRAY COULD
FORCE YOU TO FALL, OR IF YOU ARE TOO
CLOSE TO THE CLEANING SURFACE, HIGH
PRESSURE COULD FORCE YOU OFF CLIMBING
APPARATUS.
“ Hook up water supply
{Fig, 12).
* Adjust nozzle to select
high pressure mode,
NOTE: Detergem wni MUt
flow when in the high pres
sure mode.
ATTACH WATER
SUPPLY HERE,
FIG. 12
colder •
-32°F
■ warmer
5W30
SAE30
Although multi-viscosity oils (5W30,10VY30, etc.) improve
starting In cold weather, these multi-viscosity oils will result
in increased .oil consumption when used above 32°F,
Check your engine oil level more frequently to avoid possi
ble damage from running low on oil. Oil sump capacity Is
20 ounces.
•
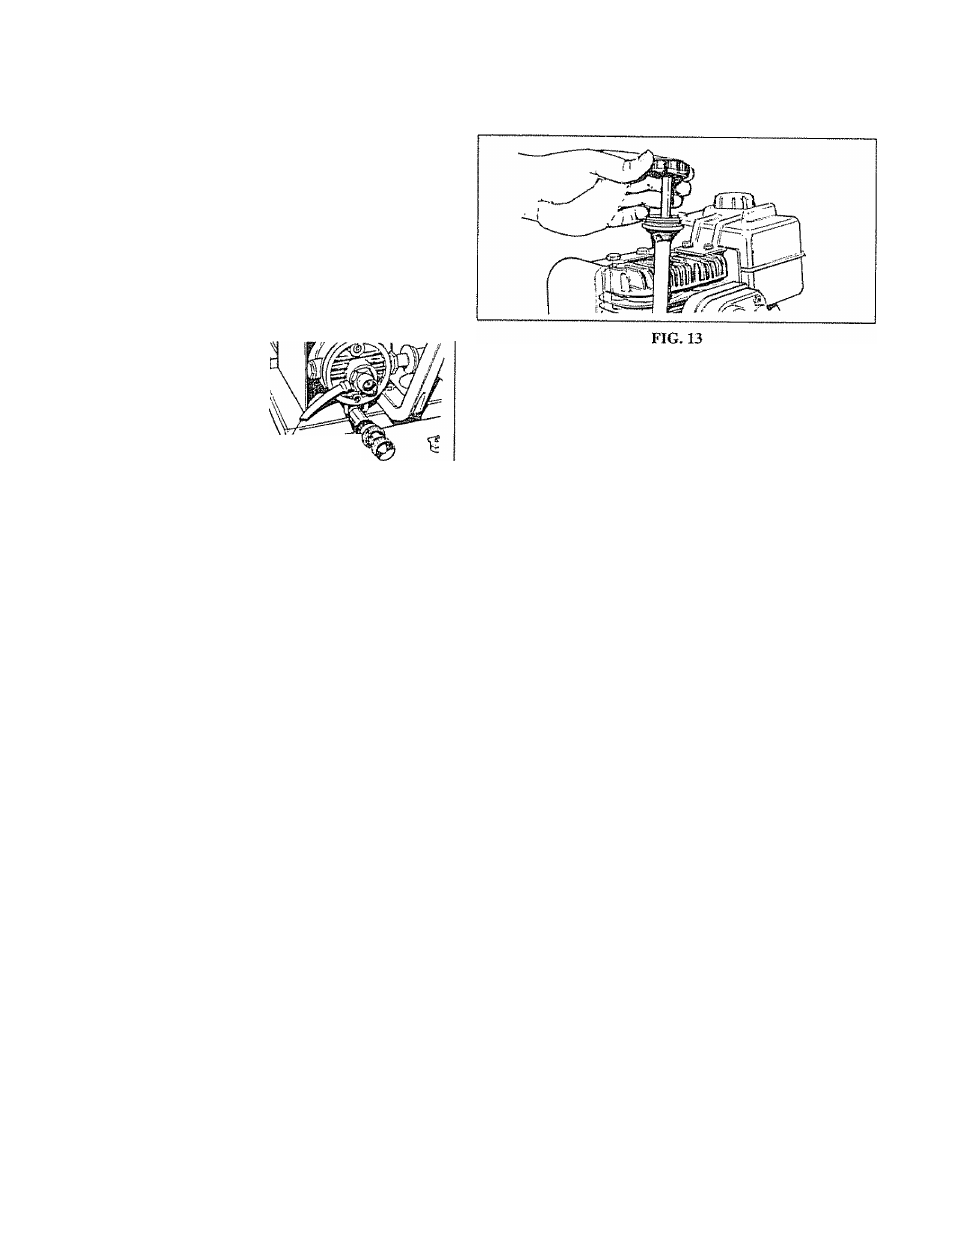
Position pressure washer so engine is level
•
Clean area around oil fill and remove oil dipstick (Fig,
13).
•
Wipe dipstick clean, insert it into oil fill hole and tighten
securely. Remove oil dipstick, if oil is not up to FULL
MARK on dipstick, add recommended oil. POUR
SLOWLY,
■» Wipe dipstick clean each time oil level is checked.
iMPORTANT: DO NOT FILL ABOVE TULL" MARK ON
DIPSTICK.
» Pour oil from the enclosed bottle into the oil fill opening.
• Install oil dipstick, hand tighten securely.
GAS
» Start washer and work
from the top of the sur
face to the bottom.
NOTE: The high pressure mode is most effective when the
tip of the wand is held between 6 inches to two feet from
the surface being cleaned.
BEFORE STARTING THE ENGINE
To operate the engine you will need the following;
ENGINE OIL
IMPORTANT: ANY ATTEMPT TO CRANK OR START
THE ENGINE BEFORE IT HAS BEEN PROPERLY SER
VICED WITH THE RECOMMENDED OIL RESULTS IN AN
ENGINE FAILURE.
A 20 oz, bottle of SAE 30 weight oil is included in the parts
carton,
NOTE: When adding oi! to the engine crankcase in the
future, use only high quality detergent oil rated with API
service classification SF or SG, rated SAE 30 weight.
Select the oil’s viscosity grade according to your expected
operating temperature.
A
A
Vi/ARNING: NEVER FILL FUEL TANK INDOORS.
NEVER FILL FUEL TANK WHEN ENGINE IS RUN
NING OR HOT. DO NOT SMOKE WHEN FILLING
FUEL TANK.
WARNING:
NEVER
FILL
FUEL
TANK
COM
PLETELY FULL. FILL TANK TO ABOUT 1/2"
BELOW THE BOTTOM OF FILLER NECK TO PRO
VIDE SPACE FOR FUEL EXPANSION. WIPE AWAY
ANY FUEL SPILLAGE FROM ENGINE AND EQUIP
MENT BEFORE STARTING.
The manufacturer recommends fresh, clean, unleaded reg
ular automotive gasoline with a minimum of 77 octane
(Leaded regular grade is an acceptable substitute). Tank
capacity is 2 U.S. quarts.
' Use clean fuel and store in approved, clean covered
containers. Use dean fill funnels. Never use "stale"
gasoline left over from last season or gasoline stored
for long periods,
IMPORTANT; IT IS IMPORTANT TO PREVENT GUM
DEPOSITS FROM FORMING IN ESSENTIAL FUEL SYS
TEM PARTS SUCH AS THE CARBURETOR, FUEL FIL
TER. FUEL HOSE OR TANK DURING STORAGE, ALSO,
EXPERIENCE INDICATES THAT ALCOHOL-BLENDED
FUELS {CALLED GASOHOL OR USING ETHANOL OR
METHANOL) CAN ATTRACT MOISTURE WHICH LEADS
TO SEPARATION AND FORMATION OF ACIDS DURING
STORAGE. ACIDIC GAS CAN DAMAGE THE FUEL SYS
TEM OF AN ENGINE WHILE IN STORAGE. TO AVOID
ENGINE PROBLEMS. THE FUEL SYSTEM SHOULD BE
EMPTIED BEFORE S T O R A G E O F 3 0 D A Y S OR
LONGER, SEE "STORAGE" ON PAGE 11. NEVER USE
ENGINE OR CARBURETOR CLEANER PRODUCTS IN
THE FUEL TANK OR PERMANENT DAMAGE MAY
OCCUR.
" Clean area around fuel fill cap, remove cap
•
Add "UNLEADED" regular gasoline, slowly, to fuel
tank.
•
Install fuel cap and wipe up any spilled gasoline.