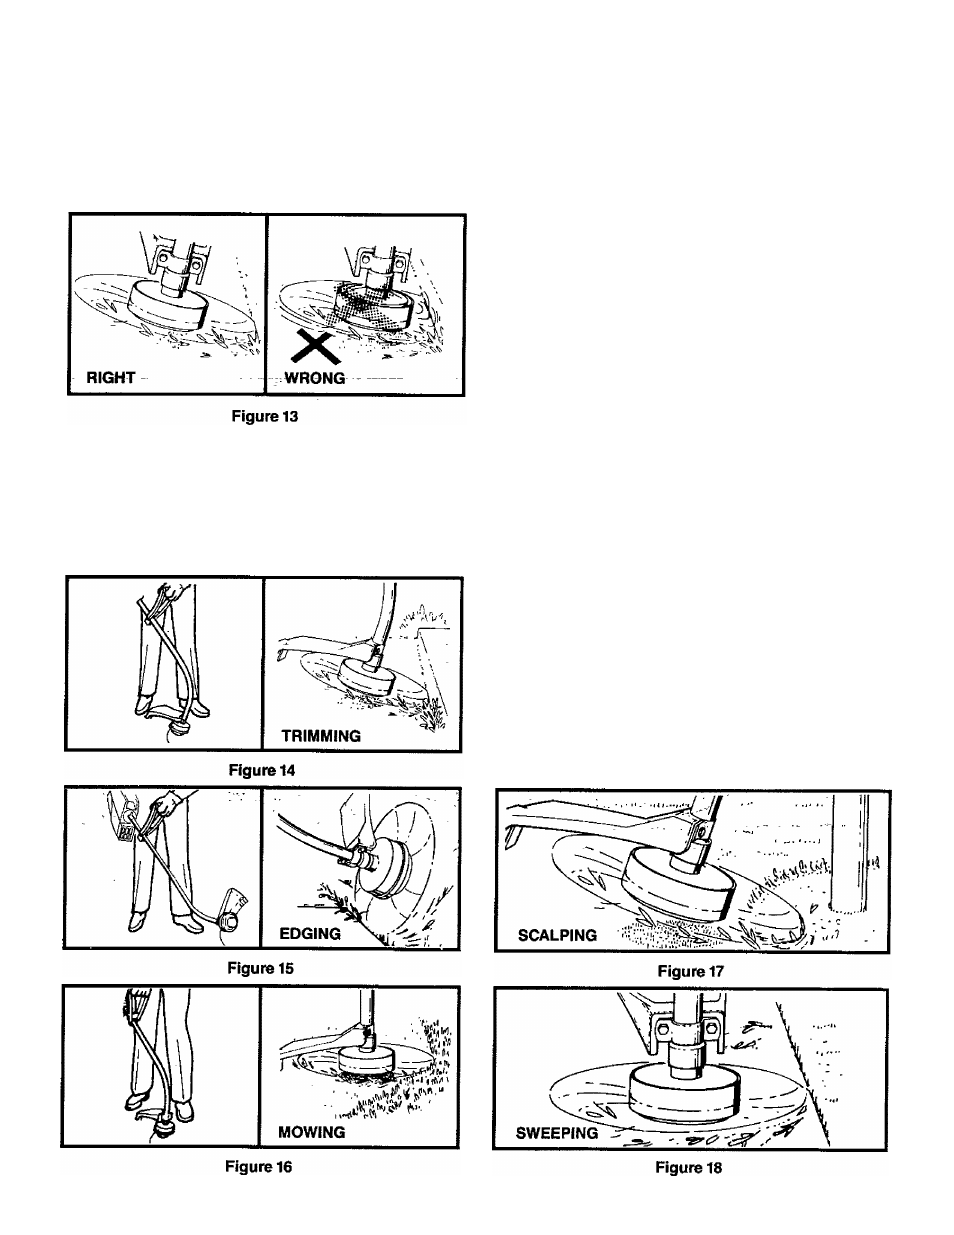
Trimming — figure 14, Edging — figure 15, Mowing — figure 16 – Craftsman 358.796131- User Manual
Page 11: Scalping —figure 17, Sweeping —figuréis
Attention! The text in this document has been recognized automatically. To view the original document, you can use the "Original mode".
• The tip of the line does the cutting.
Allow the unit
to trim at its own pace. You will achieve better results
by not crowding the line into the cutting area. The right
way and wrong way are shown in Figure 13.
• Always cut left to right.
C. CUTTING METHODS
AWARNING
Always wear eye protection. Never lean overthe
cutting head. Rocks or debris can ricochet or be
thrown into eyes and face and cause loss of
vision or serious personal injury.
1.
TRIMMING — Figure 14
Hold the cutting head at a 30 degree angle to the
cutting area for efficient trimming. Do not force the
cutting line intothe work area. Allow the tipof the line
to do the cutting.
2. EDGING — Figure 15
Adjust yourtrimmer for edging byturningtheengine
upside down so the drive shaft housing angles out
rather than down. Rotate the assist handle on the
shaft, placing it in an up, usable position. Hold the
cutting head above the area to be edged as shown
and operate the throttle trigger with your thumb.
3. MOWING — Figure 16
Yourtrimmer is ideal for mowing in places conventional
lawn mowers cannot reach. In the mowing position, the
cutting line is parallel to the ground. Avoid ietting the cut
ting head continuously contact the ground as this can
cause damage to your unit as well as scalp the ground.
4. SCALPING —Figure 17
To remove unwanted vegetation around trees, posts,
monuments, etc., maintain a30 degree angle with the
cutting head and allow the tip of the cutting iine to
strike the ground.
NOTE: Increased line wear is to be expected when
using scalping techniques.
5. SWEEPING —Figuréis
For quick and easy clean up extend the line to the
length allowed by the line limiter and move the unit
from side to side, keeping the cutting head parallel to
the surfaces being swept.
11