Dairy compartment(in some models), Egg compartment (in some models), Freezer section – LG LFC25765 User Manual
Page 21: Ice bin (in some models), Durabase (in some models), Durabase divider (in some models), Tilting door (in some models), How to use, Glide-out drawer basket (in some models), Refrigerator care and cleaning
Attention! The text in this document has been recognized automatically. To view the original document, you can use the "Original mode".
REFRIGERATOR CARE AND CLEANING
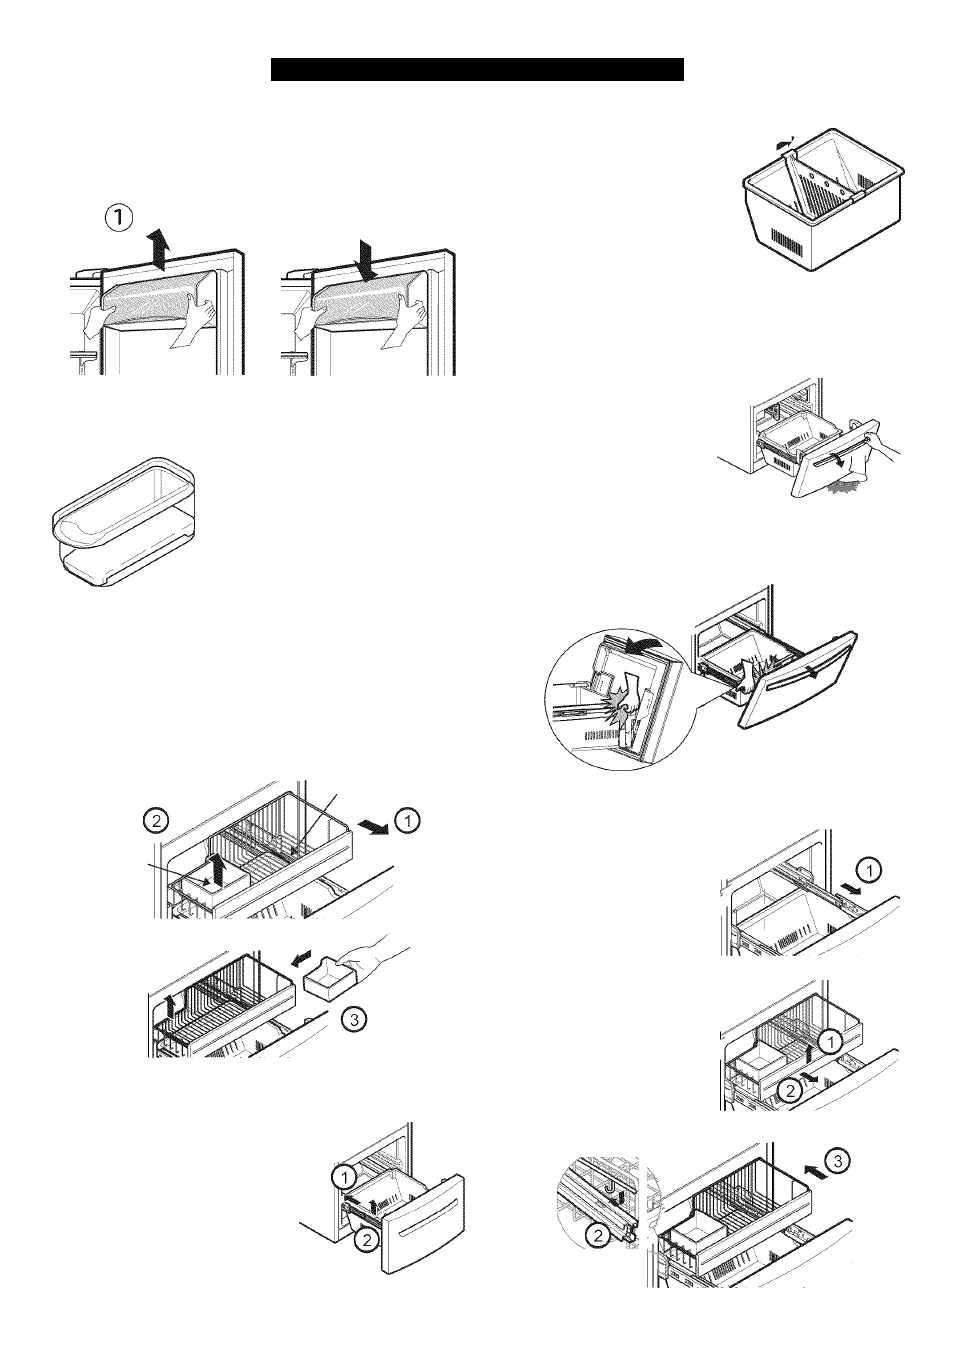
DAIRY COMPARTMENT(in some models)
• To remove the dairy oompartment, simply lift it and
pull straight out (
1
).
• To replaoe the dairy oompartment, slide it in above the
desired looation and push down until it stops (
2
).
EGG COMPARTMENT (in some models)
Keep the eggs oompartment in an interior shelf, not in
a door raok.
CAUTION:
Do
not
use
the
eggs
oompartment
as
a
oontainer
for
keeping
ioe
in
the
freezer
oompartment
If
it
freezes, it oould break easily.
FREEZER SECTION
ICE BIN (In some models)
• Pull the drawer as muoh as possible (1).
• Raise the ioe box and take it out oarefully (2).
• Take the drawer off as muoh as possible and put the
ioe bin in the right position (3).
Drawer
Ice Bin
DURABASE (in some models)
• To remove the Durábase, push
it baek, raise the front part
and pull it up (
1
).
•
To put it baok, insert the
Durábase in the rail assembly
(
2
) .
DURABASE DIVIDER (in some models)
Allows
organizing
the
Durábase
^
area in
2
seotions.
For moving the divider, just move
it in the direotion that you want
0 WARNING: There is enough
spaoe for the ohildren to play.
E3 WARNING:
In order to
prevent aooidents, such as suffocation, DO NOT let
children and pets play inside the durábase.
TILTING DOOR (in some models)
The tilting door provides an
easy access to the frozen food.
How to use:
Incline
the
door
and pull it out
downwards
0
WARNING: Be careful when opening the door, do
not place your feet under the door or your hands
inside the freezer; you may hurt them in doing so.
GLIDE-OUT DRAWER BASKET (in some models)
• Pull the box as much as
possible, pick up the basket
a bit (
1
) and pull it out (
2
).
To install, pull the cords to
their fullest (1). Lock the
supports
of
the
basket
into the slides of the cords
(
2
) and push it all the way
through (3).
20