Recording on an audio tape or dat, 1 select the desired program source, 2 set the tape (dat) deck in the recording mode – Sony STR-AV910 User Manual
Page 29: 3 start the selected program source, Tape dubbing, 3 press tape 1 (or dat)
Attention! The text in this document has been recognized automatically. To view the original document, you can use the "Original mode".
Recording on an Audio Tape or DAT
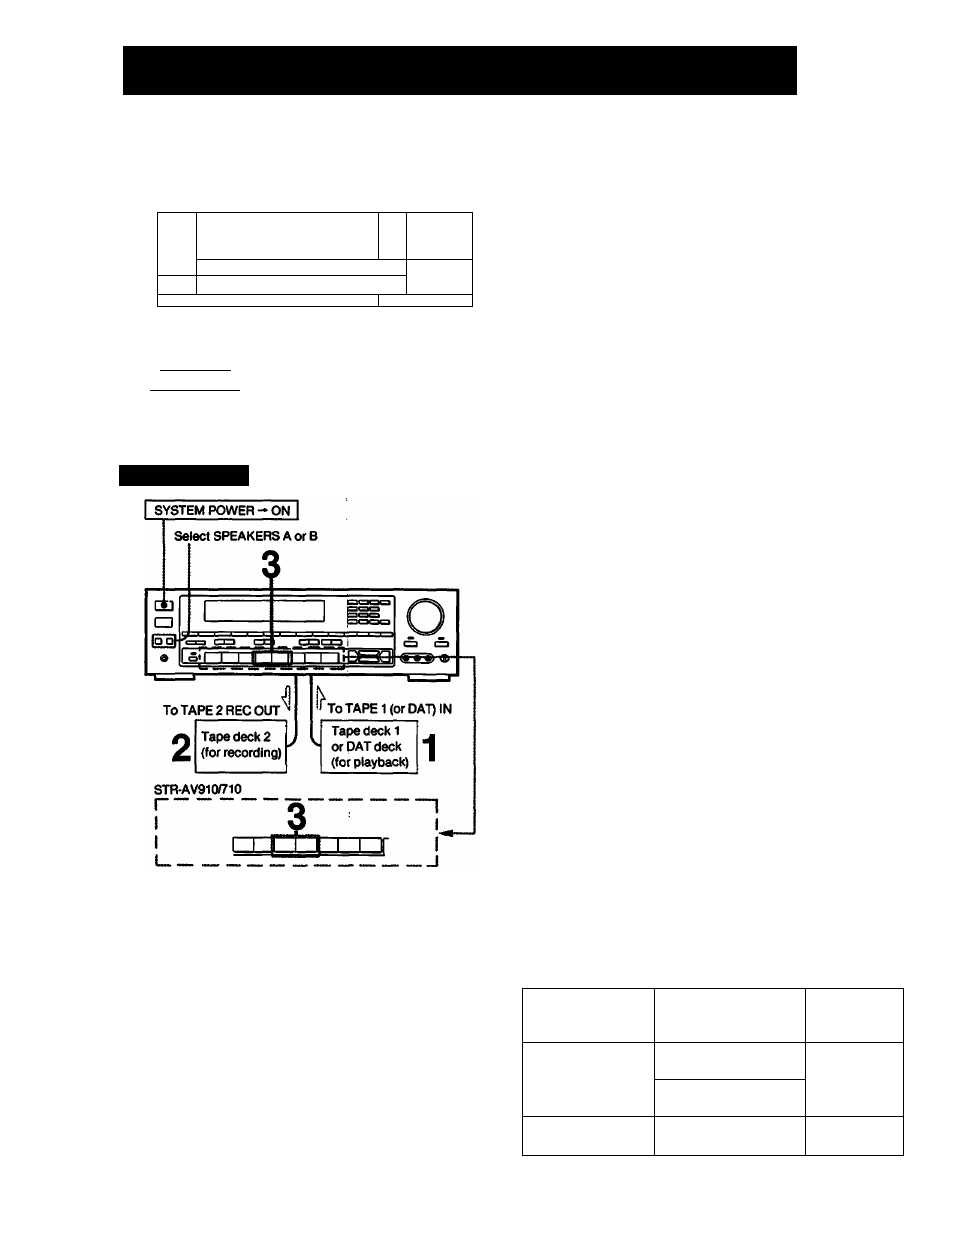
SYSTEM POWER-ON
Select SPEAKERS A or B
to DAT or
Tape1,2RECOUT
2 I DAT
Of
Tape deck
QD
a
O
*cs3 CC3 oo | i
t5
a
re e e) db
®
SIFT I "I I I I I ■ I [sa
U____I !■"
Turritable system
! CD player
VCR
1
Select the desired program source.
For an FM/AM broadcast, tune in the desired
station.
2
Set the tape (DAT) deck in the recording mode.
3
Start the selected program source.
Tape Dubbing
1
Insert the recorded tape into tape deck 1 (or
the OAT deck).
2
Insert a blank tape into tape deck 2 and adjust
the recording level.
3
Press TAPE 1 (or DAT).
4
Start the playback of the tape (or the OAT) in
tape deck 1 (or the DAT deck),and set tape
deck 2 in the recording mode.
Dubbing will start.
Note on recording
Use TAPE 2 REC OUT for the recording with the equalizer and
SURROUND effects.
For other REC OUT jacks, the settings of the VOLUME,
SURROUND, BALANCE, and graphic equalizer do not have any
effect on recording.
Monitoring the recorded sound
If you have connected a tape deck having separate record and
playback heads to the TAPE 2 jacks, you can monitor the
recording results. While recording or dubbing, press the TAPE 2
MONITOR button. To listen to the source sound again, press the
button again.
Note on tape dubbing
Tape dubbing is possible only in the following directions:
From
(playback side)
To
(recording side)
FUNCTION
selector
to be pressed
Tape deck connected
to TAPE 11N
Tape deck connected to
TAPE 2 REC OUT
TAPE1
DAT deck connected
to DAT REC OUT
DAT deck connected
to DAT IN
Tape deck connected to
TAPE 1 or 2 REC OUT
DAT
29