Compaq PowerLeap PL-P3/SMP User Manual
Page 4
www.powerleap.com
•
www.friendtech.com
-4-
Installation Guide
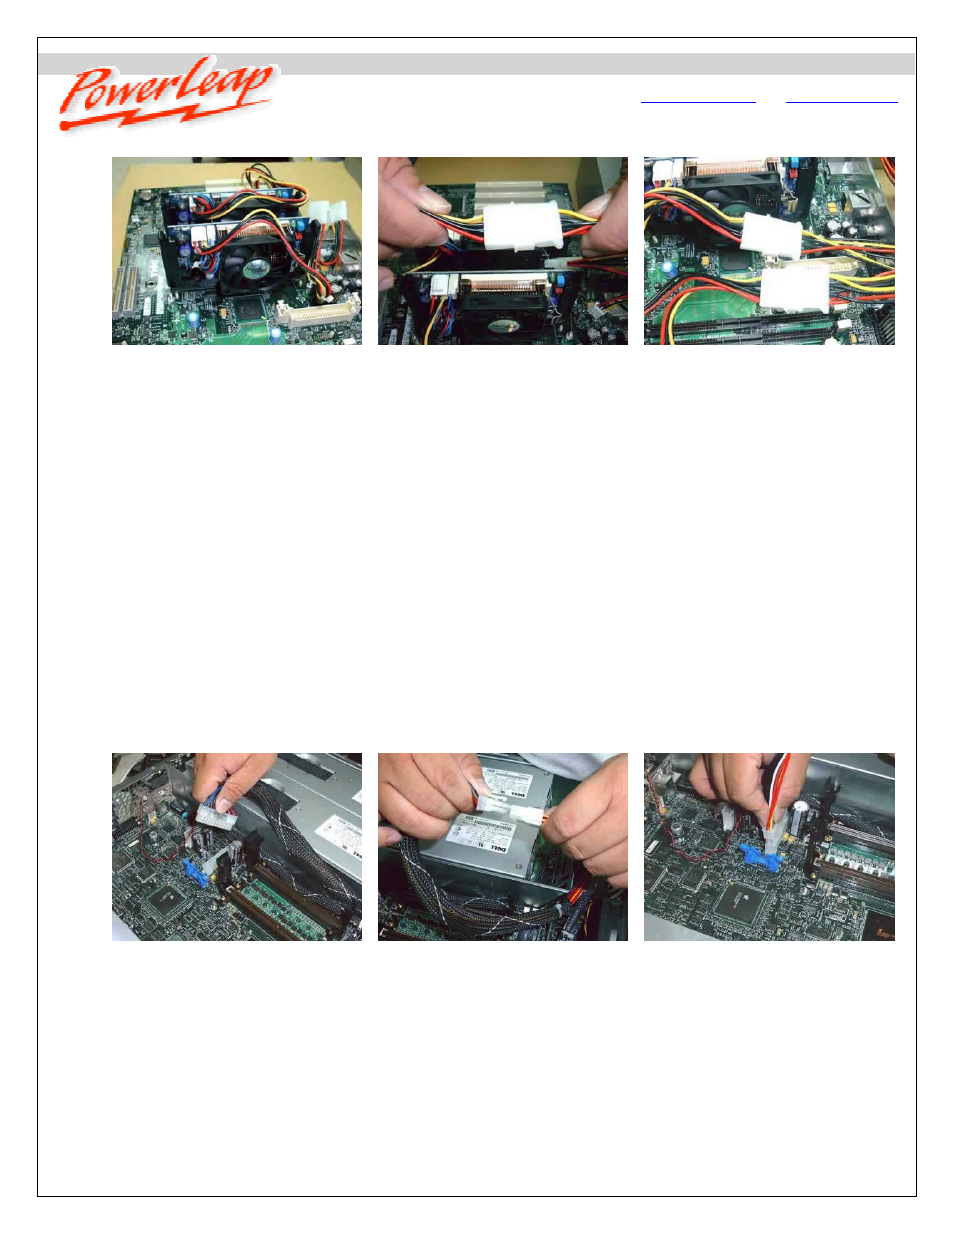
Inserting the second PL-P3/SMP into
the processor slot.
Connecting the 4-pin end of the
PL-P3/SMP’s power cable to an unused
4-pin connector from the power supply.
The connected cables for two
PL-P3/SMPs.
Important! Do not connect the PL-P3/SMP to a connector from a hard disk drive or other device.
Other Power Connection Options
If you can’t connect the PL-P3/SMP to an unused connector from your power supply (as shown above)—for
example, your system uses a WTX power supply, or a proprietary power supply (including Dell and Compaq
models) with non-standard pin signal definitions, or your power supply simply does not have any remaining unused
connectors—we can suggest several options:
Consider upgrading the power supply to obtain more reserved connectors (contact your system vendor for information
on power supply upgrades).
Contact PowerLeap for a custom-designed power cable solution (minimum order: 50 pcs.). The photos below illustrate
using a custom-designed power cable to
connect the PL-P3/SMP to a power supply.
Using a custom-designed power cable to connect the PL-P3/SMP to a power supply:
Disconnecting the WTX power supply
connector from the motherboard.
Connecting the PL-P3/SMP’s power
cable to the WTX power supply
connector.
Connecting the PL-P3/SMP’s power
cable to the motherboard.