Tri-Tronics ViceBreaker H2 User Manual
Page 6
Page 6
Page 7
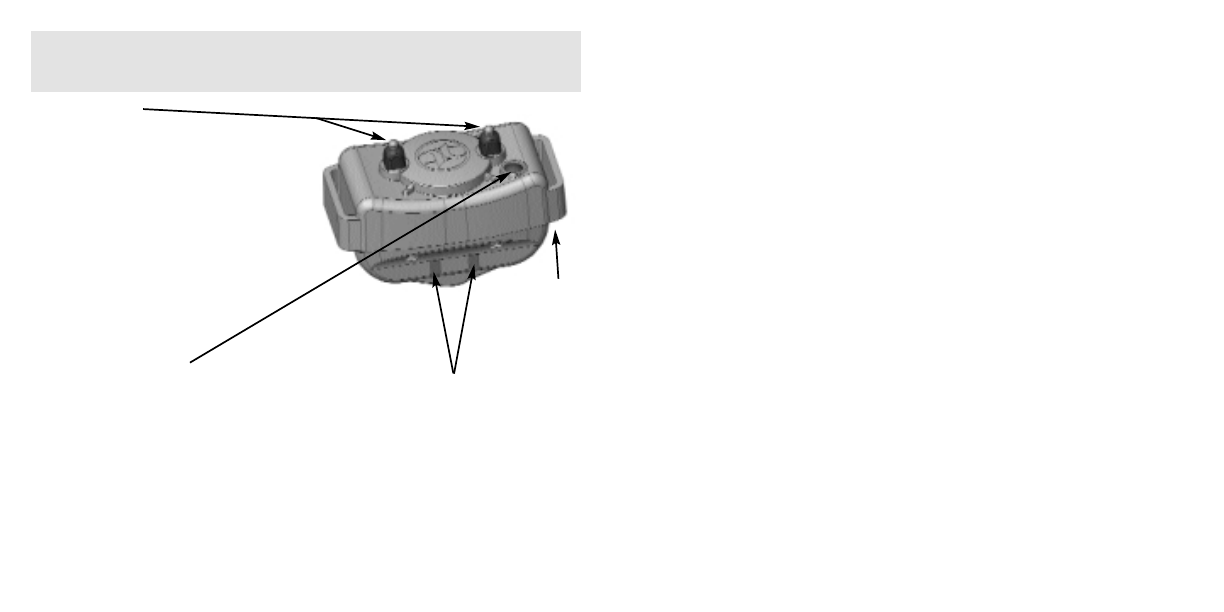
Contact Points
Tri-Tronics’ patented insulated contact
points ensure consistent stimulation
under all conditions. Check contact
points regularly for tightness. Use only
our plastic wrench to remove or tighten
and do not over tighten.
Collar On/Off Button
Press to turn the collar on. Two
confirming tones will sound and the
collar light will flash periodically while
the collar is on. Press to turn the collar
off. One long tone will sound and the
light will stop flashing. Turn the collar
off when not in use to conserve
batteries. You can also turn the collar
on and off remotely using the
transmitter.
Charging Contacts
Place the collar in the supplied cradle
to charge. Discharged batteries will take
only two hours to fully recharge with
our new battery charging system.
It will take 20 seconds after turn-on
before the light will glow steadily or
before the collar will stimulate.
NOTE: CHARGE COLLAR BEFORE FIRST USE.
Collar Strap
Retaining
Loop
(“Belt Loop”)
ATTACHING THE COLLAR STRAP TO YOUR COLLAR
Your ViceBreaker
®
H2 is shipped with the collar strap separate from the collar.
Install the collar strap by sliding the leather strap through the three “belt loops”
on the collar. Position the buckle where it is convenient. If you have purchased
an additional collar for a second horse, slide the red sleeves over the strap of the
additional collar, positioned so one will show on each side of the horse’s neck.
If you have purchased a second additional collar for a third horse, return the
included card to Tri-Tronics to receive a set of blue sleeves. When you set your
additional collar(s) to operate with your ViceBreaker
®
H2 transmitter (page 11)
be sure that the correct colored sleeve matches the desired horse selector dial
position (red or blue).
CHARGING THE COLLAR
Approximately two hours is a full charge for a ViceBreaker
®
H2.
Charge the collar before first use. Plug the power supply into an outlet and plug
the cord into the cradle. Insert the collar into the cradle so that the charging
contacts on the collar line up with the cradle charging contacts. There will be a
positive “snap” when the collar locks into the cradle correctly. The cradle light
flashes briefly when power is connected. When the collar is charging the cradle
light will be red. When charging is complete the cradle light will turn green. You
may leave the collar on charge indefinitely without damage to the batteries.
If the cradle light is off there is no power to the cradle, the collar and cradle
charging contacts are not seated properly, or the charger is faulty. Please see the
troubleshooting section.