Taylor-Wharton RS-234 User Manual
Page 12
11
5.
Clean thread sealant from threads of nipple and regulator. To install a replacement or readjusted regulator,
apply Teflon tape to the nipple on the container and thread the valve body onto the nipple.
6.
Reconnect the tube connection to the regulator and tighten.
7.
Open the ISOLATION VALVE (V-4) and the PRESSURE BUILDING VALVE (V-5) and check for leaks.
Regulator Adjustment (P.B. or Economizer) - Bench Procedure
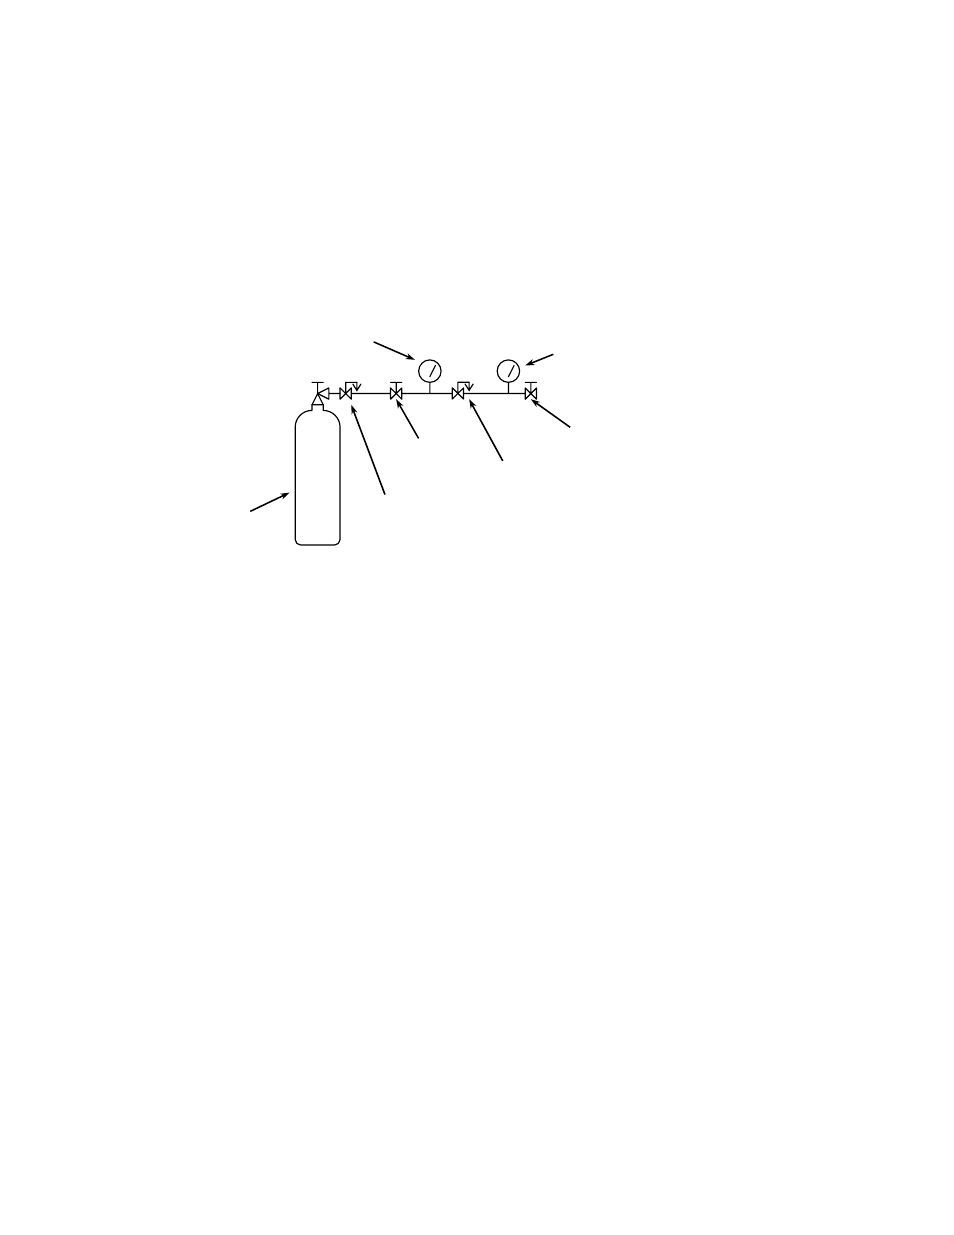
For more accurate adjustment it is recommended that the pressure building regulator be removed from the system. A
regulator bench adjustment fixture should be used. The figure below shows a typical setup.
Regulator bench adjustment fixture.
1.
Leak test joints between the high pressure cylinder regulator and the dump valve. Joints must be leak free
before proceeding.
2.
Close the on/off valve and the dump valve.
3.
Open the high pressure cylinder valve.
4.
Set the high pressure regulator above the desired set point for the pressure builder.
5.
Slowly open the on/off valve and observe the downstream pressure gauge.
6.
When the regulator under adjustment closes, the P.B. set point is indicated on the downstream pressure
gauge.
7.
Close the on/off valve and open the dump valve.
8.
To reset the regulator, loosen the lock nut on the adjusting screw. Raise the setpoint by turning the
adjusting screw clockwise; lower the setpoint by turning the screw counterclockwise. After adjustment,
repeat steps 5 and 6 to check the setting before reinstalling the regulator on the liquid container.
9.
When reinstalling the pressure building regulators on the system, orient the regulator so the flow arrow points
away from the pressure building valve (V-5).
Economizer Regulator Adjustment Procedure
Adjustment of the economizer regulator may be accomplished with the regulator removed from the system. The
regulator bench adjustment fixture shown above should be used.
High Pressure
Cylinder
Regulator
Pressure
Gauge
Regulator to
be adjusted
Dump Valve
On/Off
Valve
Pressure
Gauge