Qmark A24DD - Whole House Ventilator User Manual
Page 2
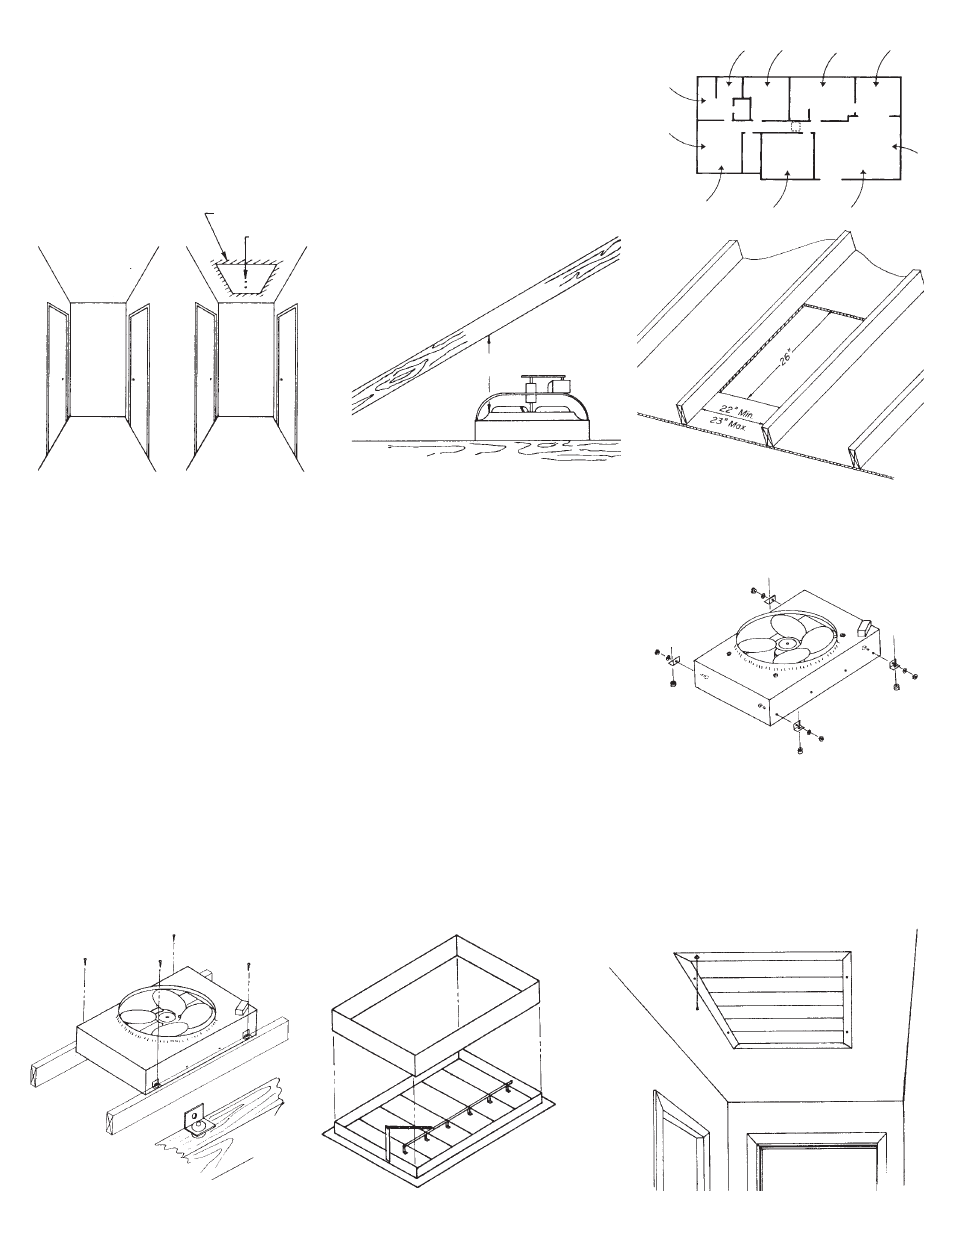
ROOF
RAFTERS
18” MIN
CLEARANCE
Step 3.
Now, clear insulation and find pilot hole in attic, and tentatively lay out same rectangular hole as on ceiling below. Adjust location of this hole
so as to insure a vertical clearance from rafters of 18” above joists. There must be a minimum of 22” between joists and a maximum of 23”.
(See Figs. 5A and 5B.)
FIG. 5A
FIG. 5B
Step 4.
Carefully cut hole in ceiling flush with joists.
Step 5.
Install angle brackets on each side of fan using hardware provided. Position brackets as shown
in (Fig. 6). Use outermost holes on side of fan. If either of these is blocked, use next hole closest
to center of fan. (See Fig. 6.)
Step 6.
Position fan over opening. Screw fan mounting brackets to joists using rubber grommets and
wood screws provided. (See Fig. 7.) Attach extra length of chain to control switch.
FIG. 6
FIG. 7
— 2 —
Step 7.
Lift spring holder into position as shown below. Lock to edge of frame by turning screw inward. Spring may now be hooked to connector.
Adjust spring tension with shutter lying flat on floor by moving the hook from one hole to another hole in the connector UNTIL THE BLADES
OF THE SHUTTER JUST CLOSE.This adjustment is important.
Step 8.
Slide sleeve over shutter as shown in Fig. 8. Position shutter and sleeve in ceiling with chain hole aligned with control switch. Sleeve should
fit inside fan housing. Make sure shutter is aligned directly beneath fan and that it opens and closes freely. Secure shutter to ceiling. Pass
chain through hole in shutter so that it hangs freely in hallway. (See Fig. 9.)
FIG. 8
FIG. 9
SLEEVE
SHUTTER
OVERLAP AREA
PILOT HOLE
FIG. 3
FIG. 4
FIG. 2
Step 1.
Fan should be located in center of house, preferably in hallway or corridor. This will allow air to
be drawn through all parts of living space. (See Fig. 2.)
Step 2.
Determine truss direction and locate one truss (joist). Lightly pencil a rectangular opening 22” x
26” on ceiling (with 26” side parallel to truss direction ) where shutter is to be located. Check to be
sure at least 2 inches of clearance area is available for overlap of shutter flanges. (See Fig. 3 and
Fig. 4.) Drill a small pilot hole in the center of this rectangle in the ceiling.