Inst alla tion – Qmark 790L Room-to-Room Ventilator User Manual
Page 2
NOT
SUIT
ABLE FOR USE OVER COOKING EQUIPMENT
. SEE
ILLUSTRA
TION.
DO NOT
MOUNT
IN
A
FIRE-RA
TED W
ALL.
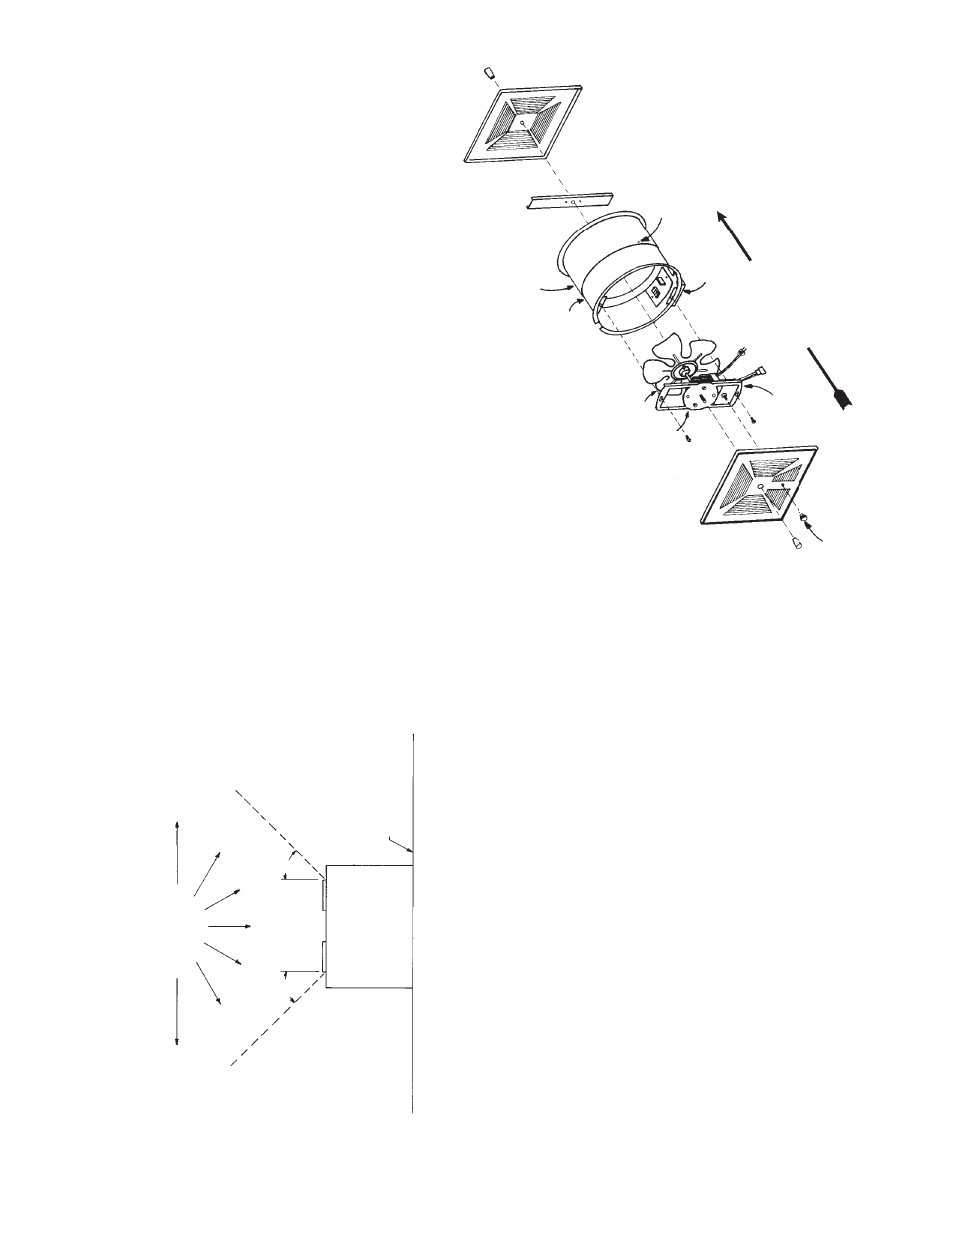
OUTSIDE SLEEVE
OUTLET
BOX
INSIDE SLEEVE
MOT
OR & BLADE
BRACKET
CONTROL
CONTROL
KNOB
SCREW (FROM INSIDE
ON BOTH SIDES)
AIR FLOW
FIG. 2
INST
ALLA
TION
1.
Determine location of ventilator
. Locate wall studs, being careful of obstruc-
tions. Remember to leave enough clearance for the outlet box.
2.
Mark and cut round hole as close to a stud as possible at desired location
in wall. Hole should be 9
1
⁄
8
” in diameter
.
3.
Remove ventilator from carton and disassemble. Remove control knob
and
grille cover knob. Remove grille cover
. Remove motor bracket
assembly by loosening screws and twisting bracket clockwise. Be sure to
unplug motor and control from outlet box. Remove two screws which
secure inside and outside sleeves together
. Pull sleeves apart. See
Figure 2.
4.
Establish air flow direction desired and install outside sleeve (without junc-
tion box) in room to be exhausted
into
. Slide inside sleeve (with junction
box) from other side of wall into place and secure with two screws.
This will
trap the wall between the sleeve flanges and hold ventilator in place. If
sleeves cannot be clamped tightly enough to secure housing in wall, screw
or nail to stud through any of holes or slots in sleeve.
(Be sure power to
supply line is of
f.)
5
.
Remove outlet box cover and outlet box. Run power cable from
source into back of outlet box, and secure with proper clamp.
6.
Attach ground supply lead to ground terminal in outlet box (green screw).
Attach supply leads to receptacle wires, white to white and black to black.
All wiring must meet all local and N.E.C. codes.
7.
Carefully replace outlet box and cover securely being sure not to pinch any
wires.
8.
Replace motor and bracket assembly by carefully plugging in motor and
control into their respective receptacles and placing key hole slots in bracket
over screws.
T
wist to lock bracket in place, centering blade in housing
before securing screws.
9.
Replace grille covers and knobs.
DO NOT
INST
ALL
ABOVE
OR INSIDE
THIS AREA
45˚
45˚
COOKING
EQUIPMENT
FLOOR