Installation (continued) – Dell S520 Projector User Manual
Page 6
6
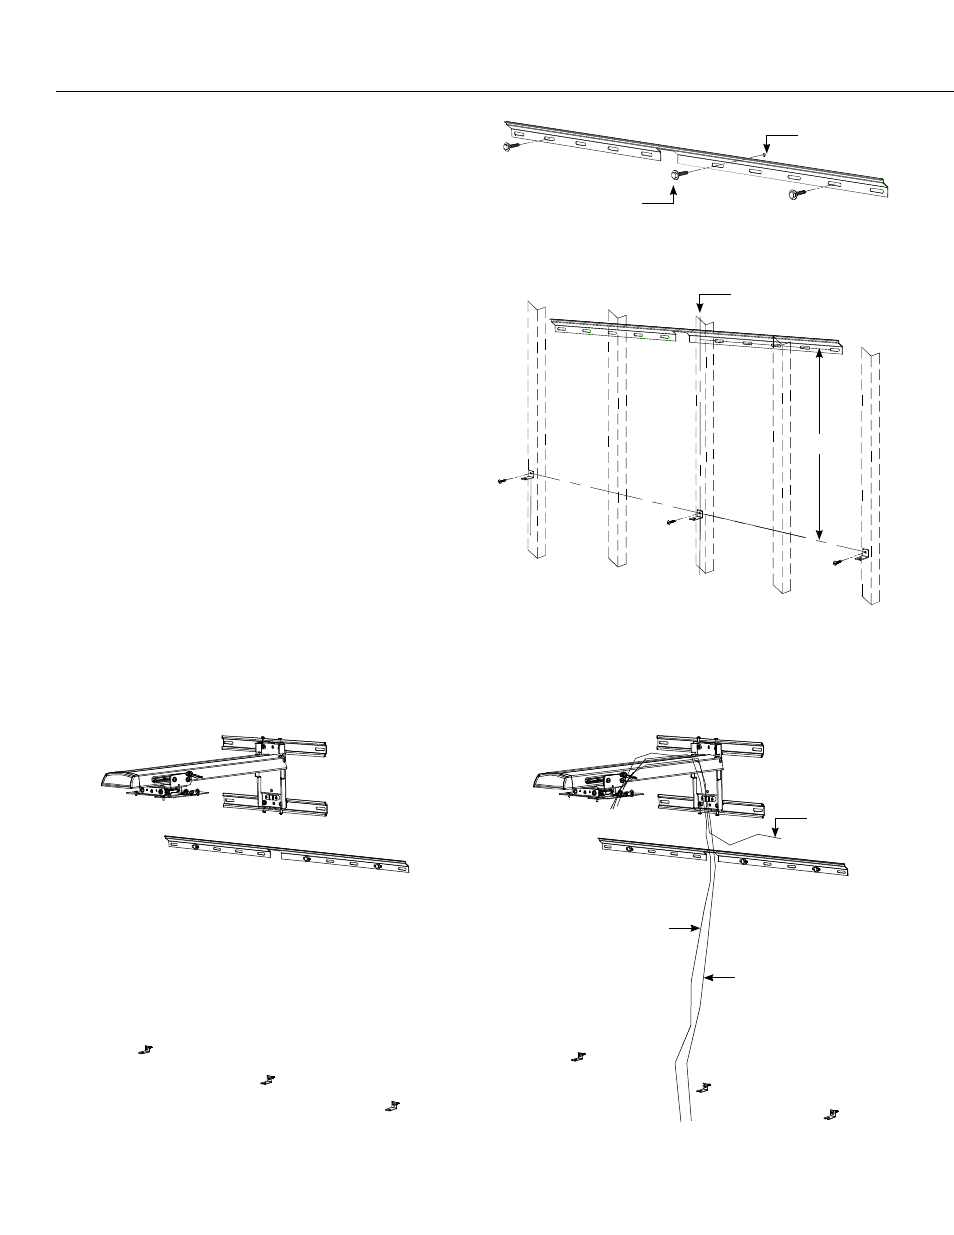
6. Install (1) 1/4” x 1-1/2” bolt and (1) washer through
middle of bracket into previously drilled hole,
leaving 1/2” of the bolt extending from wall. Use
carpenter’s level to make sure bracket is properly
level (Figure 2).
7. Position level on top of wall bracket. Move bracket
until level. Drill (2) holes for the other bolts in wall
studs.
8. Install the other (2) 1/4” x 1-1/2” bolts and (2) 1/4”
washers in the previously drilled holes. Tighten all
bolts against wall bracket.
9. Measure down 52-1/4” on center and mark spot.
Move right and left of screen until wall studs are
found and mark (Figure 3).
10. Install the (3) screen brackets using:
Wood or steel studs: (3) supplied #8 x 1” screws.
Concrete wall or no studs: (3) supplied #8-10 wall
anchors and (3) supplied #8 x 1” screws.
11. Install projector mount. Refer to the S520 Dual
Stud Wall Mount (MSP-DCCUST2) manual. Do not
install the (2) plastic covers for mount (Figure 4).
12. Run cables for projector up through hole in wall
bracket and cover to projector location (Figure 5).
Middle Fastener
Previously
Drilled Hole
Center of Screen
IR Sensor Power
Projector Signal Cable
Projector Power Cord
Figure 2
Figure 3
Figure 4
Figure 5
52-1/4 in.
Installation (continued)