Clarion CZ200 User Manual
Page 24
English
Français
English
24
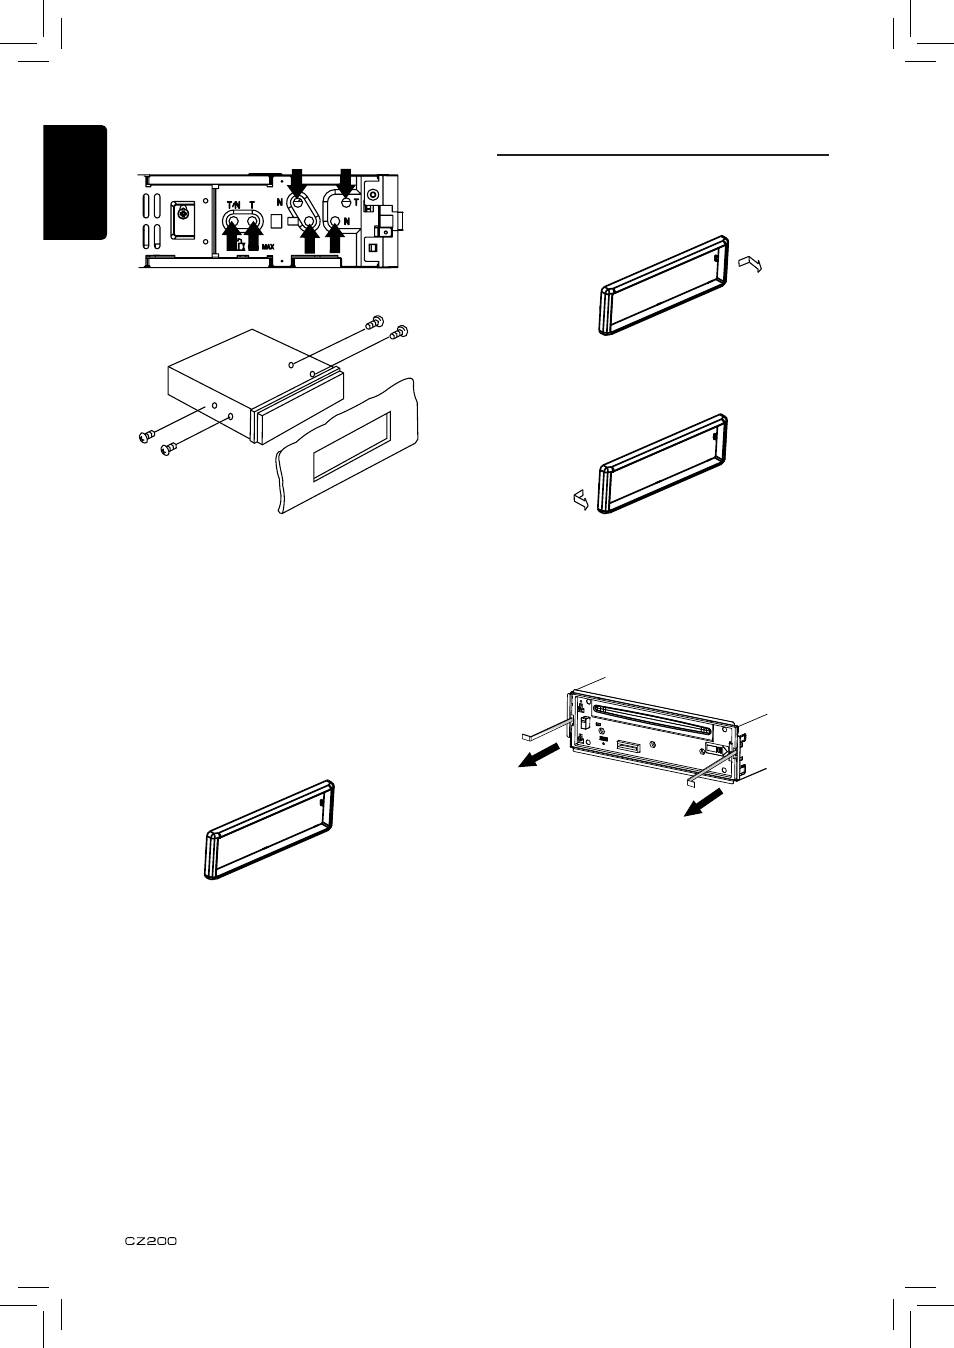
6) Removing the Source Unit
Method B
Mounting frame
Dashboard
M5×6
1. Insert this unit directly to the opening of
the dashboard.
2. Place M5×6 cylindrical screw through the
holes of the mounting frame located inside
the opening to holes of the unit and fasten
the screws to left & right.
Trim ring installation
Attach the trim ring around the front panel.
Disassemble trim ring
1. Push the trim ring to right and pull out the
right part.
2. Push the trim ring to left and pull out the
left part.
Disassemble the unit
1. Switch off the power.
2. Remove the panel.
3. Remove the trim ring.
4. Insert the removal keys straight back until
they lock, then pull the unit out.
5. Disconnect all the wires.
See also other documents in the category Clarion Car speakers:
- MAX685BT (83 pages)
- EQS746 (16 pages)
- DB336MP (2 pages)
- ProAudio DXZ535 (15 pages)
- ProAudio DXZ435 (14 pages)
- DB358RMP (21 pages)
- CZ501 (34 pages)
- DB265MP (18 pages)
- PE-2322B (26 pages)
- DXZ585USB (41 pages)
- DXZ835MP (96 pages)
- DXZ735MP (28 pages)
- DXZ735MP (16 pages)
- DXZ858RMP (55 pages)
- DB625MP (26 pages)
- DB625MP (80 pages)
- CM1635 (6 pages)
- DRX7575Z (22 pages)
- DB566USB (24 pages)
- bd239rg (15 pages)
- DB125 (12 pages)
- BD269RMP (24 pages)
- AUTOMOTIVE INFRARED WH100 (2 pages)
- DXZ525 (21 pages)
- CMD5 (38 pages)
- DXZ868RMP (56 pages)
- DB325 (16 pages)
- DXZ676USB (2 pages)
- DB225 (12 pages)
- DB258R (17 pages)
- CX201 (33 pages)
- DXZ758RMC (2 pages)
- Net DXZ638RMP (34 pages)
- XA311 (10 pages)
- CDC635 (1 page)
- SRQ1720S (4 pages)
- DXZ756MC (34 pages)
- DB345MP (20 pages)
- RDX555D (16 pages)
- DXZ865MP (46 pages)
- HX-D2 (31 pages)
- DXZ846MC (2 pages)
- DB245 (16 pages)
- DMX5555Z (13 pages)
- DXZ545MP (41 pages)