Installing a hard drive in the flexbay – Dell XPS 430 (Mid 2008) User Manual
Page 18
Replacing Drives: Dell XPS 430 Service Manual
drives.htm[4/15/2014 11:28:30 AM]
the SATA ports (SATA 0 through 4) to the correct configuration.
16. See the documentation that came with the hard drive for instructions about installing any software required for the
operation of the hard drive.
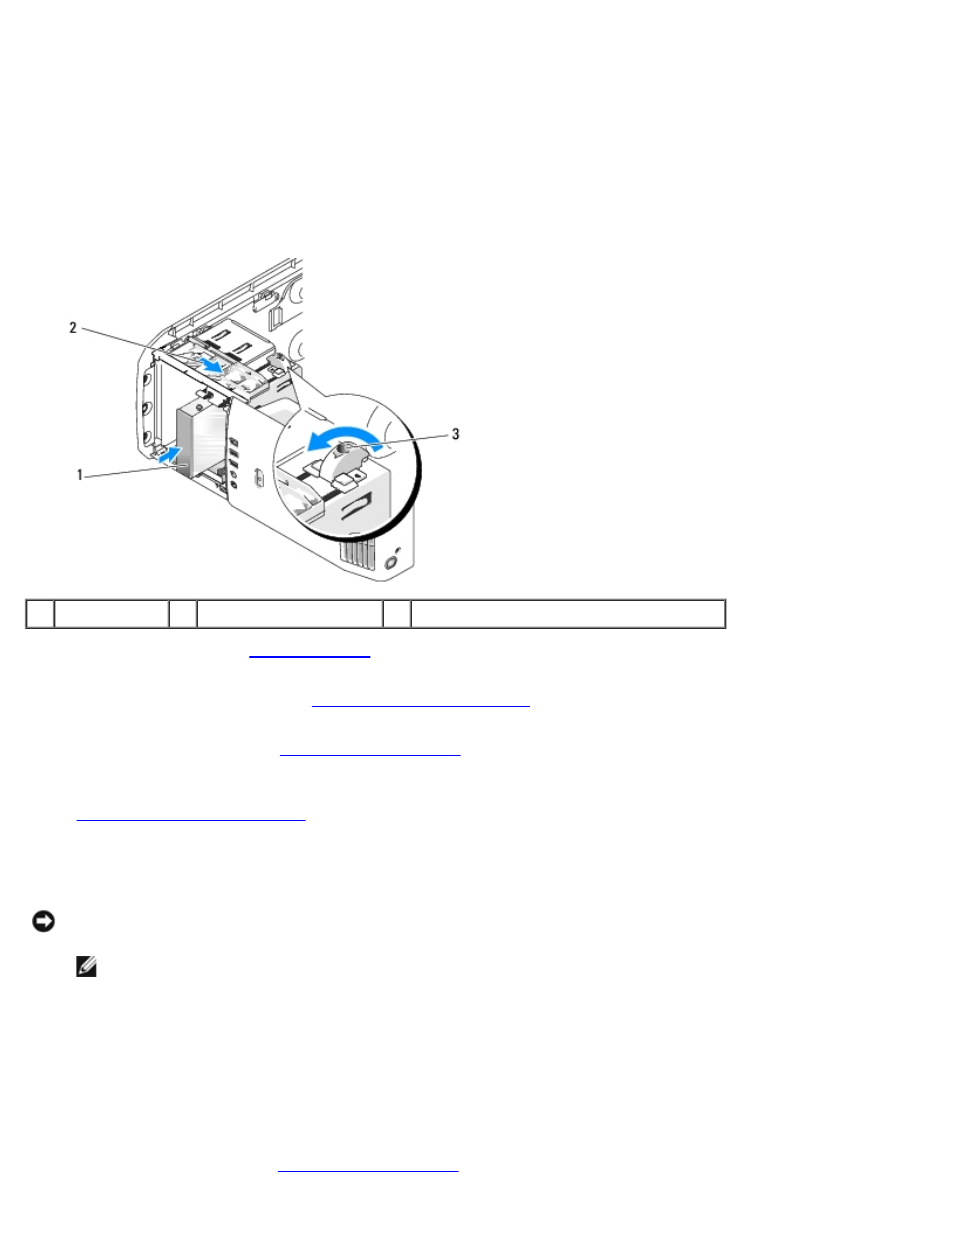
Installing a Hard Drive in the FlexBay
The top FlexBay drive on your system can hold an additional hard drive.
1
hard drive
2
sliding plate lever
3
flexbay knob (default position)
.
2. Remove the computer cover (see
3. Remove the drive panel (see
4. Remove the shoulder screws from the inside of the drive-panel insert and attach the screws to the new drive (see
Replacing the Drive-Panel Insert
).
5. Turn the FlexBay knob on the cage by 90 degrees, in the anti-clockwise direction.
NOTICE:
Ensure the FlexBay knob is turned in the anticlockwise direction, failing which can result in the knob being
broken.
NOTE:
Turning the FlexBay knob once opens up the drive space to accommodate a larger device like a hard drive.
The knob at this stage is in a horizontal position.
6. Pull the sliding plate lever down and hold in place.
7. Slide the hard drive into the flex bay drive until the sliding plate clicks into place and the drive snaps into position.
8. Attach the power and hard drive cables to the hard drive.
9. Replace the drive panel (see
).