Replacing the microprocessor – Dell Dimension 4300 User Manual
Page 18
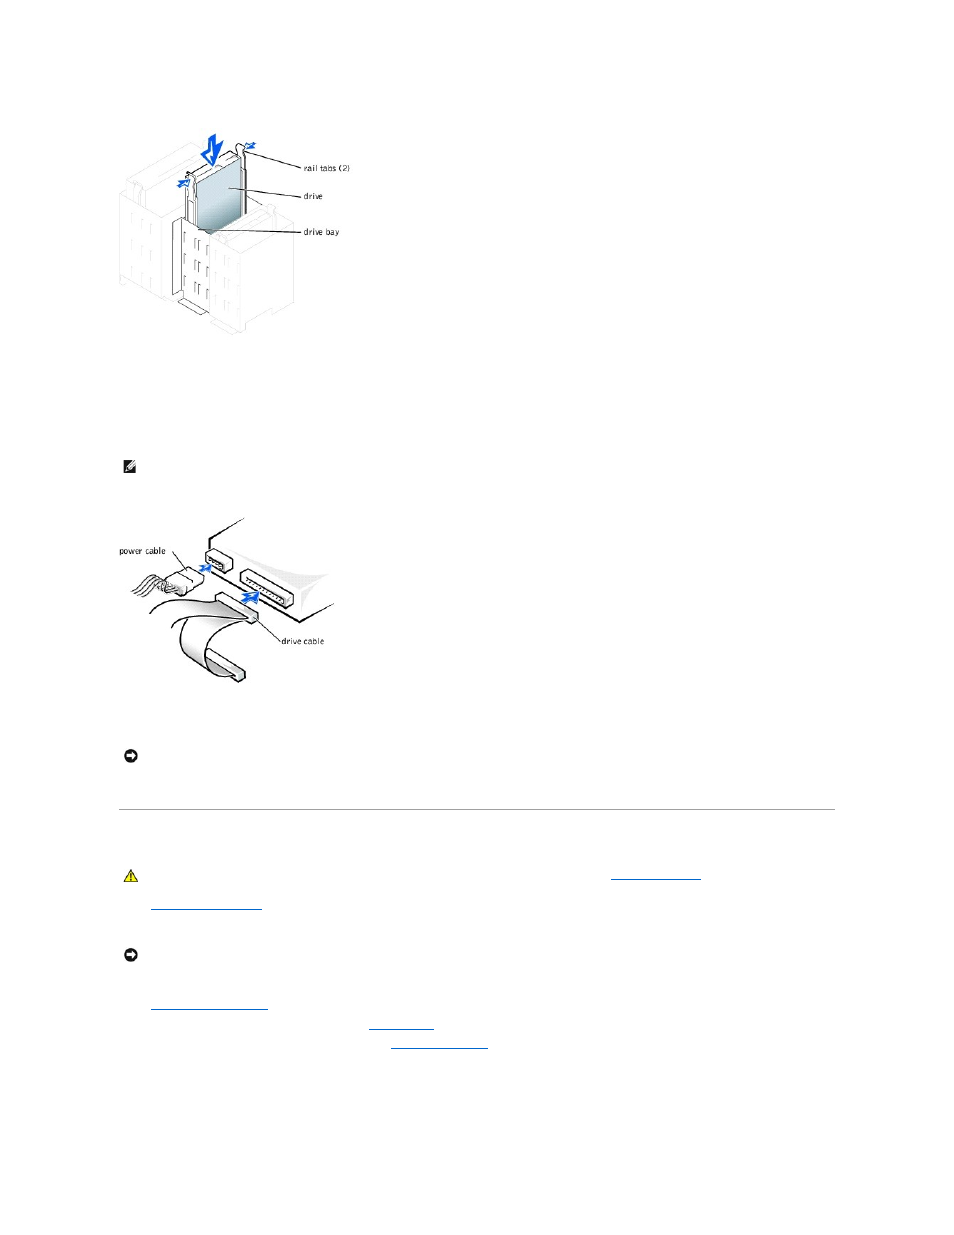
11.
Carefully replace the drive bay cover.
You do not need to replace the cover insert.
12.
Connect a power cable to the drive.
13.
See the documentation that came with the drive for instructions on connecting a drive cable to the drive.
14.
Connect your computer and devices to their electrical outlets, and turn them on.
15.
Install any drivers required for the drive as described in the documentation that came with the drive.
Replacing the Microprocessor
1.
2.
Turn off any attached devices and disconnect them from their electrical outlets.
3.
Disconnect the computer power cable from the wall outlet, and then press the power button to ground the system board.
4.
5.
Disconnect the cooling fan power cable from the
FAN connector
on the system board.
6.
Disconnect the +12-VDC P2 DC power cable from the
12VPOWER connector
on the system board.
7.
Lift up the airflow shroud.
HINT:
Your computer uses cable-select drive cables. This means that the device connected to the end connector of the drive cable is the master device
and the device connected to the middle connector is the slave device. Be sure the jumper setting on the new device is set for "cable select" (see the
documentation that came with the drive for information).
NOTICE:
To connect a network cable, first plug the cable in to the network wall jack and then plug it in to the computer.
CAUTION:
Before you begin any of the procedures in this section, follow the safety instructions in "
NOTICE:
To disconnect a network cable, first unplug the cable from your computer and then unplug it from the network wall jack.