Support bracket, Removing the support bracket, Replacing the support bracket – Dell Inpsiron 560s (Late 2009) User Manual
Page 6
Back to Contents Page
Support Bracket
Dell™ Inspiron™ 560s Service Manual
Removing the Support Bracket
1.
Follow the procedures in
Before You Begin
.
2.
Remove the computer cover (see
Removing the Computer Cover
).
3.
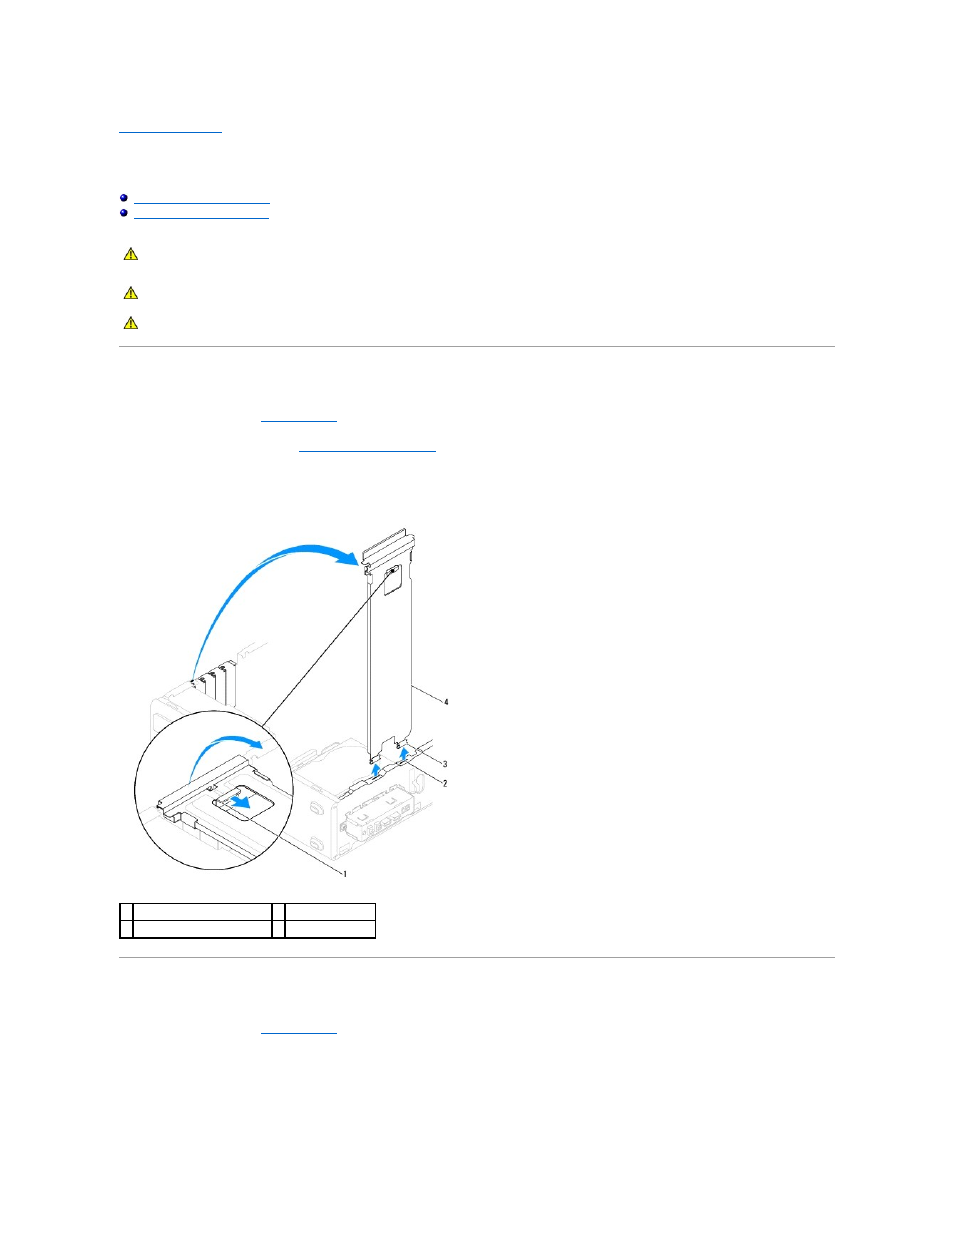
Pull back the support-bracket release latch and pivot the support bracket up.
4.
Lift the support bracket off the hinge-tab slots and set it aside in a secure place.
Replacing the Support Bracket
1.
Follow the procedures in
Before You Begin
.
2.
Align and insert the hinge tabs at the bottom of the support bracket into the hinge-tab slots located along the edge of the computer.
3.
Pull back the support-bracket release latch and pivot the support bracket downward, until the support-bracket release latch locks into place.
WARNING:
Before working inside your computer, read the safety information that shipped with your computer. For additional safety best
practices information, see the Regulatory Compliance Homepage at www.dell.com/regulatory_compliance.
WARNING:
To guard against electrical shock, always unplug your computer from the electrical outlet before removing the cover.
WARNING:
Do not operate your equipment with any cover(s) (including computer covers, bezels, filler brackets, front-panel inserts, etc.)
removed.
1 support-bracket release latch 2 hinge-tab slots (2)
3 hinge tabs (2)
4 support bracket