Floppy drive, Removing a floppy drive – Dell Dimension C521 User Manual
Page 17
b.
Remove the three shoulder screws from the drive-panel insert.
4.
If you are replacing an existing drive:
a.
Remove the existing drive.
b.
Remove the three shoulder screws from the existing drive.
5.
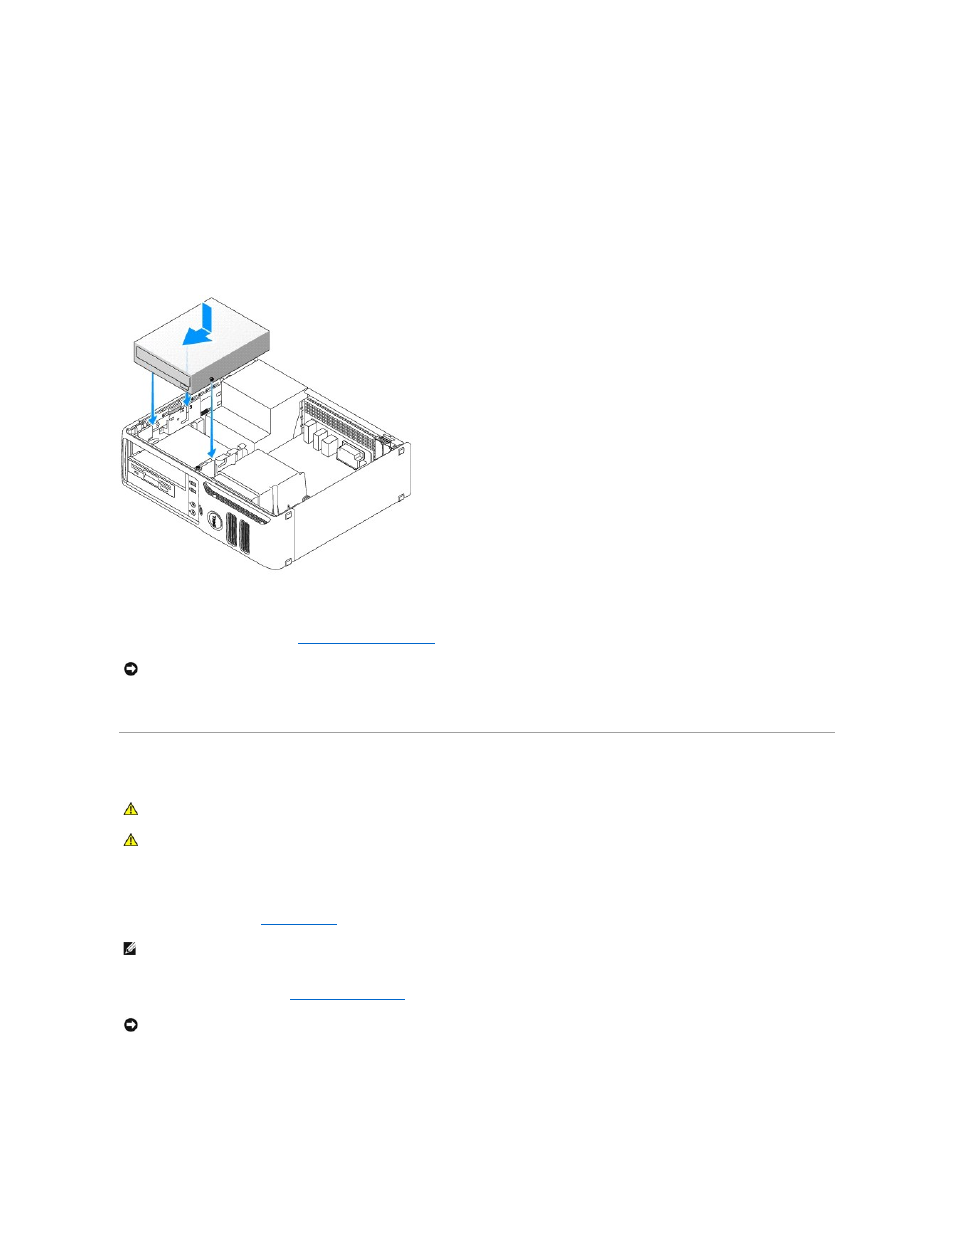
Insert the three shoulder screws into the sides of the new drive and tighten them.
6.
Connect the power and data cables to the drive.
7.
Align the shoulder screws with the screw guides, and slide the drive into the bay until it clicks into place.
8.
Check all cable connections and fold cables out of the way to avoid blocking airflow between the fan and cooling vents.
9.
Replace the computer cover. See
Replacing the Computer Cover
.
10.
Connect your computer and devices to electrical outlets, and then turn them on.
Floppy Drive
Removing a Floppy Drive
1.
Follow the procedures in
Before You Begin
.
2.
Remove the CD/DVD drive (see
) and carefully set it aside.
3.
Pull up on the drive release latch and slide the floppy drive towards the back of the computer. Then, lift up to remove the drive from the computer.
NOTICE:
To connect a network cable, first plug the cable into the network port or device, and then plug it into the computer.
CAUTION:
Before you begin any of the procedures in this section, follow the safety instructions located in the Product Information Guide.
CAUTION:
To guard against electrical shock, always unplug your computer from the electrical outlet before removing the cover.
NOTE:
It is not necessary to disconnect the cables connected to the CD/DVD drive in the following step, as long as the cables do not obstruct your
working area once the drive is set aside.
NOTICE:
Do not pull the drive out of the computer by the drive cables. Doing so may cause damage to the cables and cable connectors.