Leveling the range – FRIGIDAIRE FFES3025PW User Manual
Page 10
10
30" ELECTRIC SLIDE-IN RANGE INSTALLATION INSTRUCTIONS
IMPORTANT
If Accessories Needed :
Installation With Backguard
The cutout depth of (21 3/4" (55,2 cm) Min., 22 1/8"
(56,2 cm) Max.) needs to be increased to 24" (61
cm) when installing a backguard.
Installation With End Panel
A End Panel kit can be ordered through a Service
Center.
Installation With Side Panels
A Side Panels kit can be ordered through a Service
Center. Note: Install cabinet doors 32" (81,3 cm) min.
apart so as not to interfere with range door opening.
8.
Leveling the range
8.1
Models Equipped with Leveling Device
Level the range after installation in the cutout
opening.
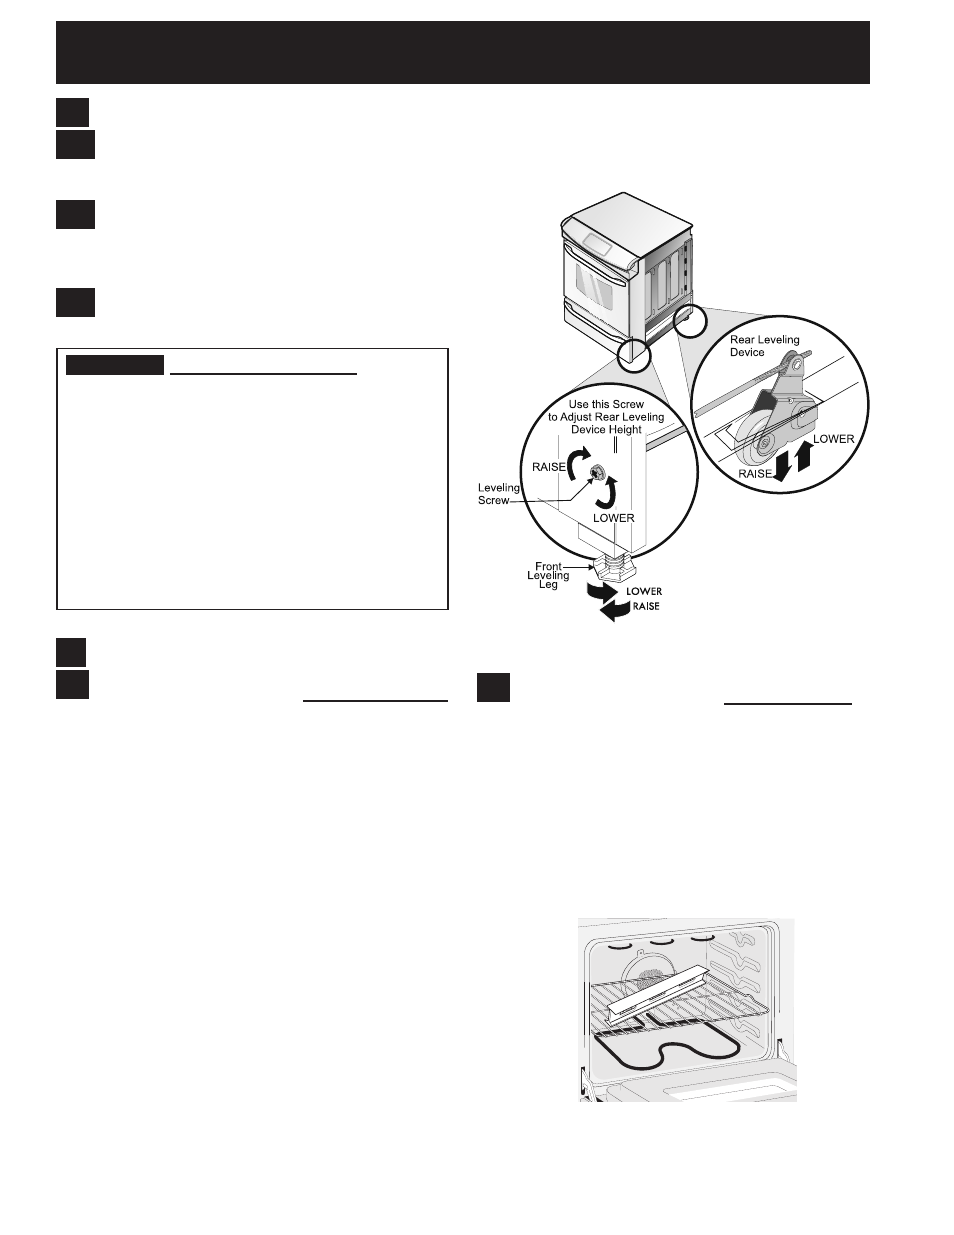
1. Open the range drawer. The leveling screws control
the height of the rear wheels.
2. Adjust the appliance wheels and legs as follows
until the underside of the cooktop surface is sitting
level on the countertop (Figure 9).
a. To adjust the front legs, use a wrench on
the leg base and turn clockwise to lower or
counterclockwise to raise.
b. To adjust the rear wheels, use a ratchet
or a nutdriver and turn the leveling screws
counterclockwise to lower or clockwise to raise.
3. Check if the range is level by installing an oven rack
in the center of the oven and placing a level on the
rack (Figure 10).
4. Take 2 readings with the level placed diagonally in
one direction and then the other. Level the range,
if necessary, by adjusting the leveling legs and
wheels.
5. If the range cannot be level, contact a carpenter to
correct sagging or sloping floor.
6. After leveling the range, the rear leveling legs
(located beside the rear wheels) must be lowered
almost to the floor level (leave a small gap). This is
necessary to secure the unit to the anti-tip bracket.
Figure 10
Figure 9
8.2
Models Equipped with Leveling Legs
Level the range and set cooktop height before
installation in the cut-out opening.
1. Install an oven rack in the center of the oven.
2. Place a level on the rack (see Figure 10). Take 2
readings with the level placed diagonally in one
direction and then the other. Level the range, if
necessary, by adjusting the 4 leg levelers with a
wrench (see Figure 16).
3. Taking care to not damage the countertop, slide
range into cutout opening and double check for
levelness.
7.9
Position range in front of the cabinet opening.
7.10
Make sure that the glass which overhangs the
countertop clears the countertop. If necessary,
raise the unit by lowering the leveling legs.
7.11
Level the range (see section 8). The floor
where the range is to be installed must be level.
Follow the instructions under "Leveling the
Range-Models Equipped with Leveling Legs".
7.12
Slide the range into the cutout opening.