Drew Technologies CarDAQ-Plus User Manual
Page 5
5
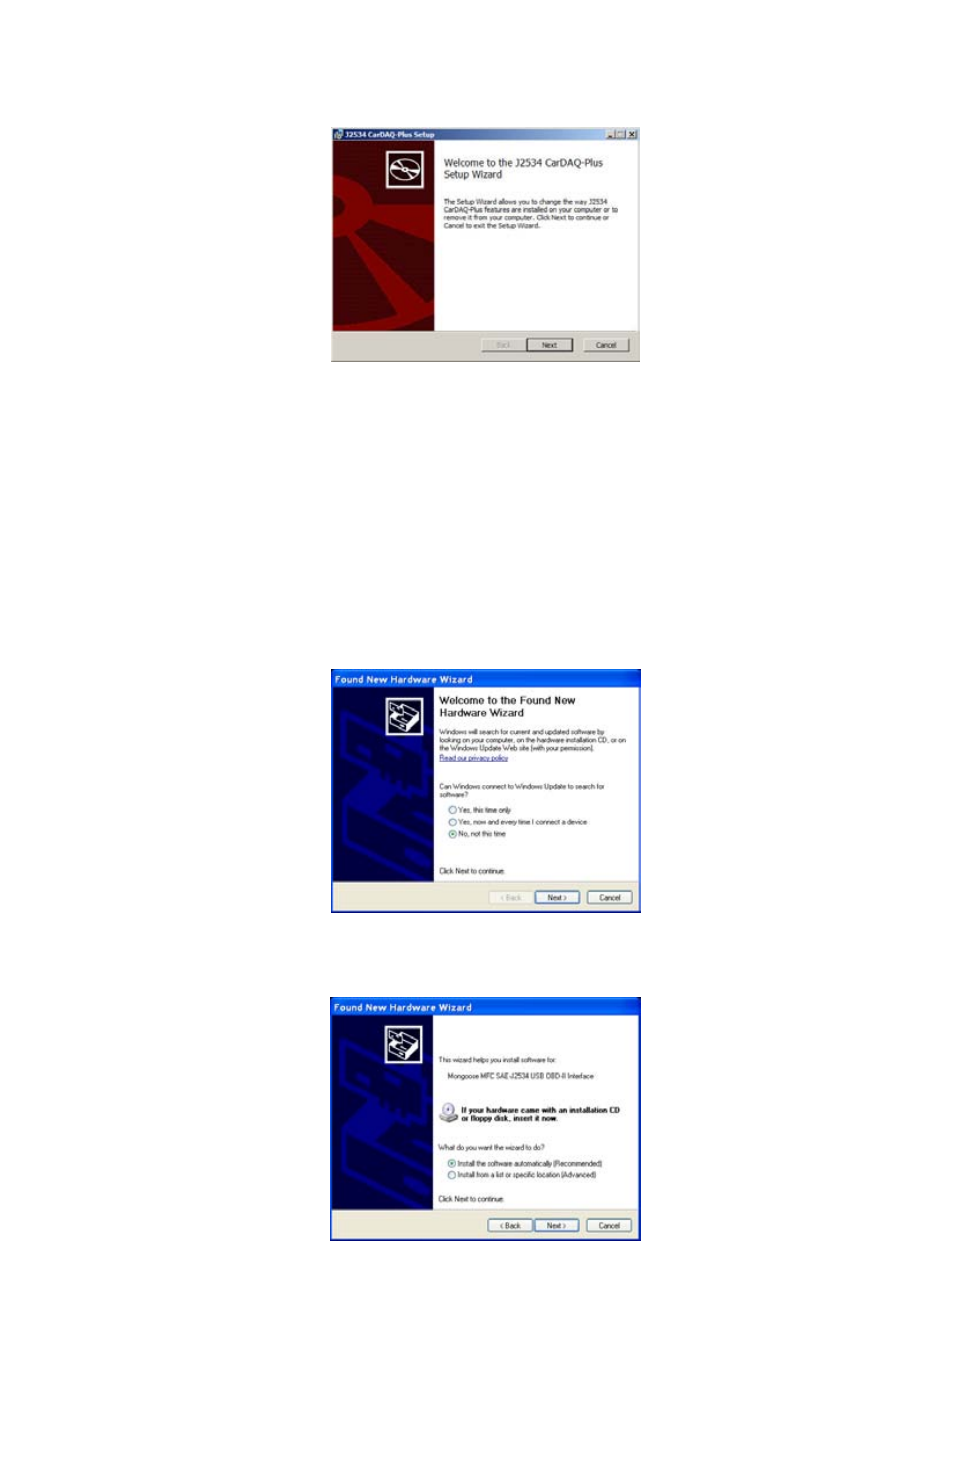
3. The CarDAQ-Plus drivers and the J2534 ToolBox will now begin
installation. Follow the Setup Wizard instructions.
4. When the installation is finished, power up your CarDAQ-Plus
from a vehicle with the OBDII cable, and then connect the USB
cable from CarDAQ-Plus to your PC. The drivers will
automatically be found and installed on Windows Vista and 7
computers.
For Windows XP, a few more steps are required:
a. The “Found New Hardware Wizard” will pop up when you
connect your CarDAQ-Plus.
b. Make sure “No, not this time” is selected and click [Next].
This screen appears:
c. Select
“Install
the
software
automatically
(Recommended)” and click [Next]. After the progress bar
finishes, click [Finish]. Windows XP users are finished
installing at this point and can run the software they will
be using with the CarDAQ-Plus.