Dogtra ARC User Manual
Page 11
18
19
that current level. In this situation, if you turn the rheostat
intensity dial, the level on the screen may not change but
WKHDFWXDOLQWHQVLW\IURPWKHUHFHLYHUFROODUZLOOFKDQJHLQ
agreement with the dial.
In this situation, it is ideal to either wait until your
transmitter is back to working order before emitting a
correction, or while holding the constant button down
slowly turn the Rheostat Intensity Dial while watching your
dog’s reaction. Do not turn the Rheostat Intensity Dial at a
UDSLGLQFUHDVHEHFDXVHWKHUHFHLYHUFROODUZLOOHPLWDVWDWLF
correction based on the level of the Rheostat Intensity Dial,
ZKLFKPLJKWQRWEHFRUUHFWO\UHÀHFWHGRQWKH/&'VFUHHQ
10. Code setting
Code setting Additional Receivers
7XUQWKHWUDQVPLWWHURQE\SXVKLQJWKH212))EXWWRQ
located on the side of the transmitter and set the intensity
GLDOWR³´
2. Place the red dot on the back of the transmitter to the red
GRWRIWKHUHFHLYHUFROODU\RXZRXOGOLNHWRFRGH+ROG
the two red dots together for about 5 seconds until the
green /('EOLQNVUDSLGO\RQWKHUHFHLYHUFROODU
:KLOHWKHJUHHQ/('LVUDSLGO\EOLQNLQJRQWKHUHFHLYHU
collar, press the 2 orange buttons on the front and side
of the transmitter simultaneously. The LED indicator light
RQWKHUHFHLYHUFROODUZLOOEOLQNHYHU\VHFRQGVZKHQWKH
coding is complete.
:LWKWKHGRJUHFHLYHUFROODUFRGHGWRWKH'RJWUD
$5&WKHJUD\EXWWRQVZLOORSHUDWH\RXUH[LVWLQJUHFHLYHU
collar, and the orange buttons will operate the newly
FRGHGUHFHLYHUFROODU
Code setting for 1-dog use
5. To code set the Dogtra ARC for 1-dog use, repeat steps
1 and 2 above. While the green LED is rapidly blinking
RQWKHUHFHLYHUFROODUSUHVVWKHJUD\EXWWRQVRQWKH
front and side of the transmitter simultaneously. The
/('LQGLFDWRUOLJKWRQWKHUHFHLYHUFROODUZLOOEOLQNHYHU\
4 seconds when the coding is complete.
6. When a button is pressed on your coded handheld
transmitter, an LED indicator light will blink on the
FRUUHVSRQGLQJUHFHLYHUFROODU
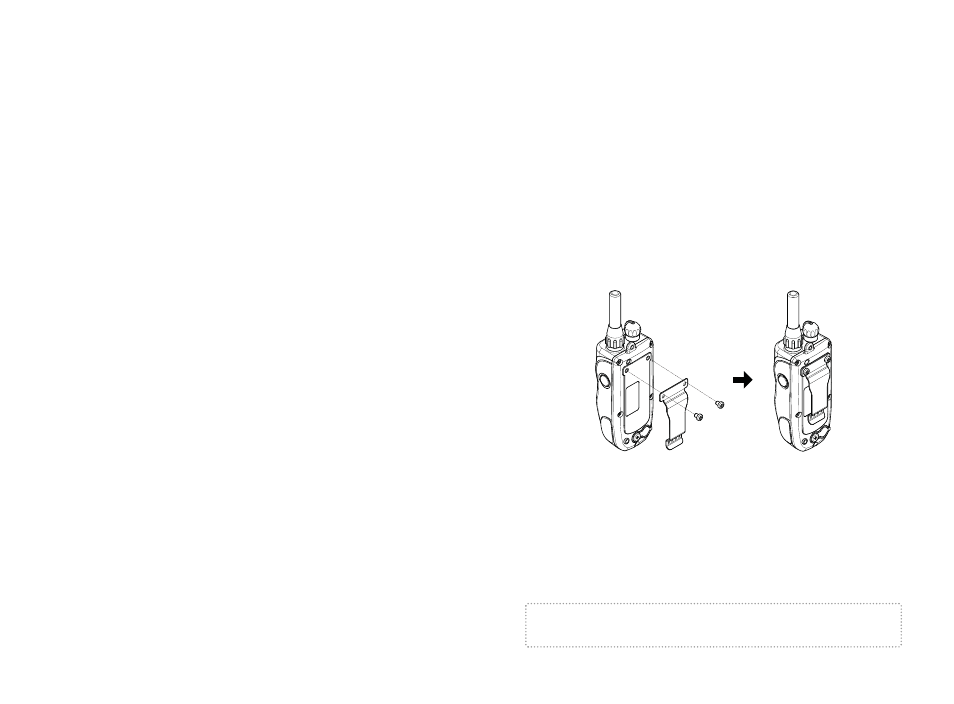
11. How to attach the belt clip on the ARC
To attach the included belt clip to the transmitter, follow the
instructions below.
1. Align the belt clip to the grooves on the back of the
transmitter.
:LWKD¿UPJULSVFUHZRQWKHEHOWFOLSXVLQJWKHSURYLGHG
Philips head screws.
Caution! 7LJKWHQXQWLO¿UPO\LQSODFH%HFDUHIXOQRWWRRYHU
tighten.