Great Plains 2S-2600 Installation Instructions User Manual
Page 6
195-300M
2/22/2005
Great Plains Mfg., Inc.
Point Row Option
6
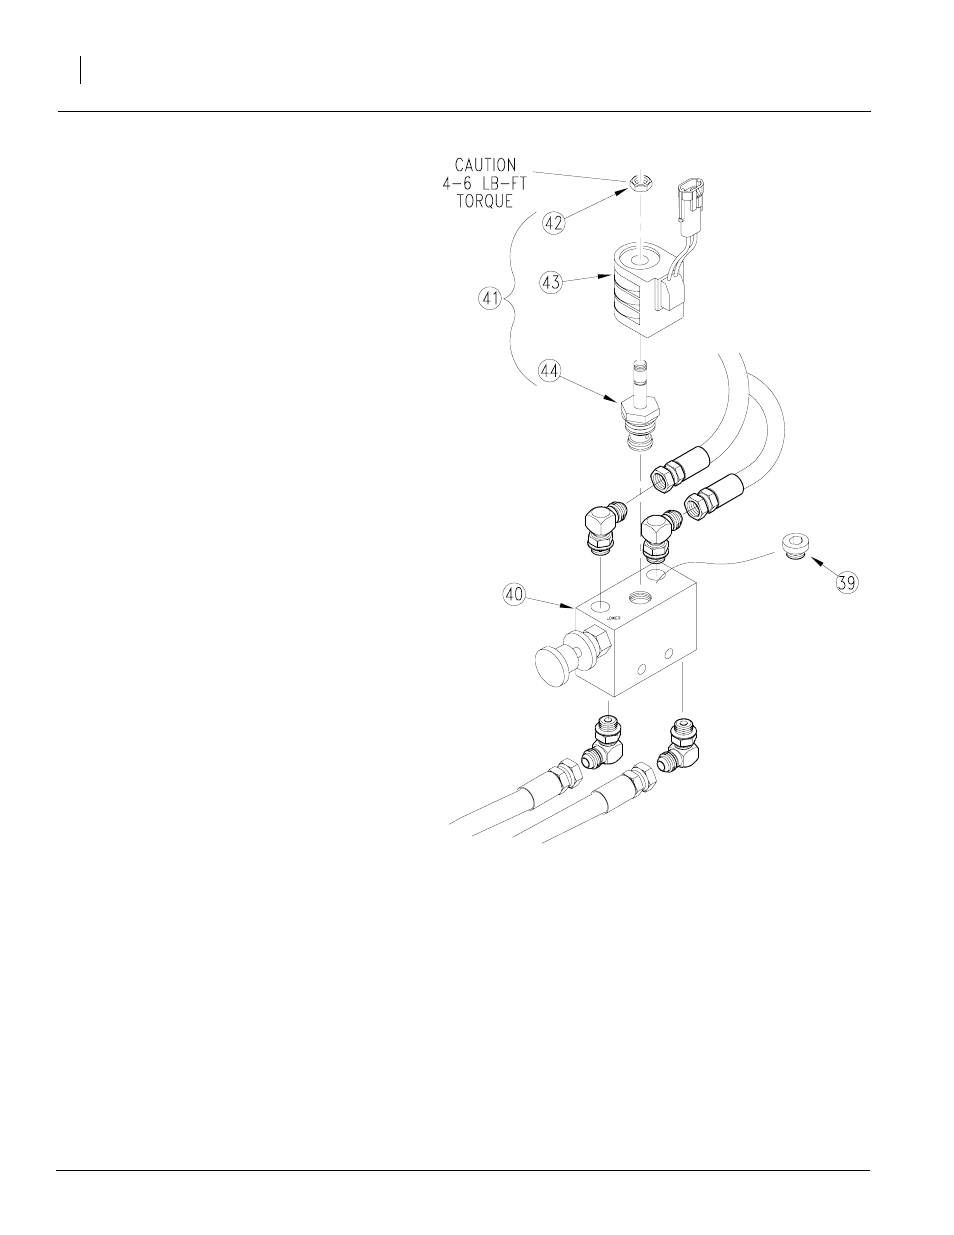
Refer to Figure 7
22. Remove the plug (39) on the bypass valve
block (40) and discard. Install the solenoid
valve (41) from the kit into this open port. Re-
fer to the next step for special handling and
tightening instructions.
23. The solenoid valve (41) needs to be tightened
into the valve block (40) to seat the oring. A
special thin wrench is required for this. If a
special thin wrench is not available, do the fol-
lowing.
24. Carefully loosen the coil nut (42) on top of the
solenoid (41). Remove the coil assembly (43).
The hex (44) on the lower part of the valve is
now exposed and a regular wrench may be
used to tighten the valve into the block.
25. Reinstall the coil (43) and coil nut (42). Use
great care to not over tighten this nut. Torque
to 4-6 lb-ft.
26. Route the wire harness through the tongue.
Connect the 3 weatherpak ends without dust
caps to the 3 solenoid valves on the large
valve block (22).
Note that the center solenoid is not used on this
drill, but can be connected to keep dirt and water
out of the ends.
27. Remove the dust cap from the remaining
weatherpak end and connect it to the single
solenoid valve (41) in the bypass valve block
(40).
Figure 7
Bypass Valve Solenoid Installation
22637