Preparation and setup, Prior to going to the field checklist, Spring pre-load adjustment – Great Plains 2551SC Operator Manual User Manual
Page 16
540-179M
10/09/2013
12
2536-2551SC
Great Plains Manufacturing, Inc.
Preparation and Setup
This section helps you prepare your tractor and 2536-
2551SC seedbed conditioner for use, and covers tasks
that need to be done seasonally, or when the tractor/
Seedbed Conditioner configuration changes.
Before using the Seedbed Conditioner in the field, you
must hitch it to a suitable tractor, inspect systems and
level the Seedbed Conditioner. Before using the Seedbed
Conditioner for the first time, and periodically thereafter,
certain adjustments and calibrations are required.
Prior to Going to the Field Checklist
Complete this checklist before routine setup:
❑ Read and understand “Important Safety Informa-
❑ Check that all working parts are moving freely, bolts
are tight, and cotter pins are spread.
❑ Make sure your tractor horsepower matches the
implement you are pulling. This is important so the
implement can do the best possible job.
❑ Clean all hydraulic couplings and connect to tractor
as shown on page 13 and 14.
❑ If machine is folded, remove the transport pins from
wing stops. (DO NOT remove pins if the wing is lean-
ing against the pins or putting pressure on the pins.
Use the hydraulics to pull the wings in completely
before unpinning them.) Once the pins are removed,
slowly untold the unit. Make sure no one is under the
wings during the unfolding process.
❑ Check again for hydraulic leaks and watch that
hoses do not get pinched in hinges, wing stops, etc.
❑ After the machine is completely unfolded, raise and
lower the seedbed conditioner several times to purge
air from the hydraulic system. Again check for
hydraulic leaks and tighten or replace if necessary.
❑ Check safety chain hookup. Make sure all warning
lights are hooked up and functioning correctly.
❑ Check that all grease fittings are in place and lubri-
cated. See “Lubrication” on page 18. The hubs will
come pre-greased and will not need greased at this
time.
❑ Check that all safety decals and reflectors are cor-
rectly located and legible. Replace if damaged. See
“Safety Decals” on page 5.
❑ Inflate tires to pressure recommended and tighten
wheel bolts as specified. See “Tire Inflation Chart”
on page 21.
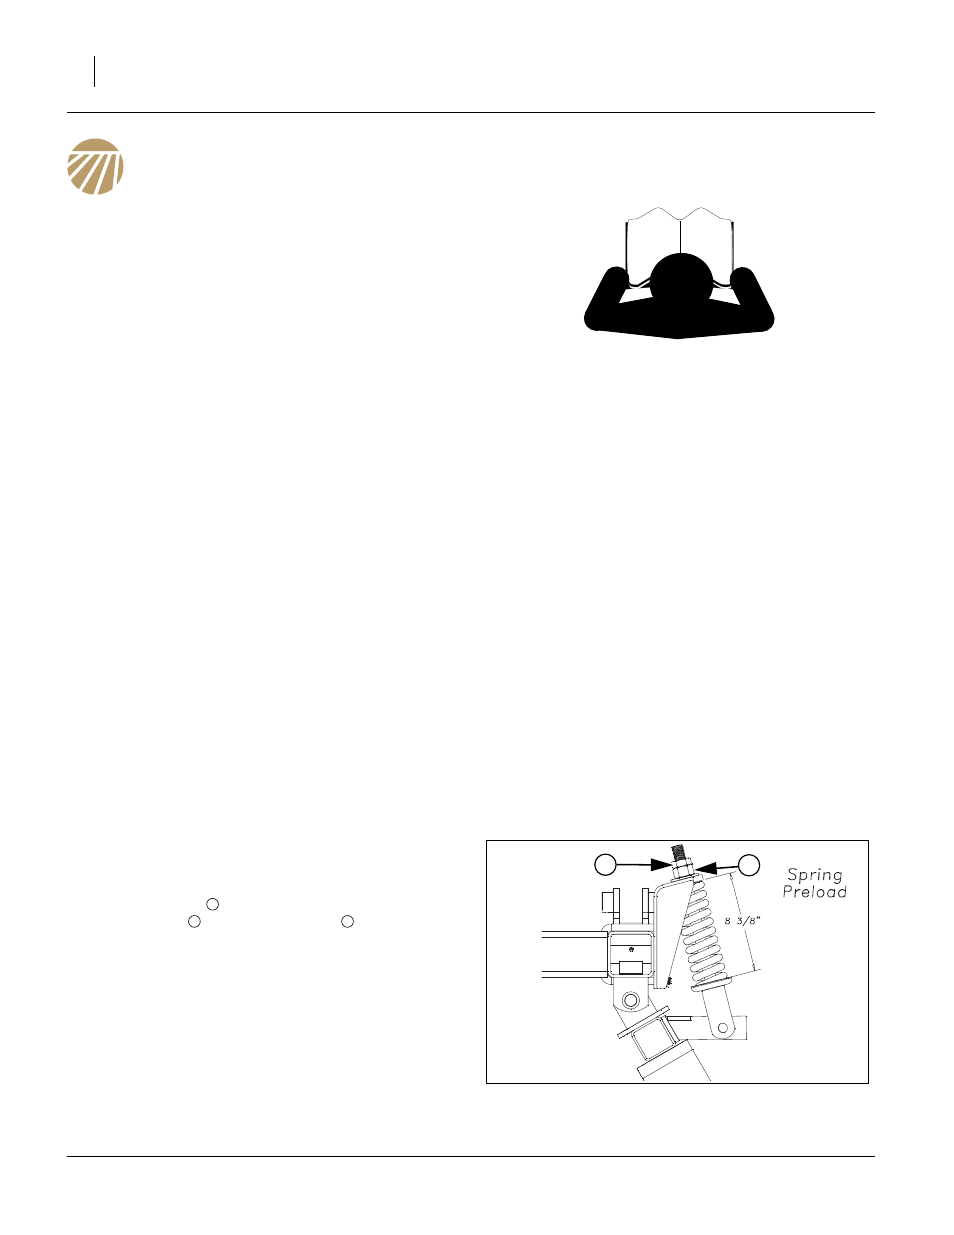
Spring Pre-load Adjustment
Refer to Figure 3
Note: Be sure shipping block is removed from each spring
assembly.
1.
Loosen jam nut
and set spring pre-load to 8 3/8” by
adjusting nut
. Re-tighten jam nut
.
2.
Put transport locks in place and refold the machine
slowly. Put wing stop pins in place. Always use the trans-
port pins when moving from field to field. You are now
ready to go to the field.
Figure 3
Basket Spring Pre-load
40846
1
2
1
2
1