Seeding adjustment, Change drive sprockets, Seed calibration – Great Plains EWF13 Assembly Instructions User Manual
Page 4
4
Seed Calibration
EWD13 and EWF13 Sprocket Box Update 152-208M
5/2/06
Great Plains Mfg., Inc.
Seeding Adjustment
Calibrating the seeding rate requires four steps: arranging the
drive sprockets, setting the seed-rate handle, positioning the
seed-cup doors, and checking the seeding rate.
Refer to the seed-rate charts. These charts list the proper
sprocket sizes and seed-rate-handle settings for various seeds
and seeding rates.
The seed-rate charts are based on cleaned, untreated seed of
average size and test weight. The charts are based on 9.5 x 20
rib implement tires. Many factors will affect seeding rates includ-
ing foreign material, seed treatment, seed size, field conditions,
tire pressure and test weight. You likely will need to make minor
adjustments. Set and check the seeding rate using the proce-
dures below, then re-adjust the rate as necessary.
NOTE: A pea-drive adaptor kit is available for the 13-foot end-
wheel drill. Different seed-rate charts are included in the pea-
drive kit.
Change Drive Sprockets
The seed-rate charts in your operator’s manual and in your drill
box list drive types as 1, 1A, 2 or 2A. Refer to the seed-rate
charts for the correct drive type.
Figure 1-7 shows sprocket sizes for each drive type.
Type 2A
Type 1
Type 1A
Type 2
Figure 1-7
Sprocket-Box Drive Types
Drive Types
Type 2 is Slowest
Type 2A is Two Times Faster than Type 2
Type 1 is Three Times Faster Than Type 2
Type 1A is Five Times Faster than Type 2
To change the drive types:
1.
Refer to Figure 1-8. Loosen the nut (1) holding the idler arm
(2) and turn arm so chain is slack. Remove chain from
sprockets.
16473
1
2
Figure 1-8
Loosen Idler Spacer
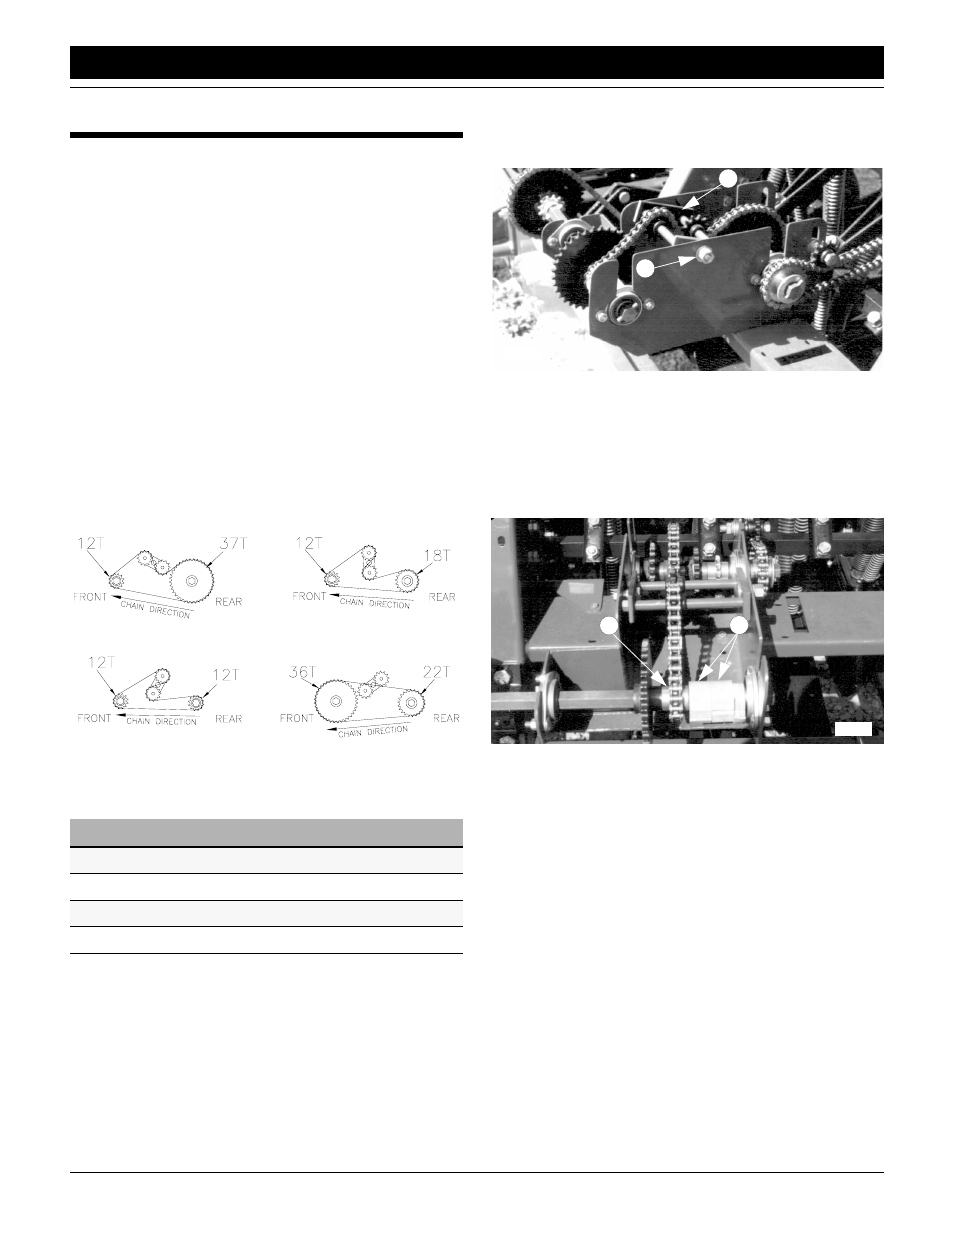
2.
Refer to Figure 1-9. Rearrange sprocket (1) and plastic
spacers (2) on front shaft so the proper front and rear
sprockets are aligned according to drive type.
3.
Slide idlers on idler arms so they are aligned with correct
sprockets. Reinstall chain.
4.
Turn idler arm as indicated by drive type to remove slack
from chain. Retighten nut that holds idler arm.
16475
1
2
Figure 1-9
Rearrange Sprockets on Front Shaft