Getting started, Connecting the impress media player, Configuring the impress player – ClearOne Impress IM100 Quick Start User Manual
Page 3: Date and time setup, Network settings, Date and time setup network settings
IMPRESS QuICk STaRT GuIDE 2
1
Technical Support: 800.283.5936
Getting Started
Before proceeding with the installation of the player unit, please check to make sure everything was received:
•
IMPRESS IM100 Main Player Unit
•
Control Keypad
•
Power Cord
•
IMPRESS Composer CD-ROM
•
1/8” Audio Cable
•
Warranty/Registration Card
It is important to note that this product is meant for high definition, widescreen displays. For best performance,
please make sure your display has a native 720p resolution mode or a native 1080p resolution mode.
COnnECTInG ThE IMPRESS IM100 PlayER
Prior to turning on your IMPRESS IM100 player for the first time, please do the following:
1.
Mount the IMPRESS player in a suitable location for connecting it to your network and your encoder
or display. (Download the IMPRESS User Manual available on the ClearOne website for details on
mounting).
2.
Connect the video cable to a StreamNet™ network connected MediaLinX™ encoder. (DVI or VGA video
connection)
3.
Connect the IMPRESS IM100 to your network using a standard Cat5 Ethernet cable
4.
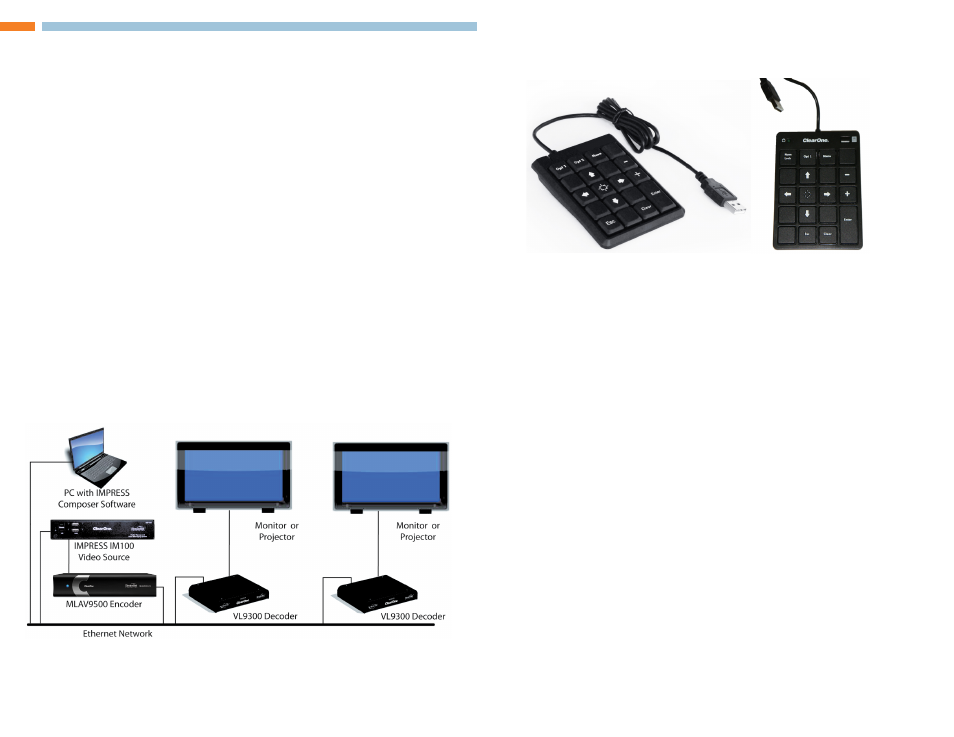
Connect the keypad that came with the system to a USB port in the front or in the back.
5.
Connect the power cable (the unit might come on automatically).
6.
If the unit does not come on automatically, push the power switch on the front.
After 30 seconds to 1 minute, you should see the Demo Project that comes with the player on your
display that is showing the encoder output on the network. If you do not see this, then connect the
IMPRESS IM100 directly to your display and push the power switch to restart the IMPRESS IM100.
COnfIGuRInG ThE IMPRESS IM100 PlayER
You will need to set the Date and Time of the player and configure the network settings before you can use full
capabilities of the IMPRESS IM100. To configure any settings on the IMPRESS IM100 player you must plug in
the USB keypad and power up the unit.
note: There are two cosmetically different versions of the keypad with identical functionality. You may receive
either one with your system with no difference in operation.
D
ate
anD
t
ime
S
etup
It is important to set up your IMPRESS IM100 with the correct date and time for your location so that content
will play when scheduled:
1.
Press the Menu key on the keypad.
2.
Use the arrow keys to navigate down to Set Date and Time
3.
Use the arrow keys to change each field in the date and press Enter when finished.
4.
Repeat for time.
5.
Set the Time Zone for where your content is being displayed and press Enter.
6.
Select Set and press Enter. Then select Close.
7.
Now reset the IMPRESS by selecting System and press Enter.
8.
Then select Restart and press Enter.
n
etwork
S
ettingS
Follow these steps to set up the network connection on the IMPRESS IM100:
1.
Press the Menu key on the keypad.
2.
Use the arrow keys to navigate down to network Settings and press Enter.
3.
Give the IMPRESS IM100 a static IP address that no other device on your network is using.
Consult your IT representative to receive this information. If you are connecting to the IMPRESS IM100
with a PC via a cross-over cable, then you need to assign an IP address that is one number higher
than the PC. For example, if my PC’s address were 192.168.10.1, then I would make the IMPRESS’s
IP address 192.168.10.2.
Then set the Gateway, Domain, and Subnet to the same as the PC.
4.
Navigate to Set and press Enter.
5.
Arrow over to Close and press Enter.
The network connection is now set up on your IMPRESS IM100. The best network configuration for the
IMPRESS IM100, is to have it connect to a network switch or router, and from there connect to the rest of the
network or to the computer(s) that are involved with managing content.
Sample Connection Diagram