Quoizel RO8414AC Rue De Royal User Manual
Assembly / installation instructions
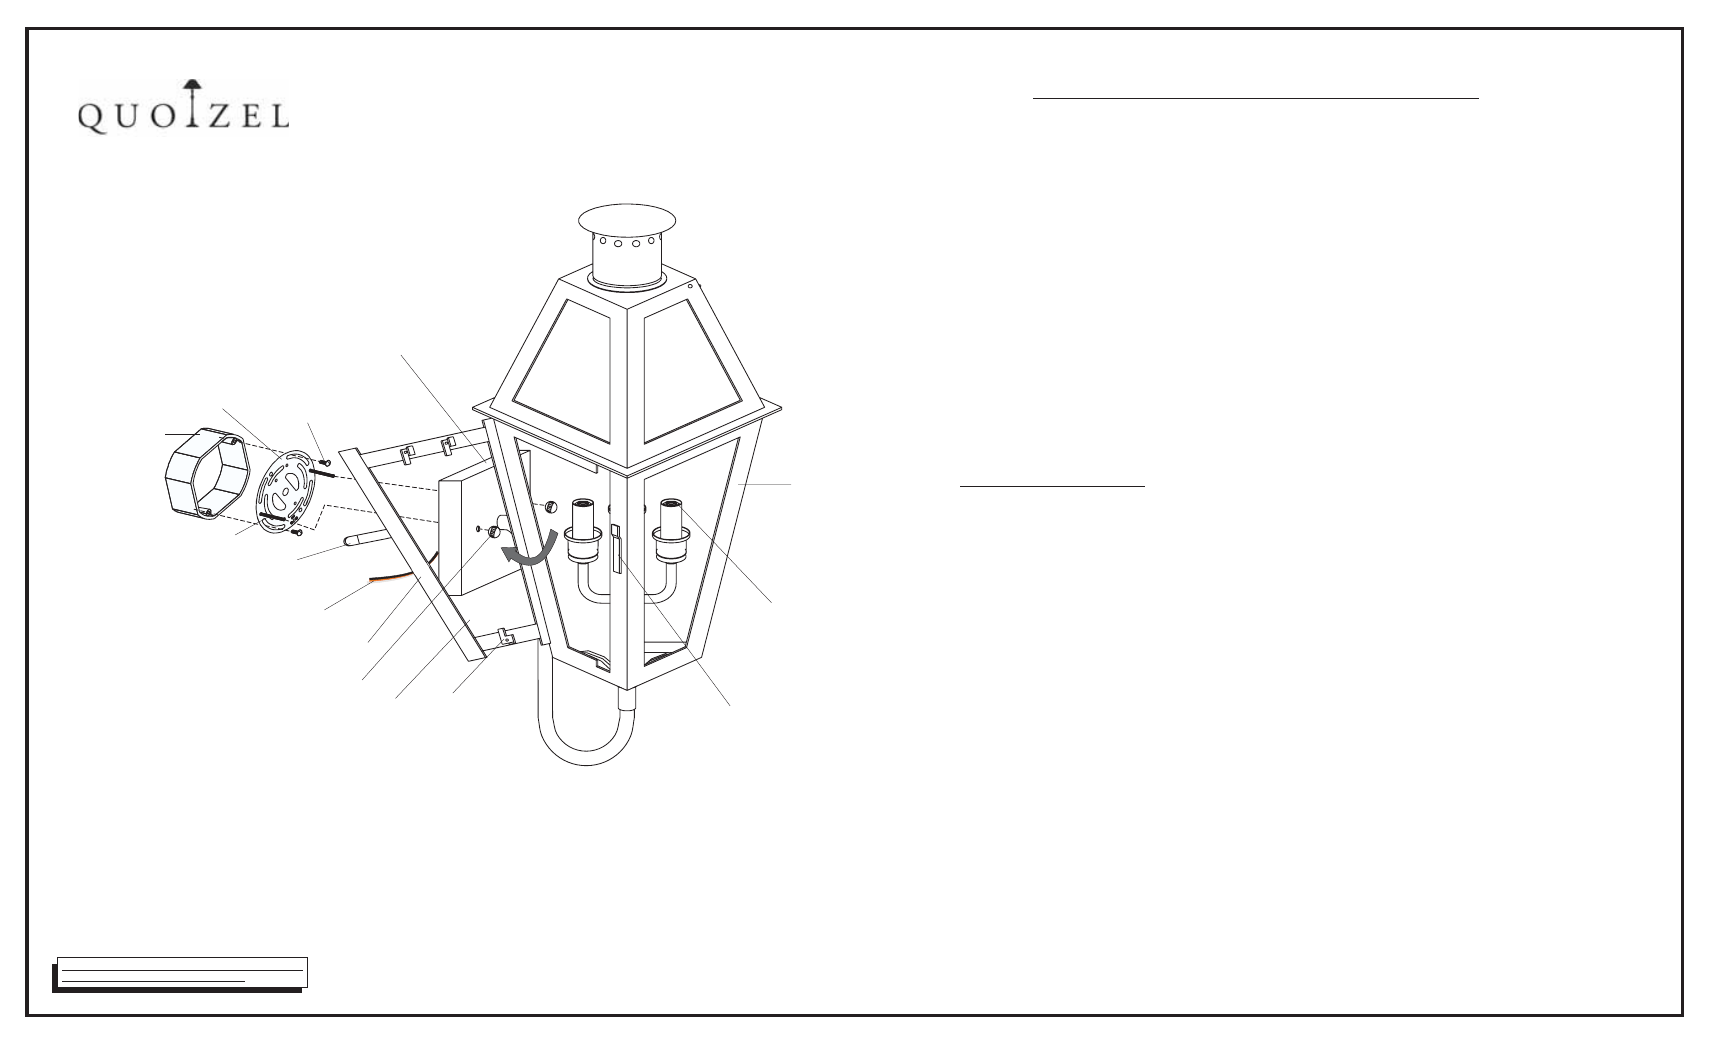
FIXTURE SUPPLY WIRE
and GROUND WIRE
OUTLET BOX
(2) MOUNTING SCREWS
(2) OUTLET
BOX SCREWS
(not supplied)
UNIVERSAL
CROSSBAR
BACKPLATE
( )
2 MOUNTING BALLS
CAGE
SOCKET
BOLT
DOOR
BOLT HOLDER
ASSEMBLY / INSTALLATION INSTRUCTIONS
6 CORPORATE PARKWAY
GOOSE CREEK SC 29445
www quoizel com
,
.
.
.
IF IN DOUBT ABOUT ELECTRICAL INSTALLATION,
CONSULT A LICENSED ELECTRICIAN!
IS-RO8311
Page 1 of 2
Revised 2008 03 22
- -
Note
If you find any Tabs do not engage Glass Panels well during assembly
please
push the Tabs until they are attaching onto the Glass Panels
:
,
.
.
.
( )
( )
( )
1. Before beginning the installation, carefully unpack and identify all parts referring to
illustration.
2 Turn the electrical power to installation point OFF at circuit breaker
3 Open the DOOR and install the correct bulbs referring to the fixture markings
and or labels for maximum wattage
Proceed to close the DOOR by placing the
BOLT onto the BOLT HOLDER
4. Place the CROSSBAR on the BACKPLATE and align the holes in the BACKPLATE with a
set of threaded holes in the CROSSBAR. Install the (2) MOUNTING SCREWS in the
aligned threaded holes on the CROSSBAR. Next, mount the CROSSBAR to the outlet
box with (2)OUTLET BOX SCREWS (not provided).
5.
:
Use wire connectors(not supplied) connect the HOUSE GROUND to the FIXTURE
GROUND WIRE attach the HOUSE WHITE WIRE to FIXTURE WHITE (or RIBBED
SIDE) SUPPLY WIRE; connect the HOUSE BLACK(or RED) WIRE to the FIXTURE
BLACK(or SMOOTH SIDE) WIRE. Wrap each connection with approved electrical
tape.
6. Carefully tuck all wires into the WALL MOUNTED OUTLET BOX and position the fixture
over the outlet box. Align the HOLES in the BACKPLATE with the 2
MOUNTING
SCREWS attached to the UNIVERSAL CROSSBAR. Pass the fixture over the
2 MOUNTING SCREWS and secure against by threading
2 MOUNTING BALLS
onto end of screw. Tighten until snug.
7.Refer to Page 2 for fixture caulking installations.
8. Restore power to the installation point ON. Retain this sheet for future reference.
,
.
/
.
.
;
Make the connections
GLASS PANEL
TAB