Installation instructions, Step 1, Step 3 – Quoizel MY1723ML Monterey Mosaic User Manual
Page 2: Step 2
2 OF 4
INSTALLATION INSTRUCTIONS
STYLE NUMBER MY1723ML
:
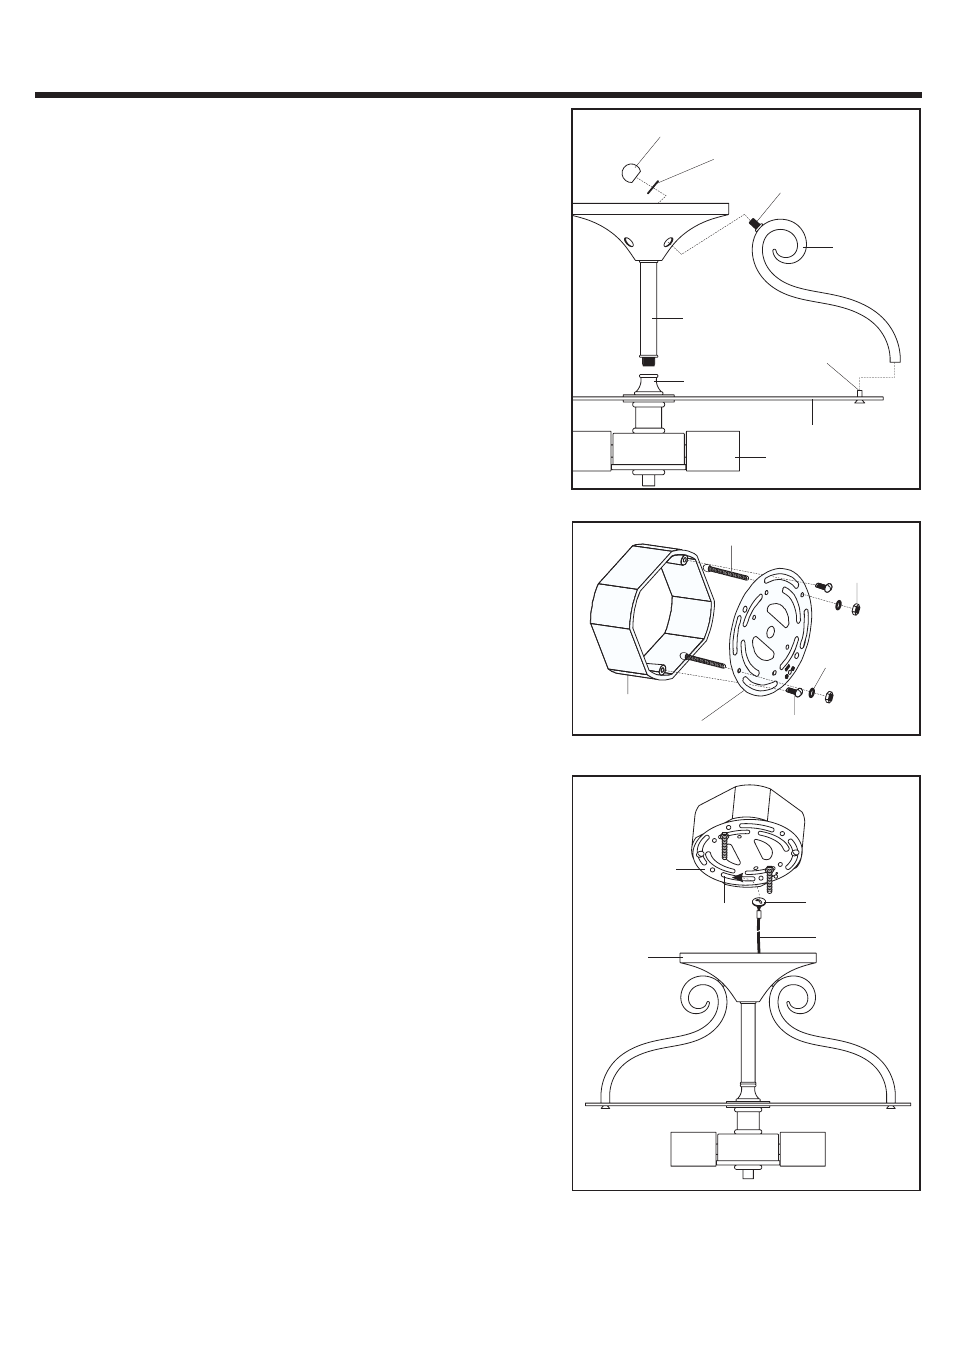
STEP 1
:
a. Thread the end of the Ceiling Canopy Assembly into the
Coupling on the top center of the Socket Assembly as
shown. Line up holes on the side of the Ceiling Canopy and
Bracket on the Socket Assembly before tighten them.
b. Pass Bolts on Side Arms through the holes on the side of
the Ceiling Canopy. Place another ends of Side Arms over
Studs on the Bracket.
c. Place Lock Washers (1/8IP) over Bolts on Side Arms and
thread Lock Balls onto Bolts. Hand tighten until snug to
secure Side Arms.
Ceiling Canopy
Assembly
Lock Ball
Lock Washer (1/8IP)
Side Arm
Bolt
Coupling
Socket Assembly
Bracket
Stud
STEP 3
:
a Locate the Ceiling Canopy onto the Crossbar and slip the
Button Stop on the end of Lanyard into the Slot on the
Crossbar as shown.
.
Slot
Lanyard
Ceiling
Canopy
Crossbar
Button Stop
STEP 2:
a Screw the Mounting Screws into the Crossbar
place the
Lock Washers (#8-32 UNC) over the Mounting Screws and
thread the Hex Nuts (#8-32 UNC) onto the Mounting
Screws as shown Secure the position of the Mounting
Screws by tightening the Hex Nuts (#8-32 UNC) against
the Crossbar
b
Secure the Crossbar to the Outlet Box with Outlet Box
Screws
.
,
.
.
.
.
Outlet Box
Crossbar
Mounting Screw
Hex Nut
(#8-32 UNC)
Outlet Box Screw
Lock Washer
(#8-32 UNC)