Installation instructions step 1, Step 2, Step 3 – Quoizel WLS1613PN Wilson User Manual
Page 2
STYLE NUMBER: WLS1613PN
INSTALLATION INSTRUCTIONS
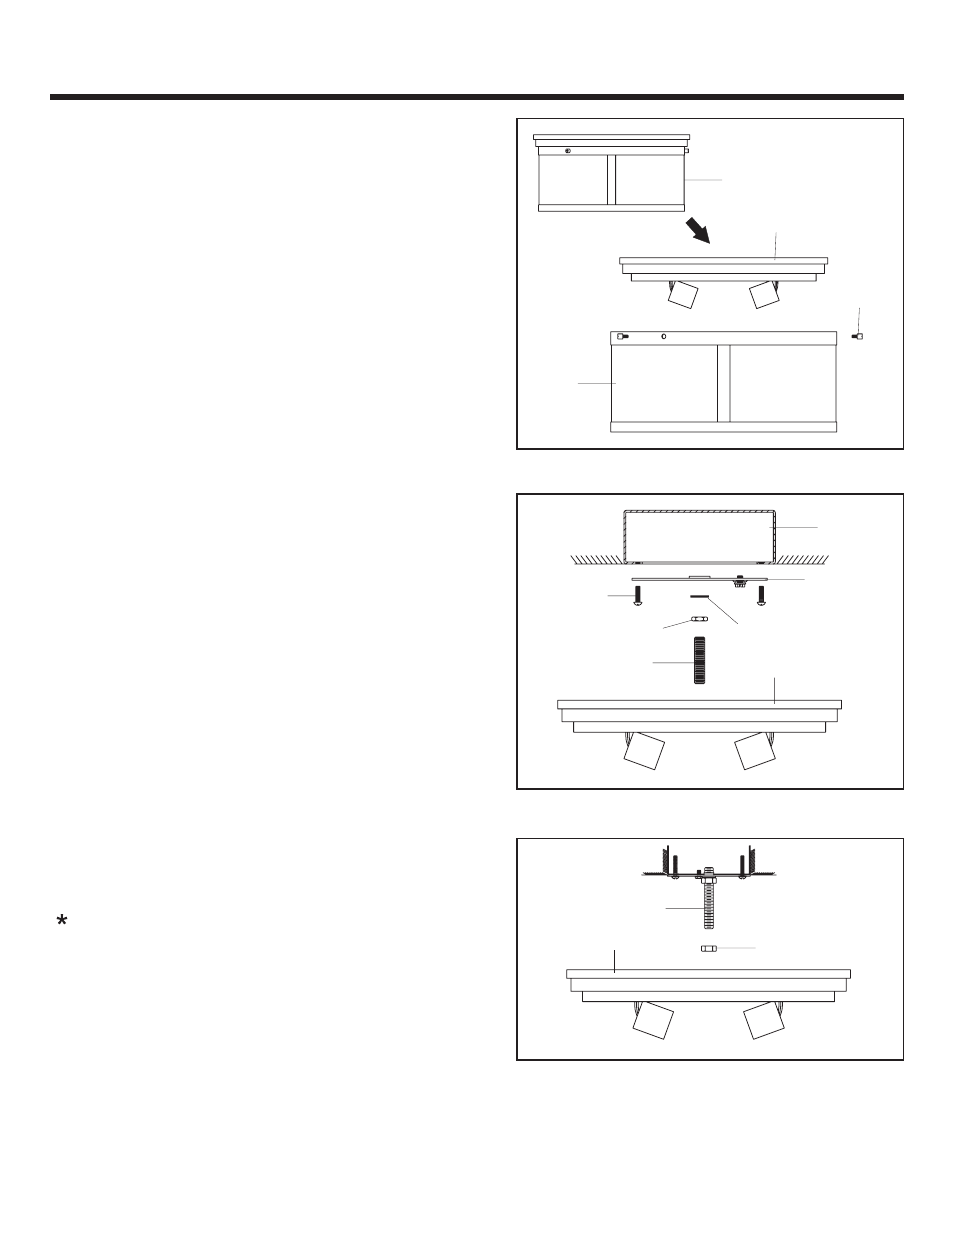
STEP 1:
a. Take apart the Cage from the Ceiling Canopy by
unscrewing the Lock Screws.
2 OF 4
Fixture Assembly
Ceiling Canopy
Lock Screw
Cage
STEP 2:
a. Locate the Crossbar and attach it to the Outlet Box
using the Outlet Box screws (not supplied).
b. Locate the Nipple and thread one Hex Nut onto it about
half way. Slip a Lock Washer onto it and thread one end
of the Nipple into the center hole of the Crossbar.
c. Position the Ceiling Canopy over the Outlet Box,
passing the mounting hole in the center of the Ceiling
Canopy over the end of the Nipple.
d. Adjust the Nipple so approx. 3/8” inch of the Nipple is
protruding from the mounting hole. This adjustment
may take a few tries.
e. When this length is achieved, remove the Ceiling
Canopy and tighten the Hex Nut up against the
underside of the Crossbar with pliers.
Outlet Box
Crossbar
Outlet Box
Screw
Hex Nut
Nipple
Lock Washer
Ceiling Canopy
STEP 3:
a. Thread another Hex Nut onto the other end of the
nipple. Thread this Hex Nut on just enough so the
inside surface of the Ceiling Canopy rests against it.
You may have to trial fit the Ceiling Canopy one more
times to insure this distance also. This Hex nut is
needed here to prevent you from crushing down the
center of the Ceiling Canopy.
Nipple
Hex Nut
Ceiling Canopy