Quoizel TF1409SVB Tiffany User Manual
Page 3
Thank you for purchasing a Quoizel product.
Need assistance with parts or assembly? Call Quoizel customer service at 1-631-273-2700
or visit us on-line at www.quoizel.com
3of5
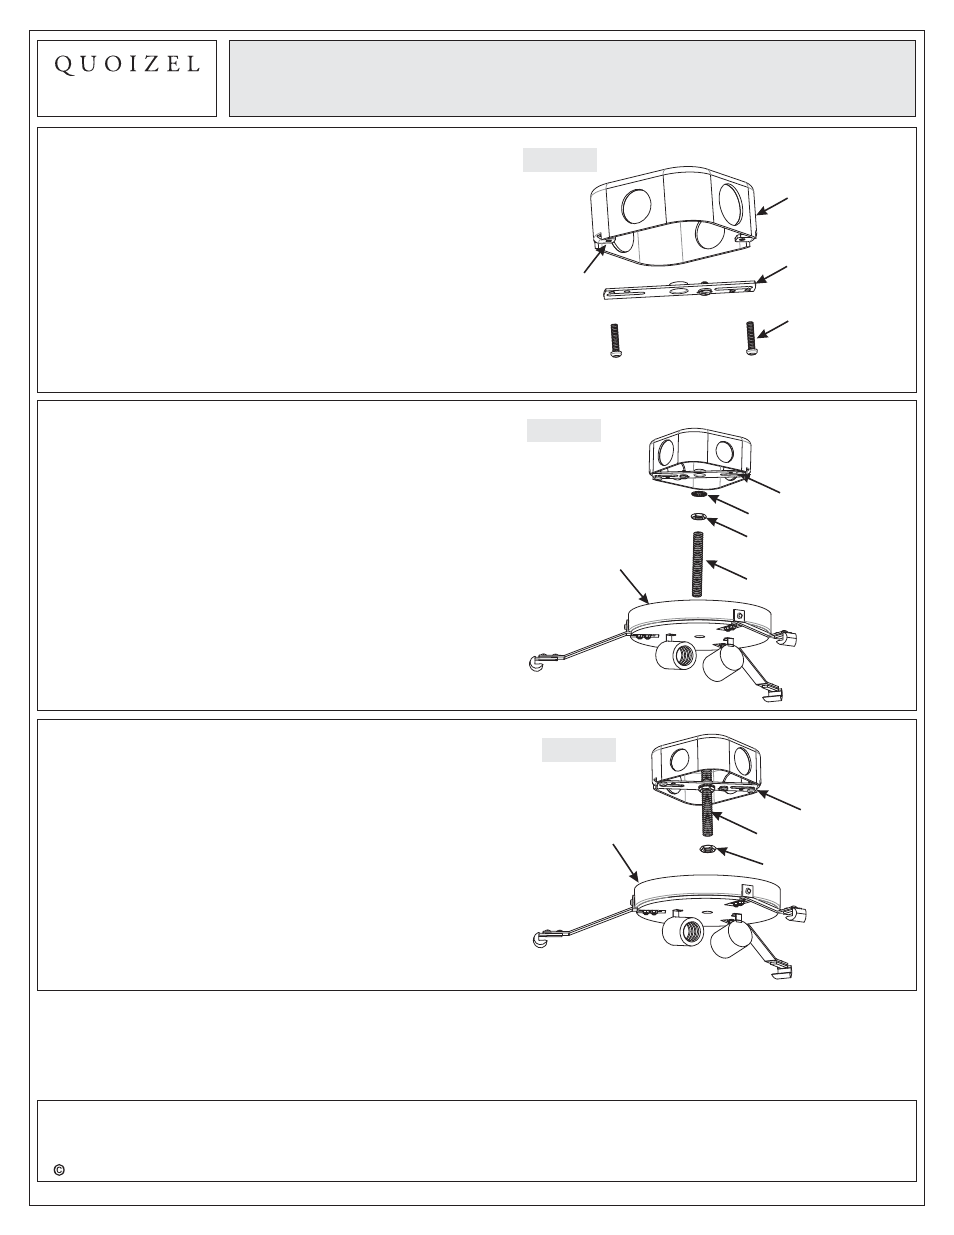
Figure 2
STEP 2
Attach Nipple to Crossbar
-
A. Locate the Nipple (B) and thread one Hex Nut (D) onto
it about half way. Slip a Lock Washer (C) onto it and
thread one end of the Nipple (B) into the center hole of
the Crossbar (A).
B. Position the Ceiling Canopy (E) over the outlet box,
passing the mounting hole in the center of the Ceiling
Canopy (E) over the end of Nipple (B).
C. Adjust the Nipple (B) so approx 3 8 inch of the Nipple
(B) is protruding from the mounting hole. This
adjustment may take a few tries.
D. When this length is achieved, remove the Ceiling
Canopy (E) and tighten the Hex Nut (D) up against the
underside of the Crossbar (A) with pliers.
Nipple
Crossbar
Lock Washer
Hex Nut
Assembly Instruction Sheet #IS-TF1409SVB
For Style TF1409SVB
STEP 1
- Attach Crossbar to Outlet Box
A. Secure the Crossbar (A) to the outlet box with outlet
box screws (not supplied). Tighten until snug.
Figure 1
Figure 3
Ceiling Canopy
STEP 3
Attach Ceiling Canopy
-
A. Thread one Hex Nut (D) onto the other end of the nipple
(B). Thread this Hex Nut (D) on just enough so the
inside surface of the Ceiling Canopy (E) rests against it.
* You may have to trial fit the Ceiling Canopy (E) one
more times to insure this distance also. This Hex Nut
(D) is needed here to prevent you from crushing down
the center of the Ceiling Canopy (E).
Crossbar
Hex Nut
Nipple
Ceiling
Canopy
6 CORPORATE PARKWAY
GOOSE CREEK SC 29445
www quoizel com
,
.
.
.
2014 QuoizelInc.
June 2014
Outlet Box
Screw (not
Supplied)
Crossbar
Outlet Box
Mounting
Hole