Winchester Repeating Arms 1873 User Manual
Page 11
18
19
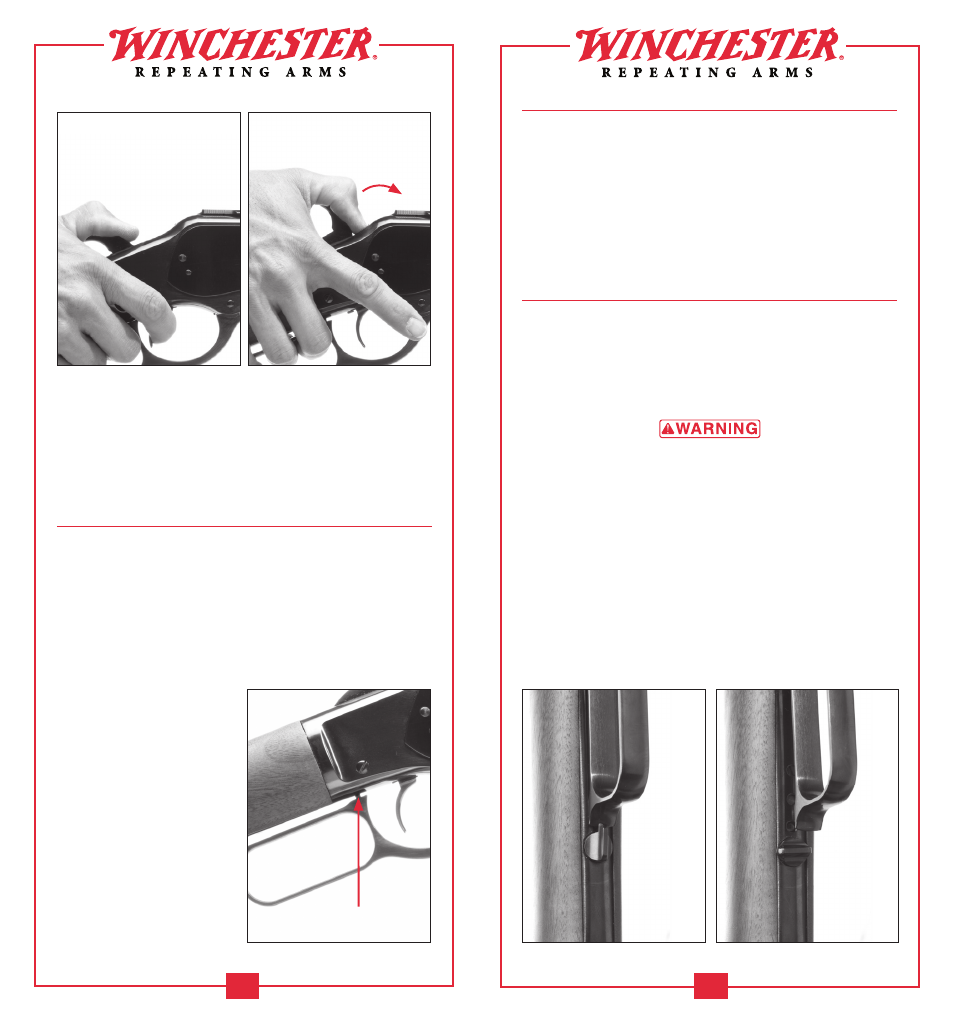
2. While firmly holding the hammer with your
thumb, squeeze the trigger to release the hammer.
3. Remove your finger from the trigger and slowly
ease the hammer to the half-cock position
(Figure 9).
t
rigger
S
toP
It is important that the breech is fully closed before
firing the rifle. To help assure that this is always the
case, the Model 1873 has a trigger stop mechanism.
Before the rifle will fire, it is necessary for the finger
lever to depress the trigger stop (Figure 10). The
trigger stop is not a “safety.” It is an interlock to assure
that the breech is fully
closed before a cartridge
can be fired. Never rely
on the trigger stop to
prevent accidental
discharge. When wearing
gloves, a portion of the
glove may get between
the lever and the lower
tang preventing the
lever from depressing
the trigger stop and
making it necessary to
squeeze upward on the
finger lever.
D
uSt
C
over
The Model 1873 has a dust cover on top of the
receiver designed to help keep the receiver clean.
Slide the dust cover forward, which is the closed
position, when the rifle is not in use. The dust cover
does not need to be manually slid to the rearward,
open position prior to shooting the rifle, it will open
when the lever is cycled.
l
ever
l
oCk
Like the original rifles, the Model 1873 includes a
lever lock that secures the lever in the up position
(Figure 11). With the lever lock in the locked
position, the lever cannot be cycled. To unlock the
lever lock, turn it 90° to the right or left (Figure 12).
using the lever locK will dePress the Finger
lever enough to dePress the trigger stoP.
do not carry your riFle with a cartridge in
the chaMber to avoid accidental discharge.
always KeeP the haMMer in the halF-cocK
Position. KeeP your Fingers away FroM the
trigger. always KeeP the MuZZle Pointed in
a saFe direction. Failure to Follow these
warnings could result in serious injury
or death.
FIGURE 8
Hold the hammer firmly
and pull the trigger.
FIGURE 9
Carefully lower
the hammer to the
rebound position.
FIGURE 10
Trigger Stop
FIGURE 11
The lever lock
shown in
the locked
position.
The lever
lock shown in
the unlocked
position.
FIGURE 12