Winchester Repeating Arms 1892 User Manual
Page 9
15
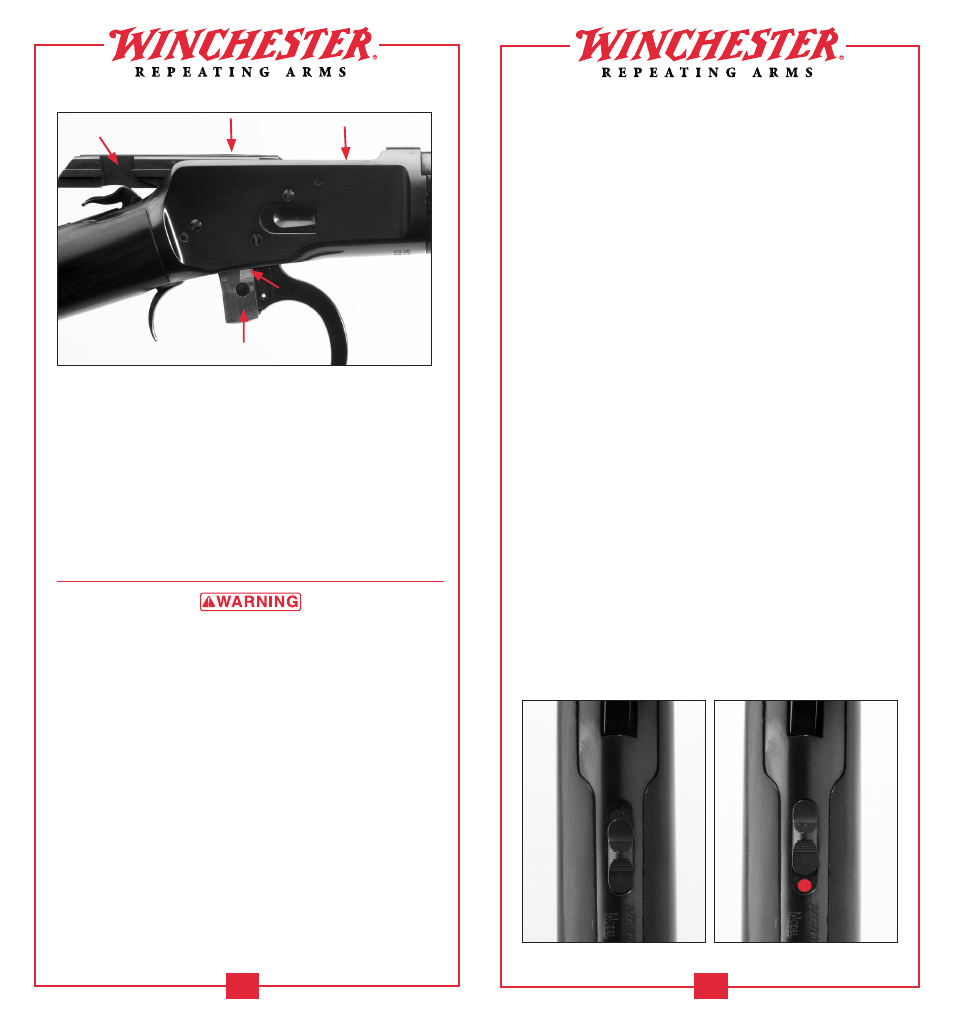
• Along the breech bolt surface.
• Along the breech bolt rail surfaces.
• On all pivot points and bearing surfaces on the
finger lever mechanism.
Avoid applying too much oil. Only a light film is
necessary. Cleaning and Maintenance Suggestions
should be followed before each oiling.
o
perAtion
oF
the
“s
AFetY
”
ALWAYS KEEP THE “SAFETY” IN THE ON SAFE
POSITION AND THE HAMMER IN THE REBOUND
POSITION UNLESS SHOOTING IS IMMINENT. ALWAYS
KEEP THE MUZZLE POINTED IN A SAFE DIRECTION.
FAILURE TO FOLLOW THESE WARNINGS COULD
RESULT IN SERIOUS INJURY OR DEATH.
The Model 1892 features a top-tang hammer block
“safety.” When the “safety” has been placed in the on
safe position it blocks the hammer from striking the
firing pin. However, the “safety” does not prevent the
hammer from falling when the trigger is pulled, even if
the “safety” is in the on safe position. When the trigger
is pulled, with the “safety” in the on safe position, the
hammer drops to the rebound position without striking
the firing pin. The “safety” has two positions:
• On Safe — This is the recommended position
of the “safety” for all times except when firing
is imminent.
To place the “safety” in the on safe position,
point your rifle in a safe direction, then slide the
“safety” fully to the rear with your thumb until
the red warning dot is covered by the “safety”
and the “S” is visible (Figure 6, page 15).
Moving the “safety” fully rearward and exposing
the “S” blocks the hammer from striking the
firing pin.
• Off Safe — When the “safety” is pushed all
the way forward it is in the off safe position
(Figure 7, page 15). In this position, when the
trigger is pulled, the cocked hammer will fall
and strike the firing pin. If a cartridge is in the
chamber the firing pin will strike the primer
and fire the cartridge.
To place the “safety” in the off safe position,
point your rifle in a safe direction, then slide the
“safety” fully forward, covering the “S” inscribed
on the rifle, and exposing the red warning dot.
When the red warning dot is visible the “safety”
is in the off safe position.
The “safety” can be actuated with the hammer
in the rebound or cocked position.
FIGURE 5
Lightly oil the rifle at these points.
14
FIGURE 6
The “safety” in the
on safe position.
The “safety” in the
off safe position.
FIGURE 7