Rite-Ride 8630 User Manual
Page 3
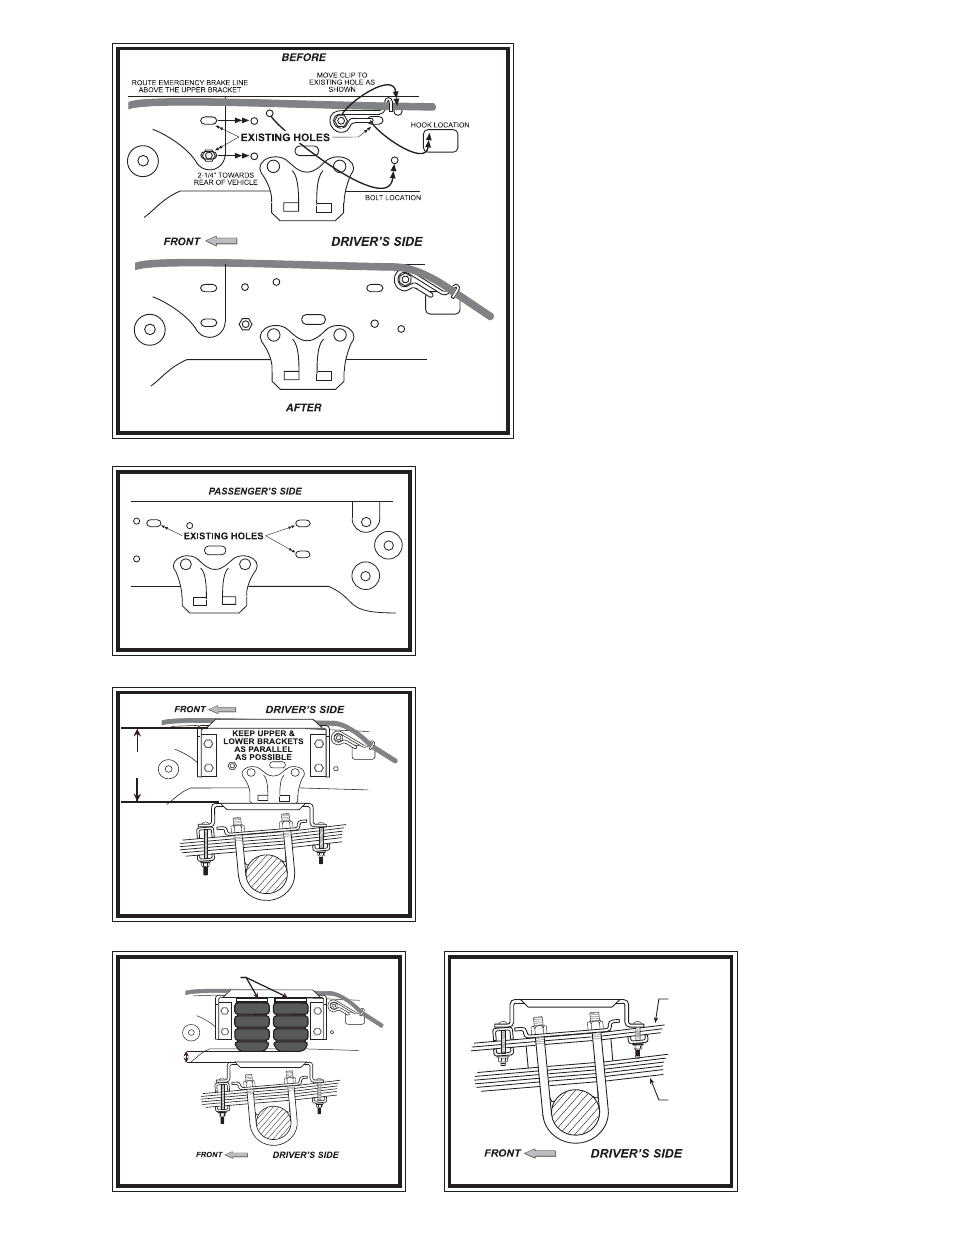
99-07 ONLY
Figure "B"
Figure "C"
5.5”
Figure "D"
Attach the upper bracket to the frame rail using the
drilled hole and a 3/8" -16 x 1-1/2" hex bolt, 3/8" -16
flanged hex nut, and large washer, making sure that the
remaining holes in the bracket are aligned with the slots
in the frame rail see Figure "A". With the upper
bracket secured in place, drill through the three holes in
the upper bracket and through the slots in the frame rail
with a 7/16" drill bit. Using the supplied 3/8" -16 x 3/4"
hex bolts, 3/8" -16 flanged hex nuts, and large washers,
attach the bracket to the frame rail. Note that three
large washers will be placed between the forward
bracket flange and the frame rail on both flange attaching
locations on the left side of the vehicle only. This
allows the air spring assembly to mount flush with the
frame rail see Figure "A".
S
TEP
5 - A
TTACH
THE
LOWER
BRACKET
TO
THE
VEHICLE
Place the lower bracket and air spring on the leaf
stack and install the 1/2" or 1" spacer between the lower
bracket and the leaf stack on the forward end of the
assembly to align the upper and lower brackets as close
to parallel as possible see Figures "A" & "D". Insert
the carriage bolts through the square holes in the lower bracket. Slide
the bracket straps onto the carriage bolts to clamp the lower bracket
to the leaf stack see Figures "A" & "D". Fasten the bracket strap
to the carriage bolts using two 3/8"-16 flanged hex nuts. Note: the
bracket strap will clamp around the overload springs only see Figures
"A" & "E".
S
TEP
6 -I
NSTALL
THE
PASSENGER
'
S
SIDE
ASSEMBLY
Reverse any orientations when assembling and installing the right,
or passenger's, side of the vehicle. Note that the installation on the
passenger's side does not require the flat washers between the upper
bracket and the frame rail. The passenger's side installation will not
require the relocation of any existing hardware on the frame rail.
S
TEP
7 - F
INISH
U
P
This now completes the installation. Re-attach the negative
battery cable and remove the wheel chocks from the front wheels.
Now you're finished and ready to put your Work-Rite’s to use.
Figure "E"
1/4”-3/8”
OPTIONAL
SPACER
OVERLOAD
LEAF STACK
PRIMARY
LEAF STACK
ON MODELS WITH OVERLOAD SPRINGS
CLAMP THE LOWER BRACKET
TO THE OVERLOAD SPRING ONLY.
Figure "F"