Nstallation, Rocedure – Rite-Ride 4107 User Manual
Page 2
S
TEP
3
A
- I
NSTALL
THE
AIR
SPRING
(Century, Celebrity, Cutlass Ciera 6000 and X, Skylark, Citation,
Omega, Phoenix, Pathfinder, Trooper, Volvo, and Ford, Lincoln,
and Mercury vehicles)
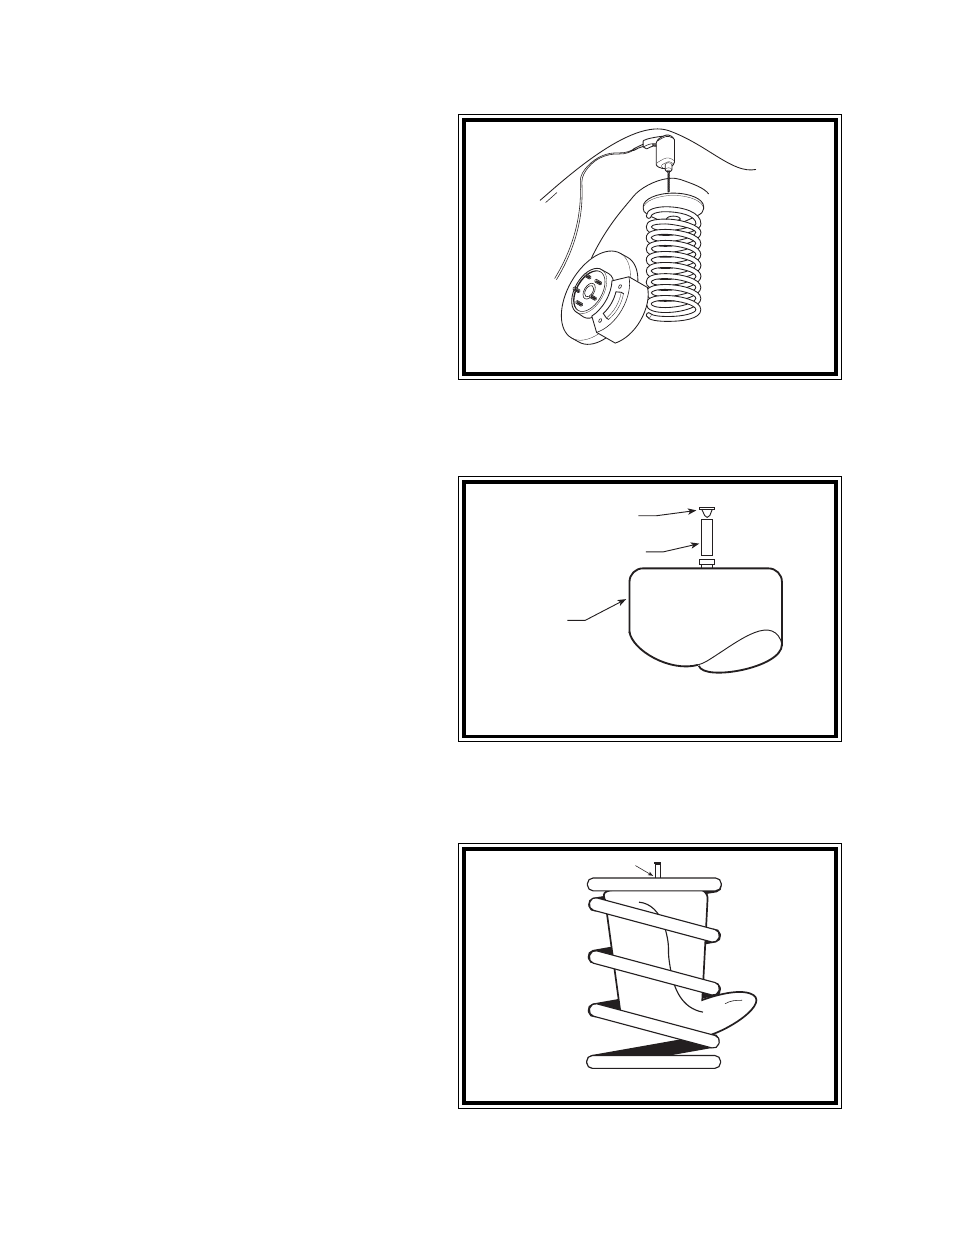
Insert the top of the flattened air spring into the coil
spring through the lowest opening in the coil spring with
the push-to-connect air inlet at the top of the coil spring
see Figures "C" & "D". The air spring supports will be
added in
Step 3D.
S
TEP
3
B
- I
NSTALL
THE
AIR
SPRING
(Toronado, Riviera, El Dorado, SeVille, LeSabre, Electra,
Park Avenue, DeVille, Olds 88, Olds 98, And Bonneville)
Insert the top of the flattened air spring into the coil
spring through the lowest opening in the coil spring with
the push-to-connect air inlet at the bottom of the coil
spring see Figures "E" & "F". The air spring supports
will be installed in
Step 3D
.
S
TEP
3
C
-
ADJUST
THE
AIR
SPRING
Push the air spring up into the coil spring by hand or
with a blunt tool, such as a spoon shaped tire iron. Do
NOT use any thing with sharp edges or corners, as this
may damage the air spring.
When the air spring is completely within the coil
spring, remove the plug and tubing section by pushing
the collar on the fitting towards the air spring and pulling
on the tubing to remove. Allow the air spring to return
to its normal shape.
S
TEP
3
D
- I
NSTALL
THE
SUPPORTS
(Century, Celebrity, Cutlass Ciera 6000 and X, Skylark, Citation,
Omega, Phoenix, Pathfinder, Trooper, Volvo, and Ford, Lincoln,
and Mercury vehicles)
Push the air spring to the bottom of the coil spring
and insert the protector between the air spring and the
top spring seat see Figure "D".
(Toronado, Riviera, El Dorado, SeVille, LeSabre, Electra,
Park Avenue, DeVille, Olds 88, Olds 98, and Bonneville)
Push the air spring to the top of the coil spring and
insert the protector between the air spring and the
bottom spring seat see Figure "F".
R
EPEAT
S
TEP
3
FOR
THE
OPPOSITE
SIDE
OF
THE
VEHICLE
P
ROCEED
TO
S
TEP
5
TO
COMPLETE
INSTALLATION
C
OIL
-R
ITE
I
NSTALLATION
P
ROCEDURE
P
LEASE
TAKE
ALL
NECESSARY
SAFETY
PRECAUTIONS
WHEN
INSTALLING
YOUR
C
OIL
-R
ITE
KIT
.
FIGURE "A"
FIGURE "B"
FIGURE "C"
AIR INLET
PLUG
AIR LINE
COIL-RITE
AIR SPRING