System optimization, Revel performa c30 rear connector panel, Revel performa c30 rear – Revel C30 User Manual
Page 15: Connector panel
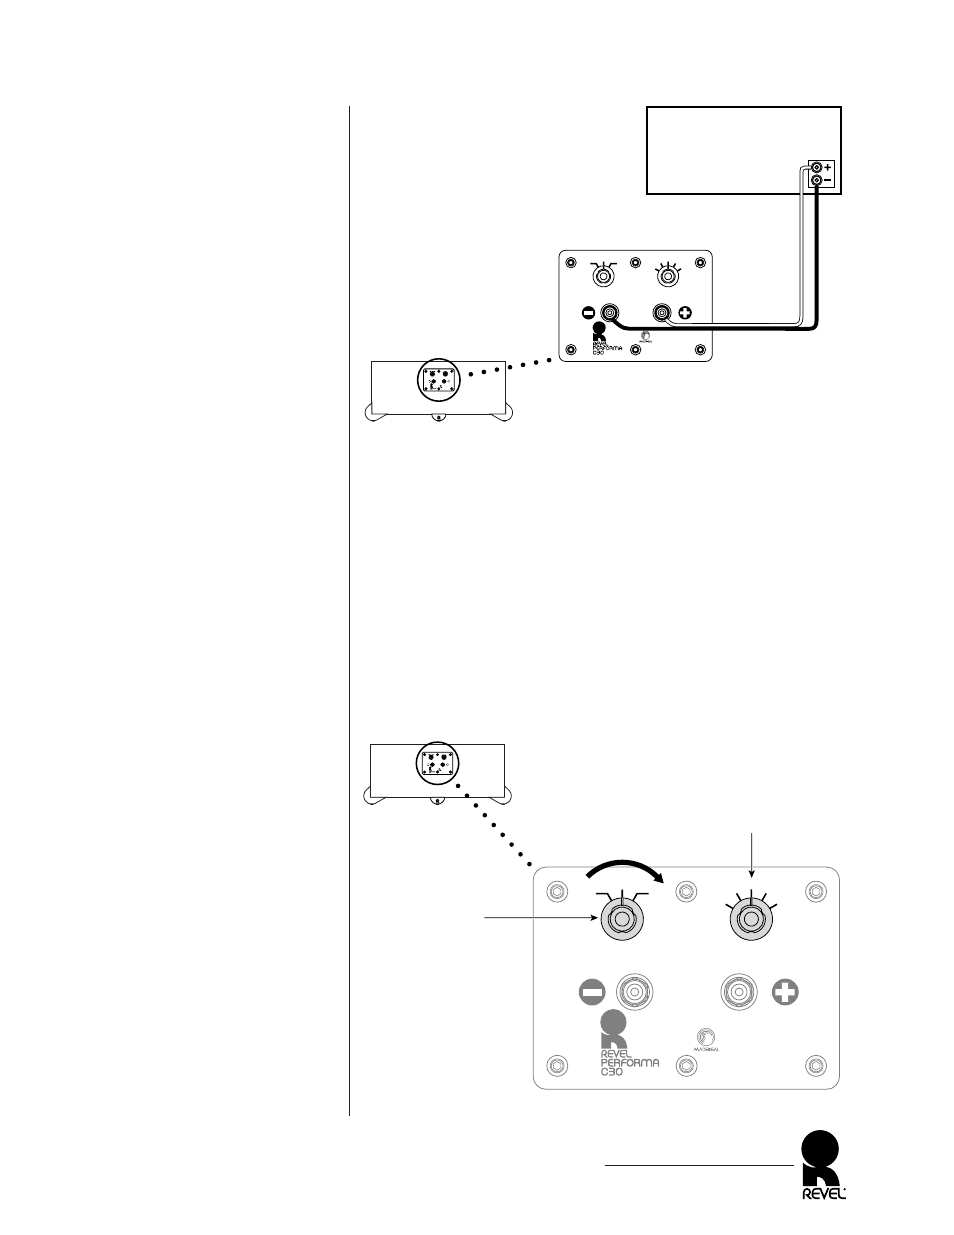
Figure 15. How to connect the
REVEL PERFORMA C30
center-channel loudspeaker in a
single-wired system.
Figure 16. The REVEL
PERFORMA C30 level and
placement control locations and
initial settings.
SYSTEM OPTIMIZATION
1. After connecting the REVEL PERFORMA C30 loudspeaker,
initially set the HIGH FREQUENCY LEVEL control on the
rear panel to the “0” position (see Figure 16).
REVEL PERFORMA C30
Owner’s Manual
15
On Top of
Monitor
Flush
Mounted
Stand
Mounted
0
+.5
-.5
+1
-1
Placement
Compensation
(See Owner's Manual)
High Frequency
Level (dB)
Revel
Northridge, California
Made in U.S.A.
Serial No.
On Top of
Monitor
Flush
Mounted
Stand
Mounted
0
+.5
-.5
+1
-1
Placement
Compensation
(See Owner’s Manual)
High Frequency
Level (dB)
Revel
Northridge, California
Made in U.S.A.
Serial No.
red
blk
REVEL
PERFORMA
C30
Rear
Connector Panel
Amplifier
(rear)
REVEL
PERFORMA
C30
Rear
On Top of
Monitor
Flush
Mounted
Stand
Mounted
0
+.5
-.5
+1
-1
Placement
Compensation
(See Owner's Manual)
High Frequency
Level (dB)
Revel
Northridge, California
Made in U.S.A.
Serial No.
On Top of
Monitor
Flush
Mounted
Stand
Mounted
0
+.5
-.5
+1
-1
Placement
Compensation
(See Owner’s Manual)
High Frequency
Level (dB)
Revel
Northridge, California
Made in U.S.A.
Serial No.
Connector Panel
Set High-Frequency
Level Control To “0”
Bass
Increases
Set Placement
Compensation
Control To Match
C30 Placement