Wall-mounting the m10, Using the included wall bracket, Step one – Revel M10 User Manual
Page 8: Step two, Step three, Step four, Step five
8
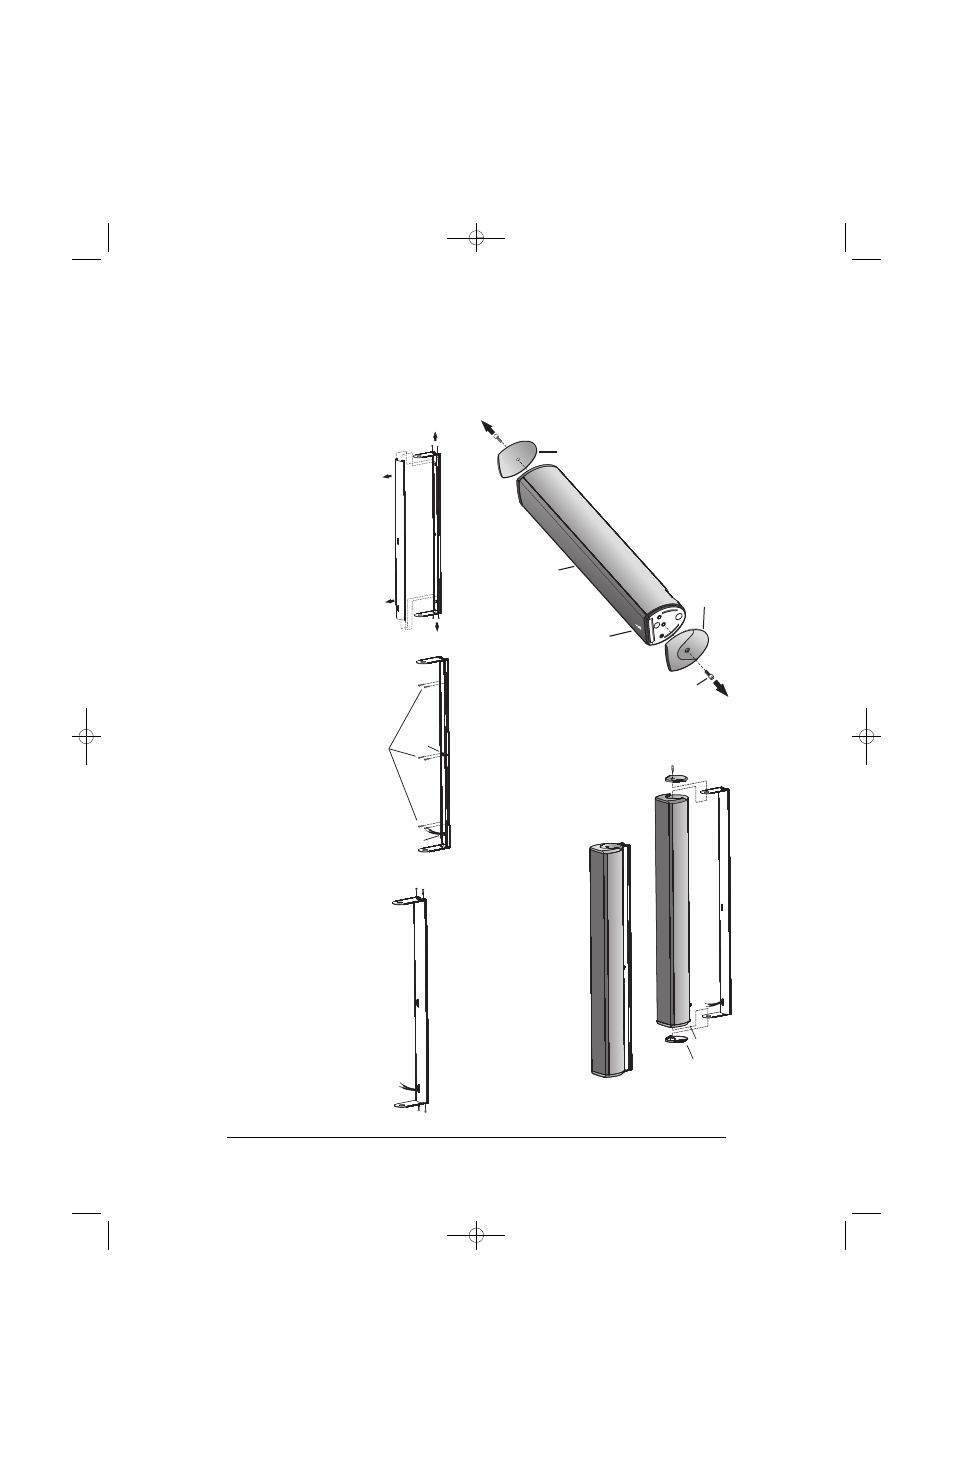
Wall-Mounting the M10
Using the Included Wall Bracket
The customer is responsible
for the proper selection and
use of mounting hardware,
and for correctly and safely
wall-mounting the speakers.
Step One
Remove the wall-bracket cover
by removing the four wall
bracket screws on the ends,
as shown.
Step Two
Run the speaker wire behind
the wall bracket and out
through the hole at the
bottom. After deciding where
to place the satellite speaker,
attach the wall bracket (in a
vertical position) to the wall,
using the appropriate screws
and anchors.
Step Three
Run the speaker wires out
through the bottom hole of the
wall bracket cover. Resecure
in place, as shown, with four
of the wall bracket screws.
Step Four
Using the included Allen wrench, remove the bottom end
cap of the speaker by unscrewing the single center screw
on bottom.
Note: The bottom is the end closest to the
Revel logo on the front grille and the speaker
connections on the rear.
Step Five
Connect the wires (see page 9).
Replace the end caps while
capturing the wall bracket in
between parts A and B and
securing it in place.
Tighten until snug.
Mounting screws
and anchors
not included
Bottom hole
Wall bracket
End cap
Satellite speaker
Revel logo
End cap
1/4-20 x 3/4"
Screw
Wall-mount
end cap A
Wall-mount
end cap B
HSGP1052-M10_OM 9/12/08 12:18 PM Page 8