Revel W990 User Manual
Page 6
6
In-Wall Architectural Loudspeaker
Instruction Manual
Making Connections
Connect each channel’s positive (+) terminal on the back of the amplifier
or receiver to the positive (“IN+”/red) terminal on the corresponding
speaker; connect each channel’s negative (–) terminal on the back of
the amplifier or receiver to the negative (“IN–”/black) terminal on the
corresponding speaker. Do not reverse polarities (that is, do not connect
+ to –, or – to +) when making connections. Doing so will cause poor
imaging and diminished bass response.
Negative Terminal
(“IN–”/Black)
Positive Terminal
(“IN+”/Red)
Press down on the top of the terminal to open the hole; insert the bare
end of the wire into the hole; and release the terminal to secure the wire.
CAUTION: To avoid short circuits that may damage your equipment,
be certain that positive and negative wire strands do not touch
each other and do not touch metal parts such as the speaker frame.
mouNtINg tHe SpeAkeRS
For New Construction
If you wish to pre-install a pre-construction frame for the speakers
before the drywall is installed in new construction, you will need to
purchase the correct rough-in frame kit for your loudspeaker model
from your authorized Revel dealer. Detailed mounting instructions are
supplied with the rough-in kit. After the drywall is installed, follow the
installation instructions in For Existing Construction, below.
For Existing Construction
Note: The installation procedure is the same for all models
covered by this manual.
1. Ensure that the drywall, plywood or other wall material is 1/2 in –
1 in (13mm – 25mm) thick and capable of withstanding the weight of
the speaker being installed.
Make sure to allow at least 1" (25mm) between the edge of the supplied
installation template and any studs or other obstructions behind the
wall, so the speaker’s locking mechanism will have room to engage fully.
Perform an obstruction survey to be sure that there are no studs, lengths
of conduit, pipes, heating ducts or air returns in the stud bay that could
interfere with the speaker.
Mounting
Opening
1"
(25mm)
1"
(25mm)
1"
(25mm)
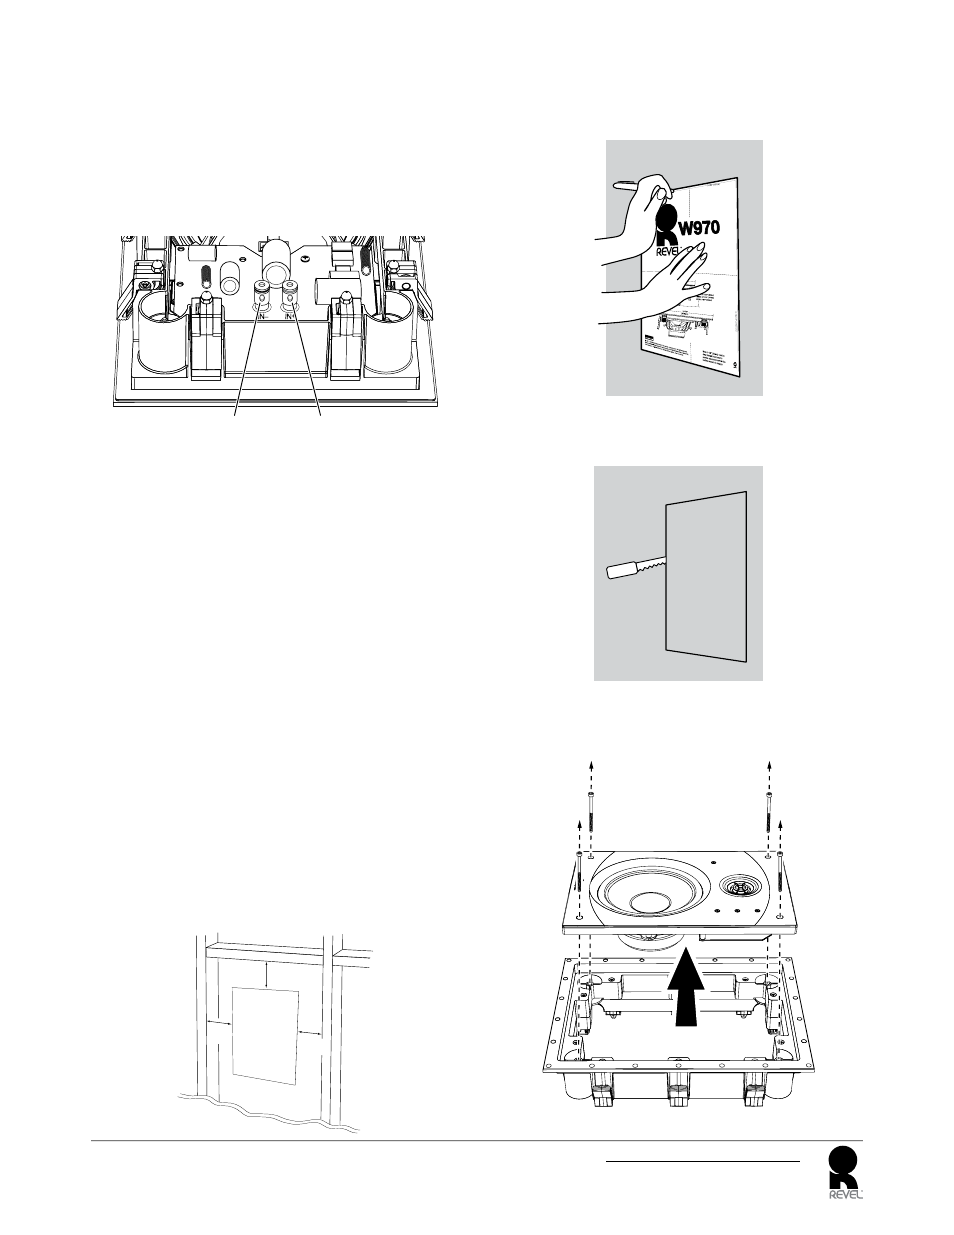
2. Determine the correct speaker location and use the template included
with the speaker to mark the wall material.
3. Cut the drywall along the mark you made in Step 2 to create the
mounting opening.
4. Using the supplied hex wrench, remove the four hex screws that attach
the speaker baffle to the mounting frame and remove the baffle from
the frame. (You will use the screws later, so put them in a safe place.)