HCO UM562 User Manual
Page 2
Sending a Picture Manually with Your UM562 Camera:
1. If you do not already have images on your camera, go ahead
and take one.
To do so, first switch your camera to the “SETUP” mode. If
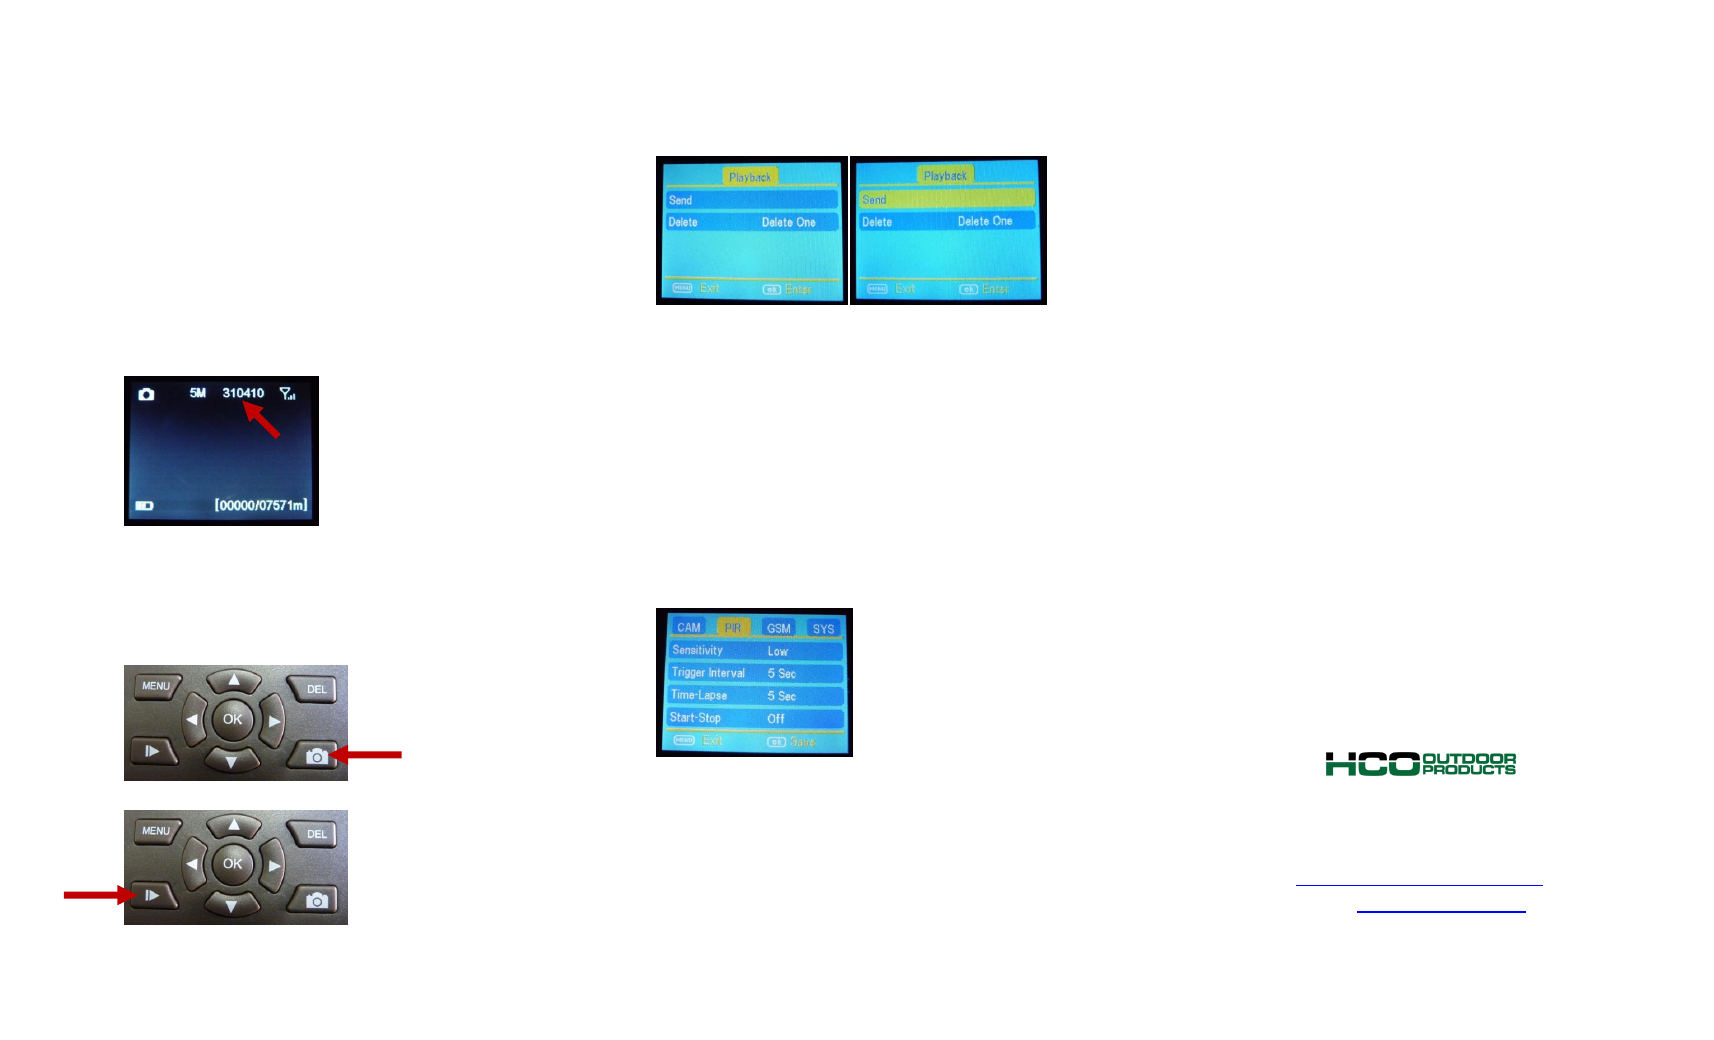
you have just set up your camera for sending, you will see
the message “Update Success”.
Then you will see the “Checking” and “Search Network”
messages while you wait for the connection to be
obtained, as indicated by the 6-digit connection code in the
top right of your screen.
Note, if the number does not appear, but rather the
camera says “Login fail”, simply shut the camera off and
try again. You may be in an area with bad signal.
Now simply point the camera where you want, and take a
picture by pressing the camera button.
2. Now hit the playback button to see your image.
3. Next hit “MENU”, and you should see this screen. Scroll down
to “Send”, and hit the “OK” button on your keypad.
4. Now you should see the camera going through a series of 10
steps on a blue screen to send the picture.
5. If the screen says, “Sent Successfully”, then the picture should
now send to your specified phone or email.
Sending a Picture Automatically with Your UM562
Camera:
1. Make sure your camera is on “SETUP” mode and you have a
connection.
2. Now hit the “MENU” button and go to the “PIR” section with
your arrow buttons.
3. Next make sure to set the “Trigger Interval” to at least 2
minutes as the camera takes a minimum of 45 seconds to
send an image.
4. Then switch the camera to “ON”, close it, and wait for the red
light on the front of your camera to flash several times.
5. Now your camera can automatically take and send pictures!
Phone: 1-770-582-0004
Fax: 1-770-582-0335
Web