HCO Panda GSM Quick Setup Guide User Manual
Hco panda gsm quick setup guide
HCO Panda GSM Quick Setup Guide
Getting the SIM Card for Your Camera:
We recommend that you go to an AT&T or T-Mobile company
store and ask for a SIM card with a basic prepaid plan and
unlimited MMS messages. Plans should be no more than $19.99
per month. Make sure they activate your SIM card at the store.
Setting Up Your Panda GSM Camera for Sending
Pictures:
1. Open your camera.
2. Insert your SIM card and a clean (formatted) SD card into their
appropriate places on the camera.
3. Once that is done, look for the slider switch on the left side of
the camera. It should have three options: “OFF”, “SETUP”, or
“ON”. Push to “SETUP”.
4. Next hit the “MENU” button on your camera.
5. Once your menu screen pulls up, using your side arrow
buttons, move over to the “GSM” tab. Then scroll down to the
“Send Mode” option.
6. Change “Send Mode” to “Instant” with your right arrow, and hit
“OK”.
7. Enter your preferred number of pictures sent per day (0-99),
and hit “OK”.
8. Now you should be in the “CAM” tab with a screen like this:
9. Scroll down to where you see “Send Via”, and make sure it is
set to “MMS”. Hit “OK”.
10. Scroll further down until you see the “Download Tool” option.
11. Hit the “OK” button on your camera, and the UOV Setup tool
you need to continue setup will be downloaded to your SD
card.
12. Turn off the camera, and eject your SD card. Now insert it into
your computer’s SD card slot.
13. Once you pull up the SD card folder on your screen, right-click
on a WinZip folder called “GSMSetup”, and choose “Extract
All…”.
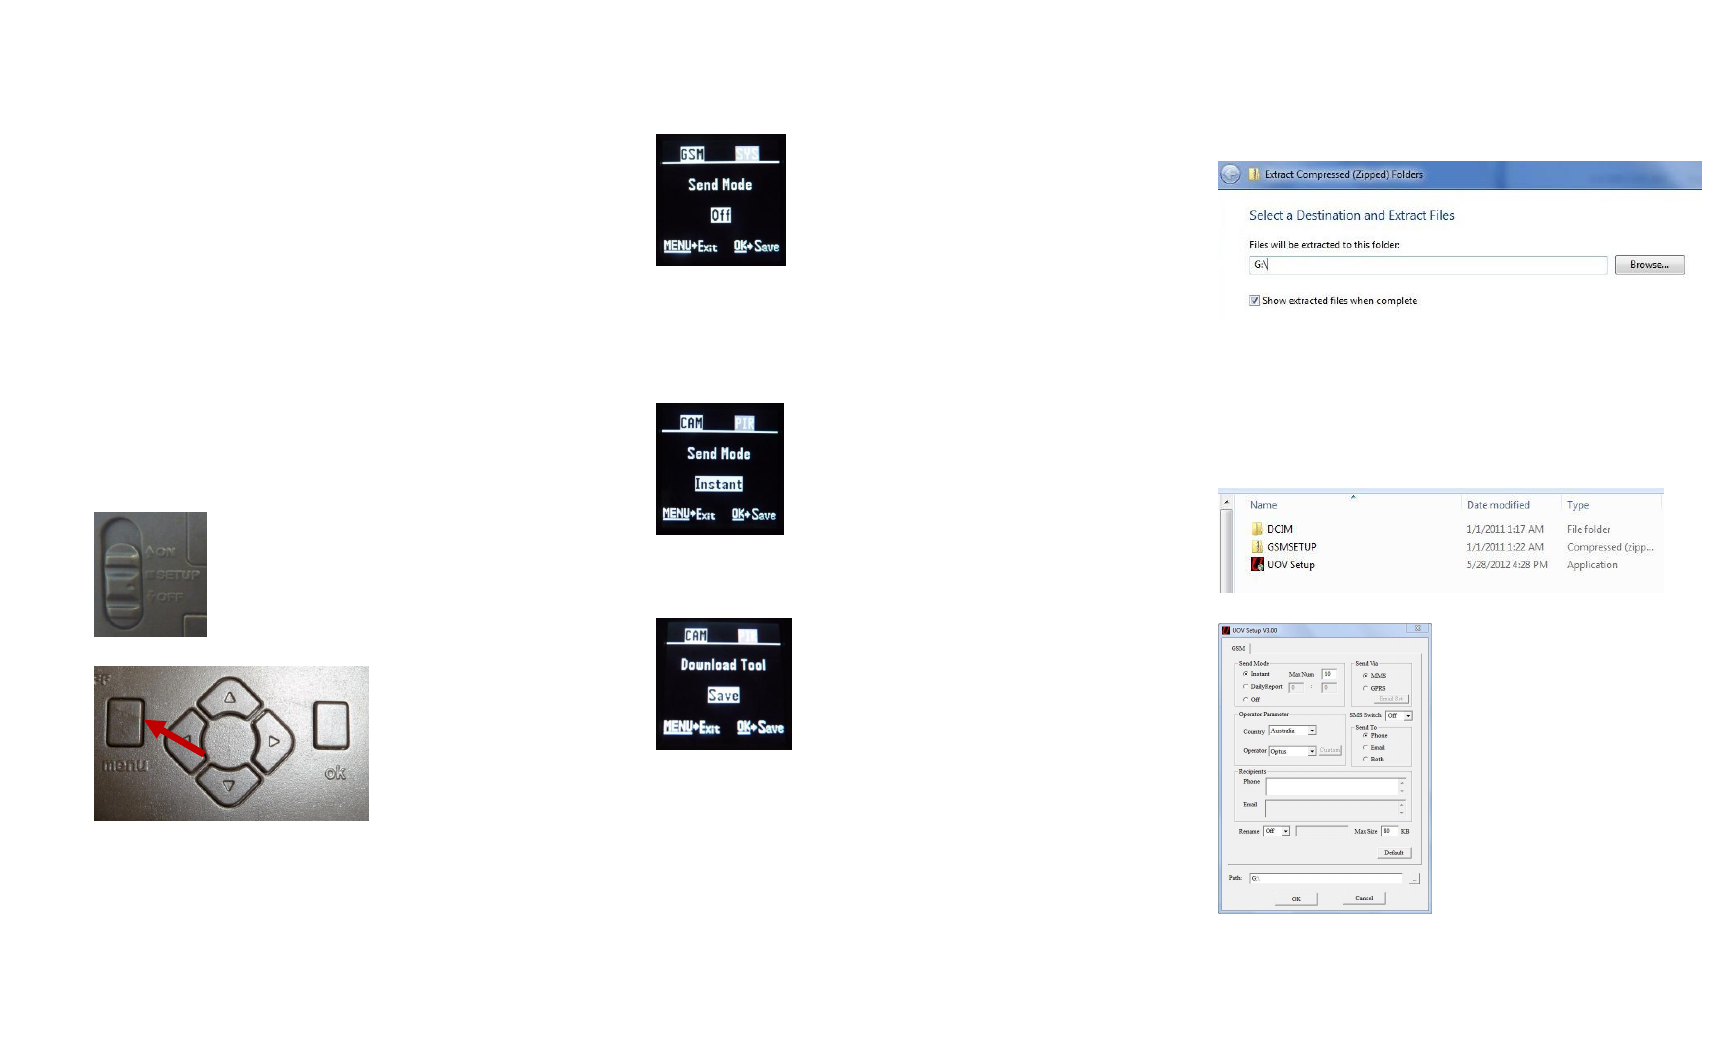
14. Before hitting “Extract” at the bottom of the window, make sure
that in the text box to the left of “Browse…”, you delete
everything except the drive letter like so:
Here, the drive letter for your SD card is “G:\” but
depending on your computer, it may be a different letter.
DO NOT modify the drive letter.
Now hit “Extract…”
15. Now the following files will be in your SD card folder:
16. Double-click on “UOV Setup”, and this screen appears:
17. For now, verify that you previously setup your camera with
these values: