Installation of optional security cable, Internal courtesy light, Dc power jack and external ac/dc power supply – GunVault GVB 2000 User Manual
Page 8
- 8 -
a) Using the template provided, drill starter holes with drill bits appropriate for your installation.
Drive screws only into the two key-slot holes. Drive the screws in until just enough room is
left between the head of the screw and the mounting surface to permit you to slide the
Vault’s key slots over the screws.
b) Slide the Vault key-slots on over the screws.
c) Now lift the foam padding in the bottom of the Vault and insert screws into remaining holes
as desired, to retain the safe in place. A minimum of three (3) screws must be used to mount
the safe.
d) Tighten all screws and smooth the foam lining. Your Vault is now securely attached to the
mounting surface!
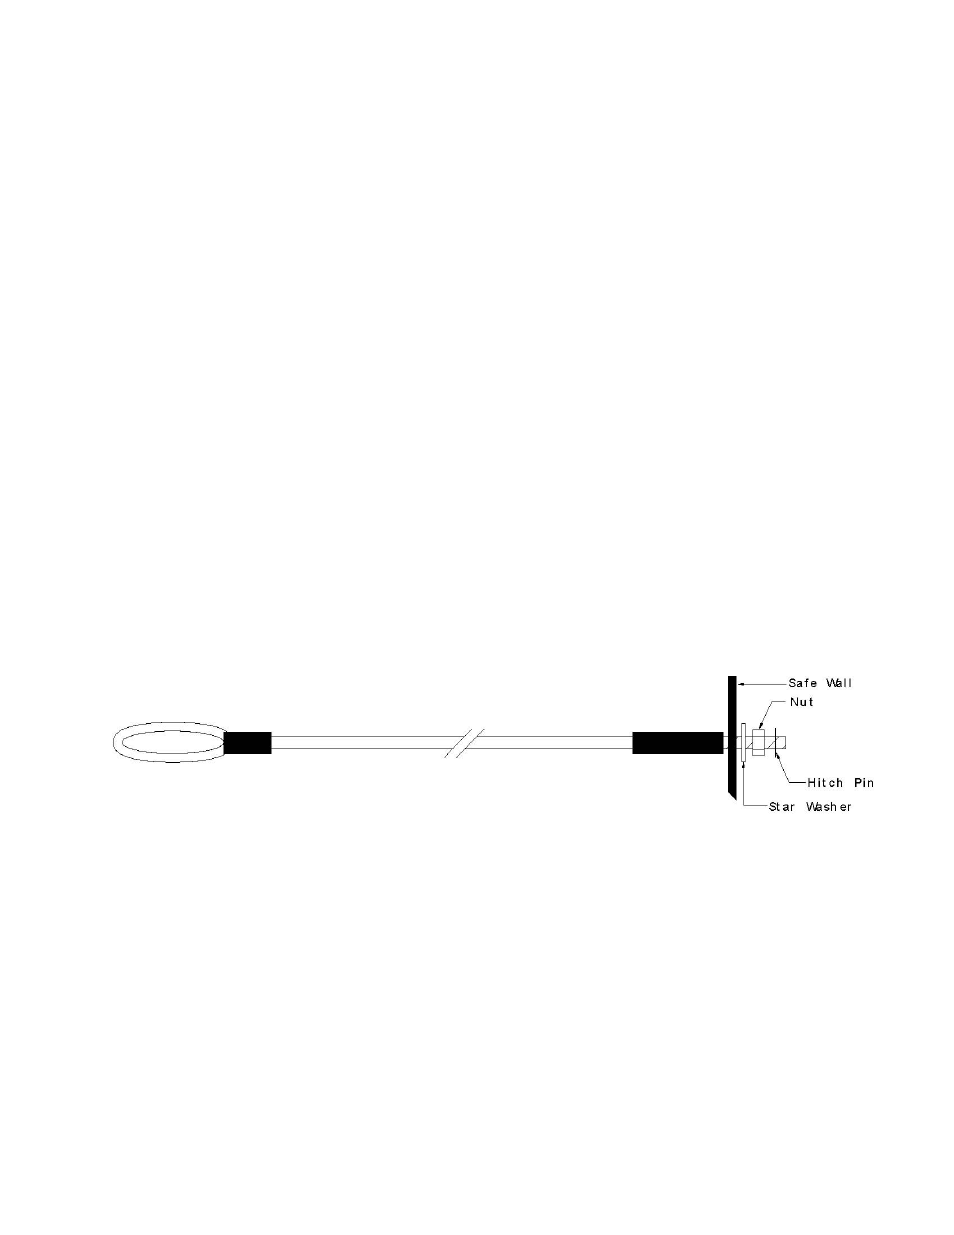
4. Installation of Optional Security Cable
“Knock-outs” are provided on both sides to permit attachment of the Security Cable. If the
Security Cable is to be installed, use a punch or nail set and a hammer to remove the knock-out.
Before inserting cable mount, be sure to remove the little metal knock-out tab from your safe.
Do not allow this small metal piece to remain inside your safe.
Hint: A pair of needle-nosed pliers will be useful for installing the hitch pin.
a) First, loop the end of the security cable through the eye and around a stationary object.
b) Then, insert the threaded mount through the hole in the safe.
c) Hold the mount in place while you slide the star washer over the threaded end inside the safe.
d) Spin on the nut and tighten “finger tight.”
e) Insert the Hitch Pin through the hole in the threaded mount, to ensure that the nut cannot
come off.
5. Internal Courtesy Light
When an enrolled fingerprint access code has been used to open the safe, the interior light will
shine for five seconds, allowing a clear view of the interior.
6. DC Power Jack and External AC/DC Power Supply
Warning: Never attempt to operate the safe with external power alone. Batteries MUST be
installed before and during operation with the external power supply, in order to avoid
interruption of power and loss of access codes.
The AC/DC power supply specified is NOT a battery charger; it is an external power supply to
be used only when batteries are installed.
.