4 setting and measuring correction values, 1 setting correction values, 2 measuring correction values – Gossen Digipro F User Manual
Page 6: 3 cancelling correction values, 4 important remarks concerning correction values
GOSSEN Foto- und Lichtmesstechnik GmbH
6
3.4
Setting and measuring correction values
(see Section 3.4.4 Important remarks concerning correction values, page 6)
3.4.1
Setting correction values
•
Select COR with the function buttons (the last valid correction
value appears in the display)
•
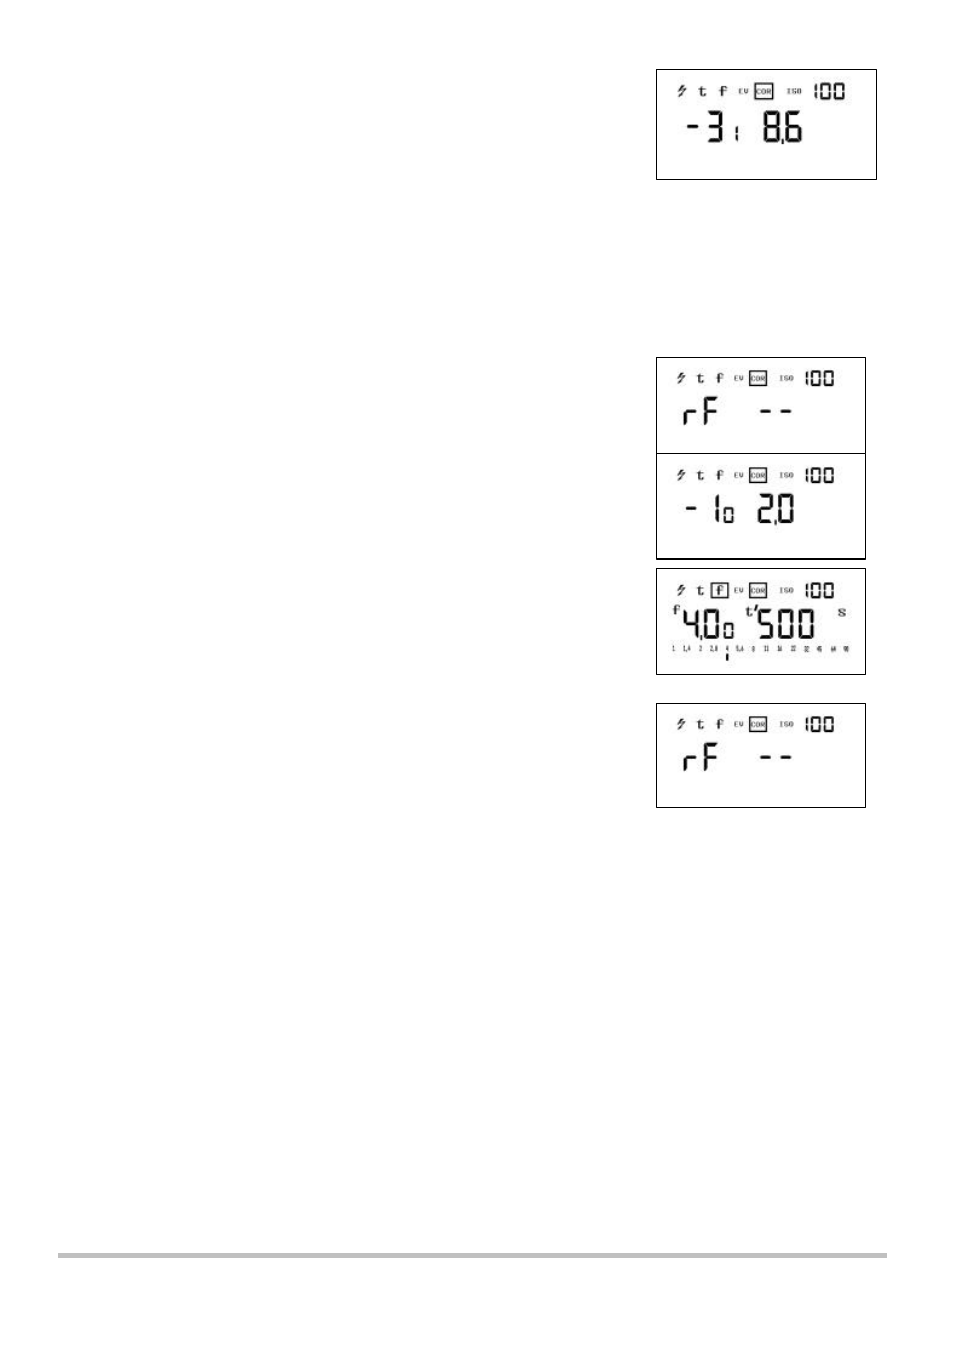
Enter or change the correction value with the value buttons
The extension factor is shown in the right-hand digital display,
and the correction value in stops in the left-hand section.
Enter in 1/10th stops (small figure) within a range of ±7.9 exposure values.
A figure preceded by „–“ indicates an exposure extending correction.
Example: –3.1 stops equal factor 8.6.
In the event of an exposure shortening correction, only the left-hand display appears as an exposure value difference
in stops.
3.4.2
Measuring correction values
Correction values can also be directly measured. An evenly illuminated
surface and constant light level are required. Measure in the reflected mode.
•
Press measuring button M and get a reference reading:
displayed as rF--
•
Weaken light by holding e.g. a grey filter in front of the measuring
aparture. Press meassuring button M
The light reducing factor will be diplayed automatically in stops
at the right, as extension factor at the left.
Pressing one of the function buttons will transfer the correction value
to the memory of the Digipro F. The COR value is now automatically
taken into account in all subsequent measuring functions. The frame
around COR is retained as a reminder that a correction value was
entered.
3.4.3
Cancelling correction values
•
Select COR with the function buttons
•
Press measuring button (display rF --)
Select any other function with one of the function buttons.
Correction value is cancelled, and the frame around COR
disappears.
3.4.4
Important remarks concerning correction values
The Digipro F is a precision meter calibrated with great accuracy to provide exact exposure data. Should you still not
be satisfied with the results, then you should remember that there are independent variables that can influence the
success of your exposures.
For instance:
the „true“ speed of your film can deviate from that on the pack
the „true“ shutter speeds and f-stops of your camera can differ slightly form the rated values
Deviations can arise when the film is processed.
Also there must be added purely subjective factors and matters of personal preference in the assessment of the
finished photos. However, you can calibrate your Digipto F to characteristics of your camera, your brand of film, your
processing methods, and to your projector.
We recommend the following procedure:
Take the readings of a few normal subjects with the utmost care by the reflected and incident light measuring
methods, and take five shots of each subject on colour reversal film. The first picture should be exposed with the
exposure settings supplied by the Digipro F. The exposure settings for the remaining shots are then increased and
decreased, respectively, by half an f-stop and then a full
f-stop. Make a note of the shooting conditions. These must not change while the five shots are being taken. Now
select from the processed pictures the one you consider to be optimal and compare its settings with the meter
readings.
If you find that you prefer exposures taken with settings that differ from those supplied by the meter, then these
settings can be programmed, as a correction, into your Digipro F. With your correction, the Digipro F will give precise
readings to produce optimal exposure results.