Blue Rhino 450000 User Manual
Page 11
10
Owner’s manual and assembly instructions: model 450000 outdoor patio heater 1/15/03
Contact 1-800-762-1142 for assistance.
Do not return to place of purchase.
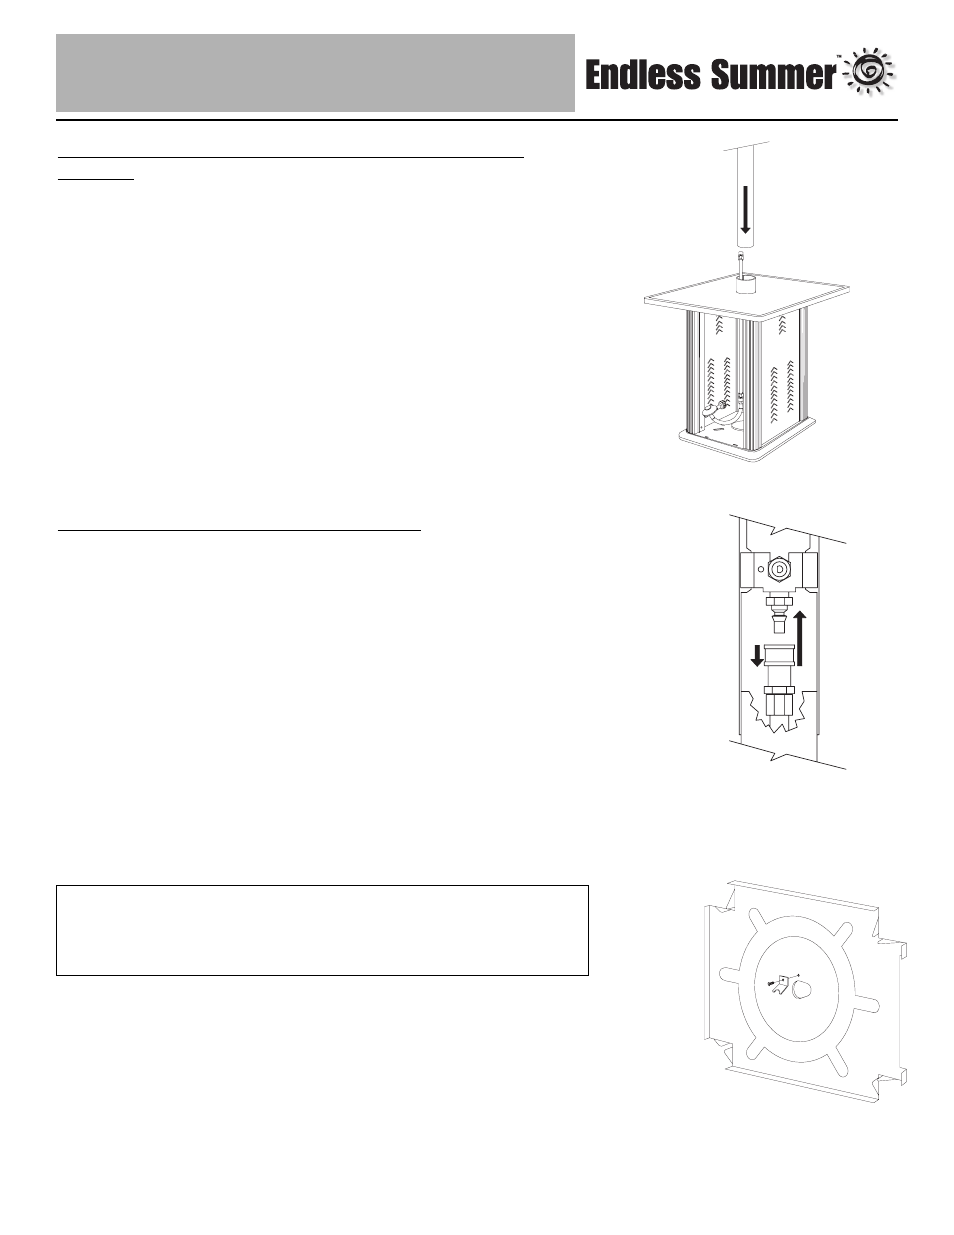
Step 10 – Attach Gas Line, Gas Line Clip
• To attach Gas Line to Control Valve:
• Pull collar on Gas Line back.
• Insert Gas Line over Control Valve stem by pushing Gas Line
from below.
• Release collar and it should lock in place.
• Gently tug on line to test for proper connection. If Gas Line moves
you are not properly connected. Do not proceed until you have a
proper connection.
• Fully tighten the (4) screws from Step 8.
• Attach gas line clip to platform using Large Screw as shown.
• If necessary, with the loosened screws still in place, move the Engine
Assembly back and forth to allow proper alignment of Gas Line and
Control Valve stem.
Step 9 – Insert Gas Line, Engine Assembly/Pole into
Platform
• Tip the Table Assembly towards the rear to allow insertion of the Gas
Line/Regulator Assembly.
• Slide top of Gas Line/Regulator assembly through oblong hole in
center of platform and upward into engine assembly. Make sure gas
line is vertical.
• Slide end of the pole without holes into collar of Platform until Post
rests completely on Platform, being careful not to bend gas line.
• Tighten bottom three Setscrews with hex (Allen) wrench supplied.
• Use top three Setscrews to adjust Post’s angle as necessary.
• Fully tighten all six Setscrews.
Note: Post must be perpendicular to Base. Failure to do so will
adversely affect burner performance. Use of a level may be helpful.
TIP:
Push Gas Line firmly from bottom to make sure it is fully seated before
releasing collar.