Wing installation prefl ight checklist – E-flite Adagio 280 BNF Basic User Manual
Page 4
4
EN
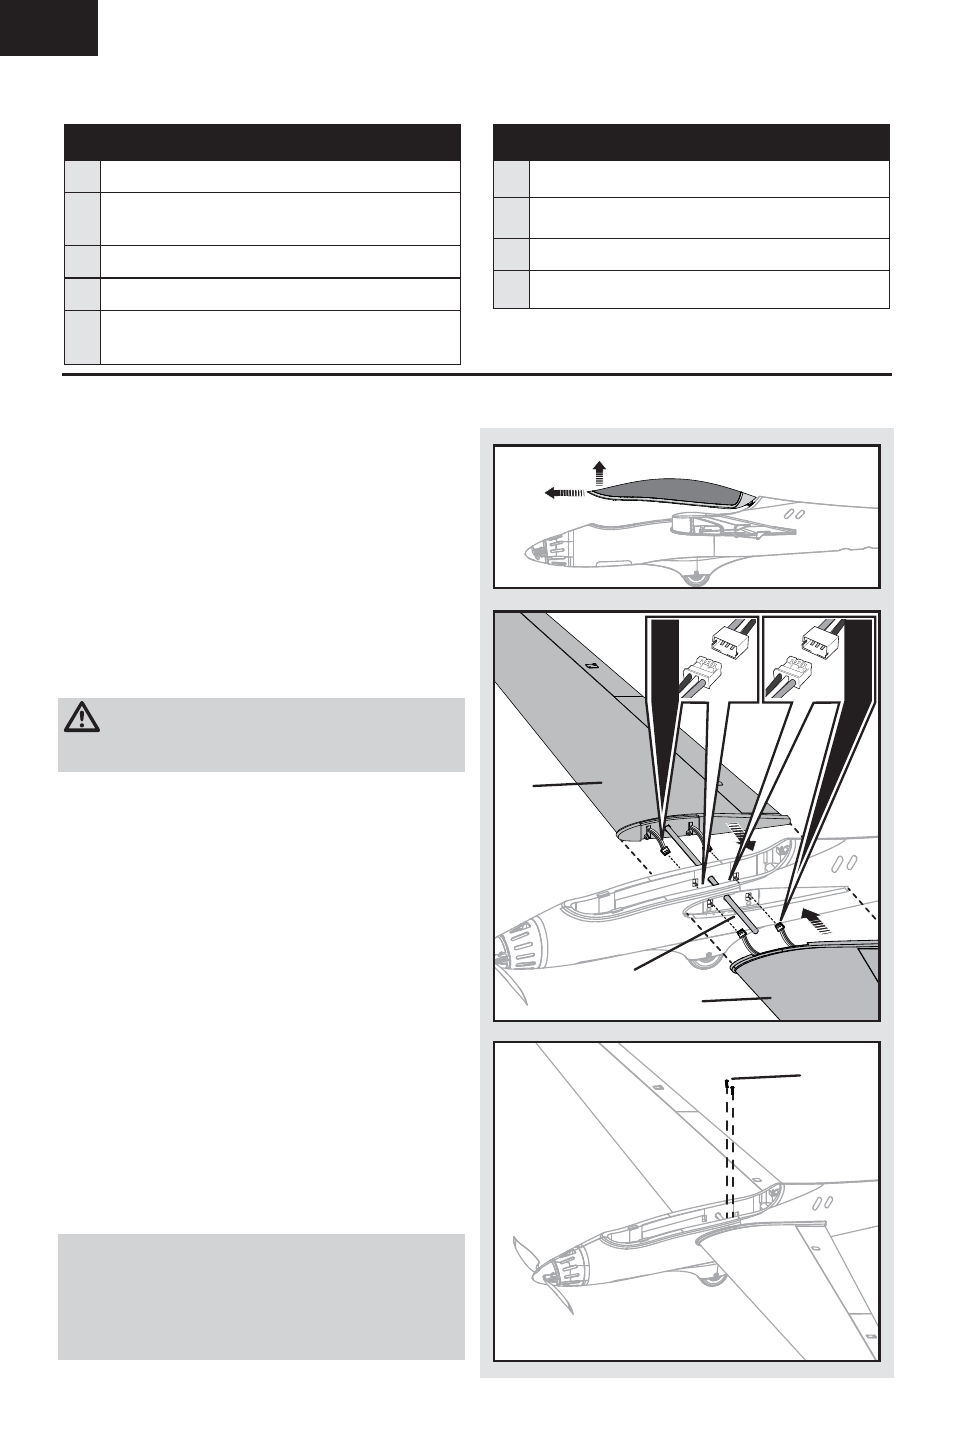
1. Remove the canopy hatch before installing the
wings.
2. Slide the wing tube (A) into the fuselage.
3. Install the left and right wing (B and C) over
the wing tube and into the wing slot of the
fuselage while inserting the aileron and fl ap
servo connectors through the provided holes.
Tip: If needed, use hemostats or pliers to pull the
servo connectors into the fuselage.
CAUTION: DO NOT crush or otherwise
damage the wiring when attaching the wing
to the fuselage.
4. Connect the aileron servos from the wings to
the Y-harness connectors in the fuselage. The
left and right aileron servos can be connected
to either side of the Y-harness.
IMPORTANT: Correct operation of the AS3X system
requires connection of both ailerons to the included
Y-harness and the AILE channel of the receiver.
5. Connect the fl ap servos from the wings to
the Y-harness connectors in the fuselage. The
left and right fl ap servos can be connected to
either side of the Y-harness.
6. Secure the left and right wings to the fuselage
using the 2 included screws (D).
7. Replace the canopy on the fuselage.
When needed, disassemble in reverse order.
NOTICE: When disconnecting the servo connectors,
do not pull on the servo wires. Use a screwdriver
or pliers to break the friction fi t of the servo
connectors. Failure to do so could result in damage
to the servo wiring.
Wing Installation
Prefl ight Checklist
9
1. Charge fl ight battery.
2. Install fl ight battery in aircraft (once it has
been fully charged).
3. Bind aircraft to transmitter.
4. Make sure linkages move freely.
5. Perform Control Direction Test with
transmitter.
9
6. Adjust center of gravity.
7. Perform a radio system Range Check.
8. Find a safe and open area.
9. Plan fl ight for fl ying fi eld conditions.
C
A
B
Ailerons
Fla
ps
D