E-flite Slick 3D 480 ARF User Manual
Page 12
12
EFL Slick 3D 480
5
L
R
L
R
15
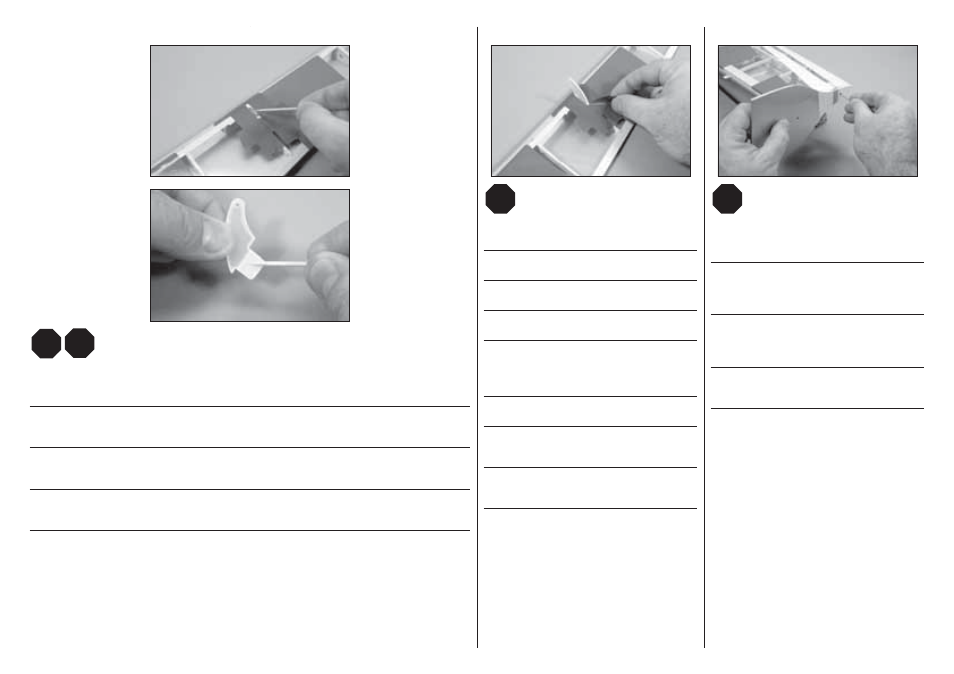
Mix a small amount of 15-minute epoxy. Use a toothpick to apply epoxy in the slot for the control horn, and to the
area of the control horn that fi ts into the aileron. Fit the control horn in the aileron. The horn will fi t snug in the slot.
Use a paper towel and isopropyl alcohol to remove any excess epoxy from around the control horn.
Mischen Sie eine kleine Menge von 15 Minuten Epoxy und geben den Klebstoff mit einem Zahnstocher in den Schlitz
und auf die Aufl agefl äche. Das Horn paßt saugend in den Schlitz. Wischen Sie überschüssigen Kleber mit einem
Papiertuch und Reinigungsalkohol ab.
Mélangez une petite quantité de colle époxy 15 minutes. Utilisez un cure-dent pour appliquer la colle Epoxy dans la
fente destinée à recevoir le guignol. Insérez le guignol dans l’aileron. Le guignol doit être correctement ajusté. Utilisez
du papier absorbant et de l’alcool dénaturé pour retirer l’excès de colle autour du guignol.
Miscelare una piccola quantità di colla epoxy 15 minuti. Con uno stuzzicadenti applicarla nelle fessure per le
squadrette e sulla parte delle squadrette che entra negli alettoni. Le squadrette si inseriscono precise negli alettoni.
Togliere gli eccessi di colla intorno alle squadrette con un fazzoletto di carta e alcool isopropilico.
6
L
R
L
R
Before the epoxy fully cures, remove the tape from
around the control horn.
Entfernen Sie das Klebeband bevor der Klebstoff
vollständig getrocknet ist.
Retirez l’adhésif de masquage avant le séchage total de
la colle époxy.
Prima che la colla sia asciutta, togliere il nastro messo
prima intorno alle squadrette.
Î Use caution when removing the tape as the
clear covering is thin and can be easily torn.
Î Bitte sein Sie beim Entfernen der Folie sehr
vorsichtig, da diese dünn ist und schnell reißen kann.
Î Décollez l’adhésif de masquage avec
précautions, l’entoilage transparent est
très fin et peu facilement se déchirer.
Î Bisogna fare attenzione quando si toglie
il nastro perché il rivestimento trasparente è
sottile e si potrebbe strappare facilmente.
7
L
R
L
R
Place the Side Force Generator on the wing tip. Insert
a t-pin in each of the mounting holes to locate the hard
points in the wing tip for the mounting screws.
Setzen Sie den Side Force Generator auf die
Flächenspitze. Stecken Sie eine T-Nadel in jede Seite
der Montagelöcher um die Befestigungspunkte der
Montageschrauben zu lokalisieren.
Placez le générateur de force latéral sur le saumon
de l’aile. Insérez une épingle dans chaque trou afi n de
localiser emplacement des trous de vis de fi xation dans
le saumon.
Sistemare sull’estremità alare i generatori di spinta
laterale. Inserire uno spillo a T in ogni foro di montaggio
per individuare il punto duro dell’ala in cui mettere le viti.