2 rear panel, The effects, 1 reverb 1 – Behringer Minifex FEX800 User Manual
Page 5
5
MINIFEX FEX800 User Manual
•
SELECT (additional effect parameter): Press this button to
choose between two different effect characteristics when using
presets 1-8, 13-14, 16. When the button lights up this means
that the corresponding parameter of the selected preset has
been activated.
◊
Table 6.1 gives you an overview of all effect parameters that
can be edited in the various presets .
(5)
Use the INPUT LEVEL control to adjust the input signal level.
Please be sure to set a level that is sufficiently high but does not
overload the unit.
(6)
The L + R LED display is for monitoring the input level.
It comprises 6 LEDs. When the CLIP LED lights up, this indicates
that digital distortion may occur at the input of the FEX800.
In this case, the input signal level must be reduced.
(7)
Use the MIX BALANCE control to adjust the ratio of original
vs. effect signal. Turn the control fully to the right to hear only
the processed effect signal. Turn it fully to the left to hear only
the unprocessed input signal.
(8)
The IN/OUT button enables/disables the effect signal.
The button lights up when the input signal is being processed
by the FEX800. In order to hear the processed signal you have
to set a suitable ratio of effect vs. direct signal using the
MIX BALANCE control
(7)
.
(9)
Use the OUTPUT LEVEL control to adjust the output level.
(10)
The
� switch turns your MINIFEX FEX800 on and off. The switch
lights up when the unit is switched on.
◊
Merely switching the unit off does not mean that it is fully
disconnected from the mains. To disconnect the unit from
the mains, pull out the mains connector. Please make sure
before installation that the mains connector has not been
damaged. If you do not use the unit for an extended period
of time, please disconnect it at the mains.
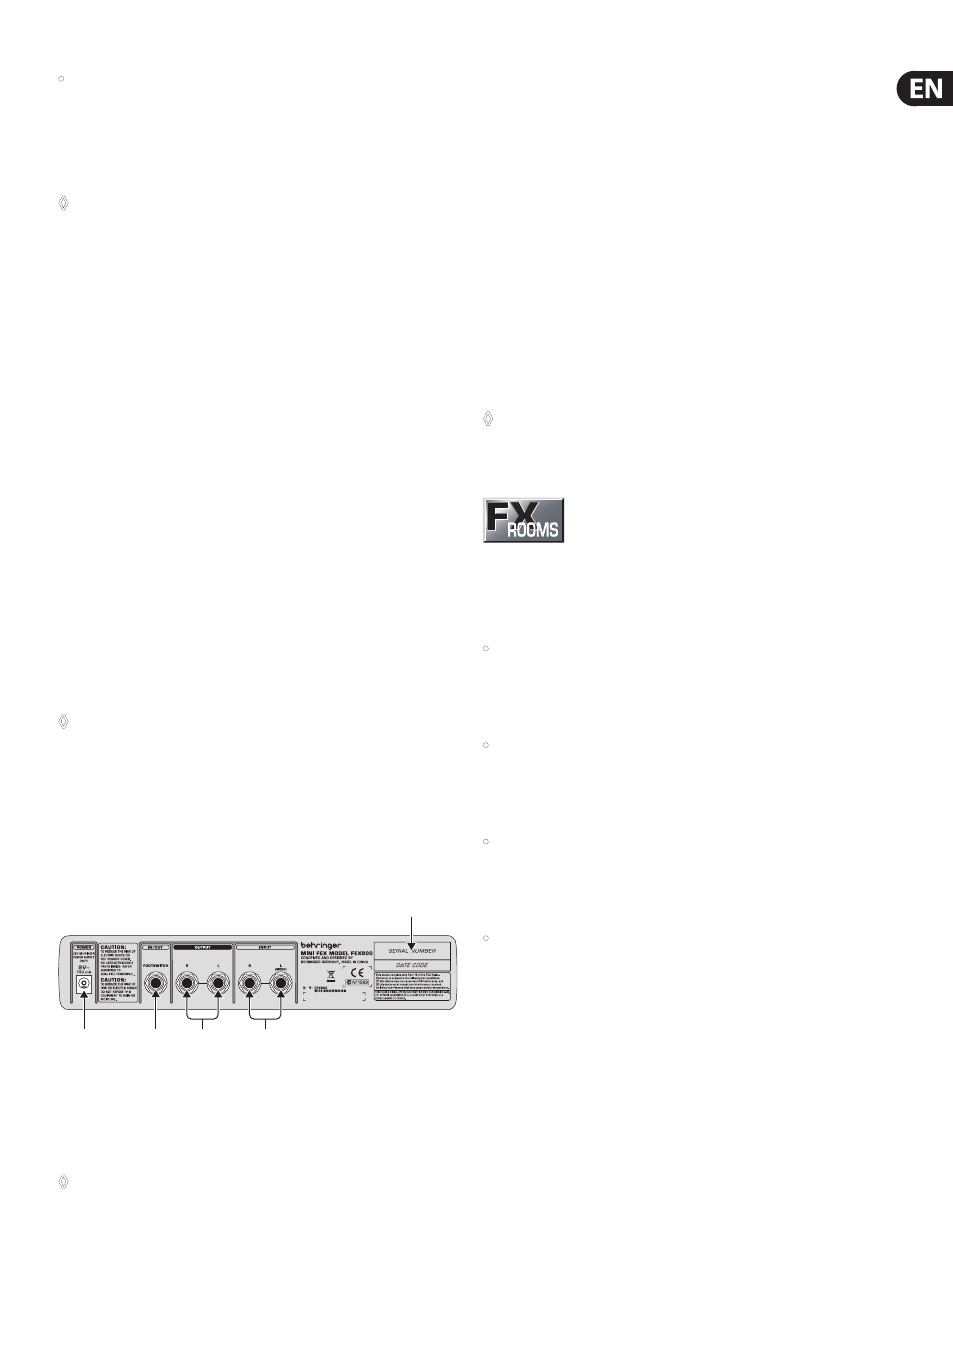
2.2 Rear panel
(15)
(15)
(12)
(14)
(13)
Fig. 2.2: Rear panel connectors of the FEX800
(11)
The FEX800 is connected to the mains using a 2-pole
POWER connector jack. A matching mains adaptor is
included with the unit.
◊
To avoid damage to your FEX800 always use the mains
adaptor supplied with the unit.
(12)
A single footswitch can be connected to the IN/OUT connector.
This footswitch allows you to remotely control the IN/OUT
button
(8)
on the front panel and switch the effect signal
on and off.
(13)
The two OUTPUT connectors are on 1/4" connectors and provide
a balanced left/right signal.
(14)
The two INPUT connectors are on 1/4" connectors and can be
used for unbalanced signals. A single mono signal should be
connected to the L jack.
(15)
SERIAL NUMBER.
3. The Effects
Your MINIFEX FEX800 comes with 16 presets, which are grouped in
four different categories. All of them are stereo effects.
◊
Table 6.1 contains a list of the preset effect parameters
which can be edited as well as a description of the
TAP/SELECT button’s function.
3.1 REVERB 1
The presets from the REVERB 1 category reproduce the characteristics
of natural spaces of different sizes.
•
CATHEDRAL simulates the reverberation that you can hear
in big cathedrals. This effect is characterized by a long reverb
and very specific echoes. It works well with solo instruments
and vocals.
•
CONCERT simulates the reverberation in a mid-size concert
hall. The preset is well suited for all natural instruments such as
piano. When used sparingly, it also gives vocals an interesting
touch, for example, in ballads.
•
CLUB simulates the cozy atmosphere of a mid-size jazz club or
theater. This reverb is characterized by its early reflections and
short decay. The preset works well with vocals, electric piano,
drums, saxophone and other instruments.
•
CHAMBER simulates the typical characteristics of a studio.
The preset is well suited for drums, guitars and vocals or
whenever you need an unobtrusive reverb to breathe some
life into a signal.