Performance se, Azimuth-setting, Antiskating-setting – Clearaudio PERFORMANCE SE User Manual
Page 17
Performance SE
User manual
Page 17
clearaudio electronic GmbH 2012
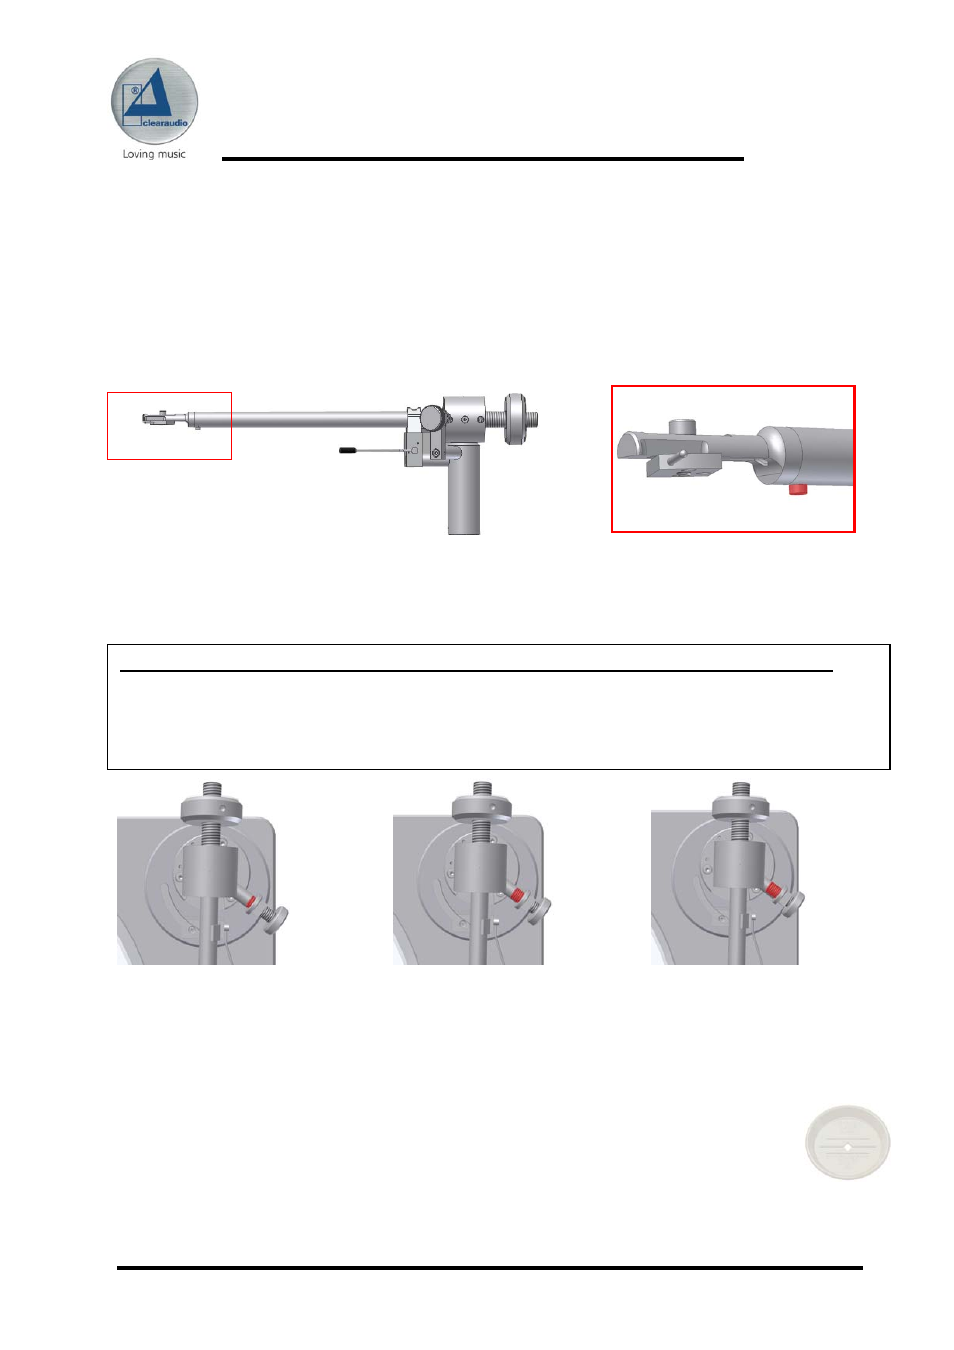
5. Azimuth-setting
Please note that the azimuth is pre-set exactly. If for any reason the azimuth must be altered
to compensate the geometry of some pick-up/cartridges, follow these steps:
loosen the screw on the bottom side of the tone arm near the headshell. Now you can adjust
the azimuth by turning the headshell gently in the tonearm. When finished, lock the screw
again.
6. Antiskating-setting
Now you can set the antiskating. It must be set in accordance to the tracking force:
picture 1
picture 2
picture 3
(minimal anti-skating)
(medium anti-skating)
(maximum anti-skating)
The tonearm is adjusted now.
Connect the power cord of the motor platter to the power supply.
Place a record on the turntable and fix it with the clearaudio clever clamp (enclosed).
Your
Performance SE
-turntable is completely set up and ready to play.
We wish you a lot of listening pleasure!
Antiskating:
Tracking force:
Position of the antiskating-screw:
Minimal antiskating
→ 10-15mN →see picture 1
Medium antiskating
→ 15-20mN →see picture 2
Maximum antiskating
→
20mN and more
→see picture 3
Picture 23 + 24: Loosen the screw to set the azimuth
Picture 25: Antiskating