Performance se – Clearaudio PERFORMANCE SE User Manual
Page 15
Performance SE
User manual
Page 15
clearaudio electronic GmbH 2012
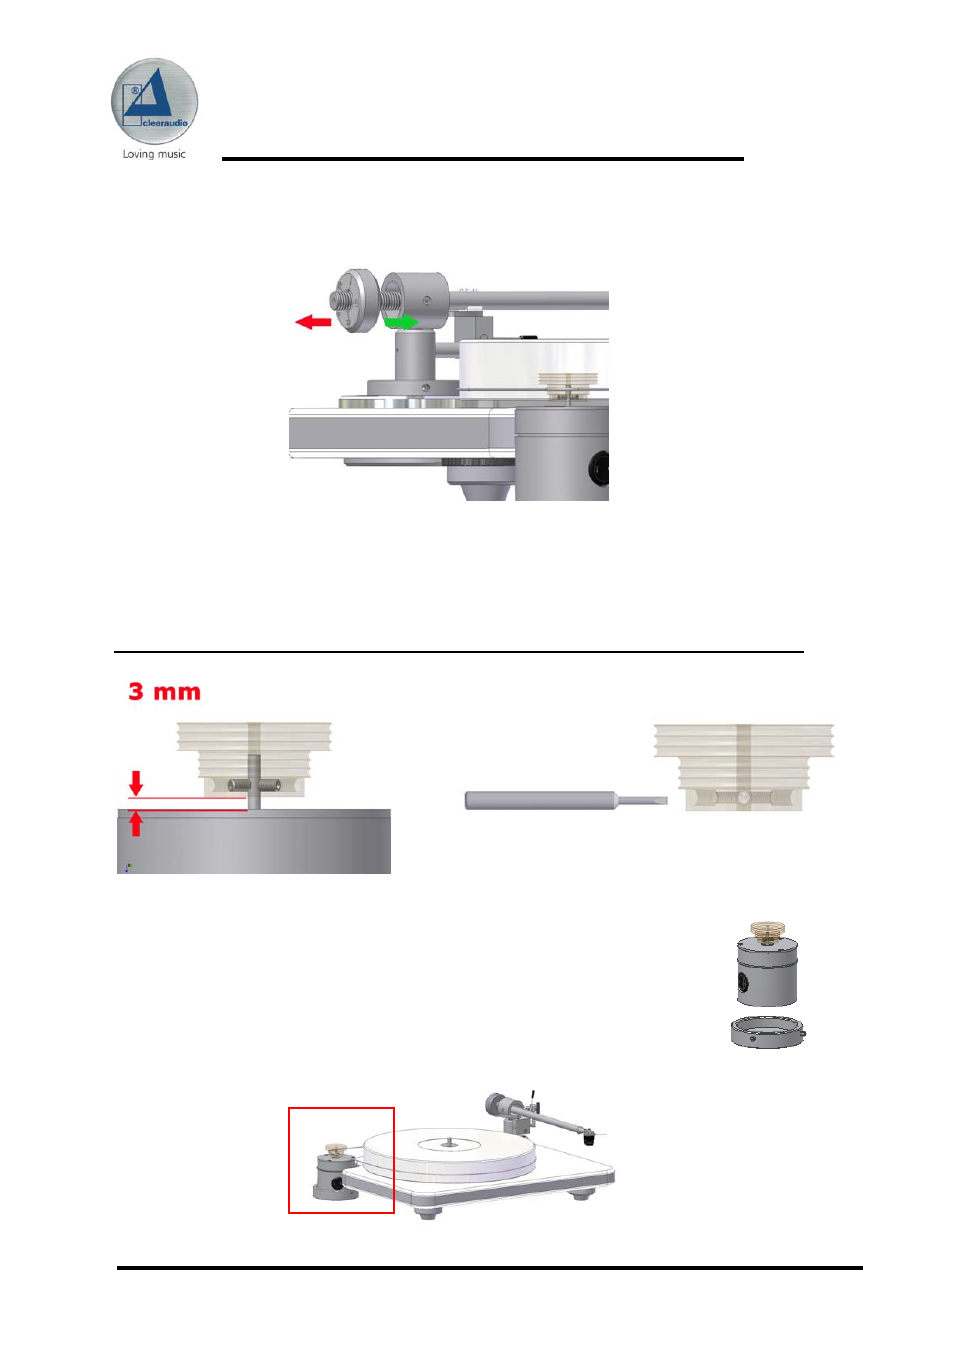
Turning the counter weight forward or backward (
green arrow = more tracking
force
/
backward = less tracking force
) you can now set the exact weight of the pick-up
/cartridge.
Now mount the pulley on the motor-unit. Slide the pulley onto the motor axis. Make sure the
distance between the bottom of the pulley and the motor-chassis is about 3 mm. Tighten the
pre-mounted screws with the enclosed screwdriver.
Please use for 230 Volt motor the 6-cut pulley (e.g. Germany, Switzerland …):
Please place first the motor unit into the stainless steel motor stand and
fix it with the two screws on the side of the motor stand.
Place the motor into the cut out on the left of chassis.
3 x
Picture 17: Changing the tracking force
Picture 18: Adjustment of the 6-cut pulley
Picture 19: Positioning the motor- unit
into the stainless steel
motor stand
Picture 20: Positioning of the motor-unit