Installation – Bully Dog OBDII Adapter Plug User Manual
Page 10
INSTALLATION
13
part 2: installing the pOwer wire
Part 2 involves locating the correct fuse within the vehicle fuse box, and connecting the power wire
from the OBD ll Adaptor plug to the fuse in the fuse box.
Pre Installation:
Locate the vehicle fuse box; the vehicle owners manual will indicate where the fuse box is
located within the vehicle. Open the fuse box and identify a fuse that has “key on power.” To identify the correct
fuse, find an accessory fuse using the fuse diagram in the vehicle owners manual. If the vehicle manual does
not help identify an accessory fuse use a voltage meter to identify a fuse that supplies power only when the key
is in the on position.
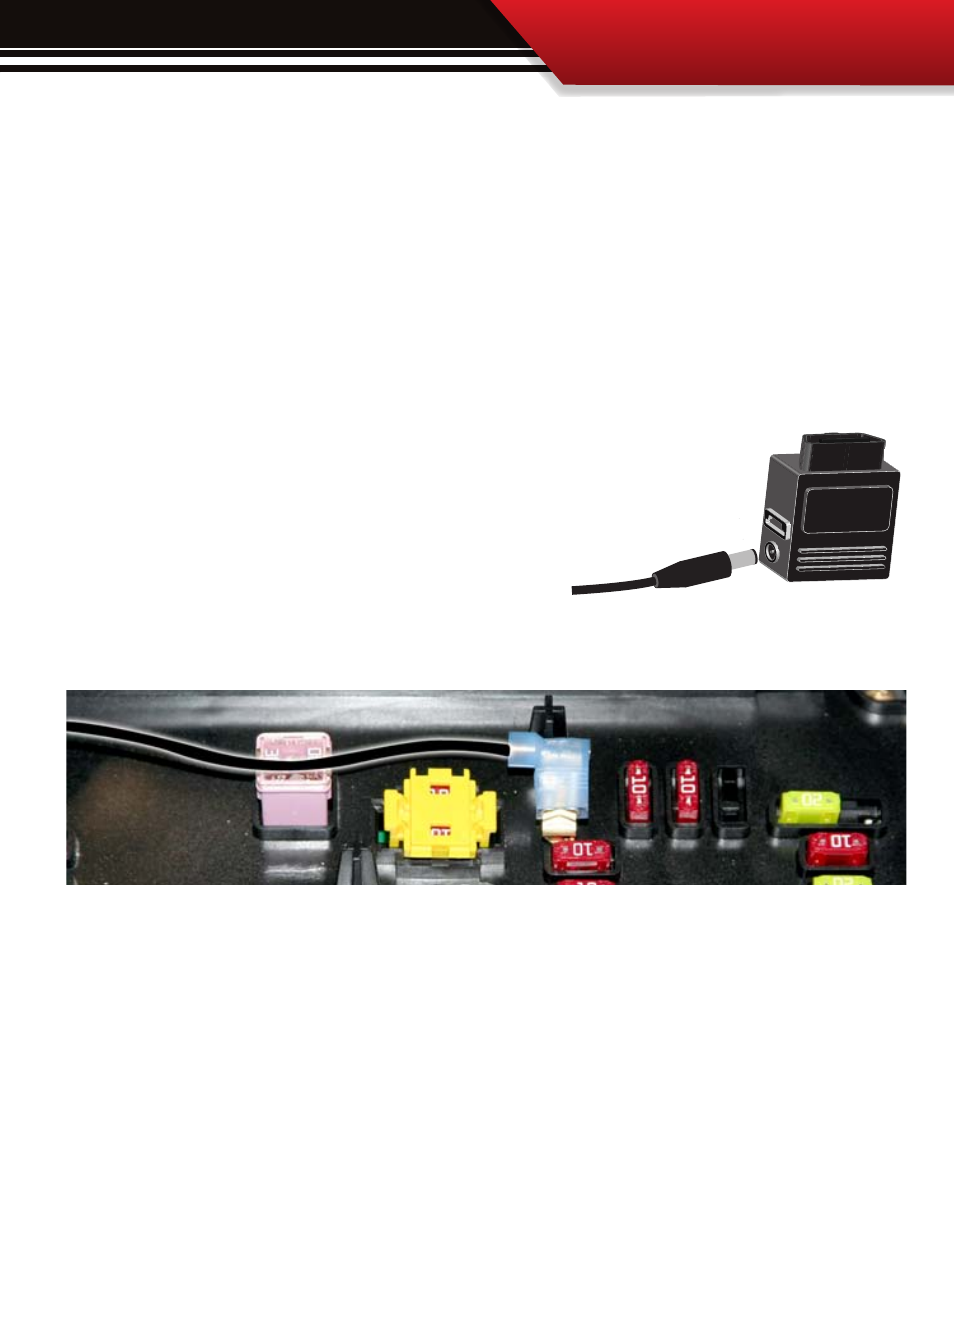
Installation:
1. See the diagram to the right, simply plug the end of the power wire into the OBD
ll block before running the opposite end to fuse box.
Quick Tip:
For the cleanest install of the power wire to a fuse
location use a spade connector and a fuse tap even though you
could just stuff the Power wire into the fuse hole.
2. Run the end of the wire to the location of the fuse box. It may be necessary to go through the fire wall to get
to the fuse box, if this is the case it may be easier to run through an existing grommet rather than drilling a new
hole.
3. Prepare the end of the power wire by attaching a spade connector to the end of the wire.
4. Remove the selected fuse from its location and then place a fuse tap that is made for that size of fuse
into that selected fuse location along with the original fuse.
5. Connect the spade connector to the end of the fuse tap.
6. Use zip ties to secure any loose wire left hanging from excess slack in the power wire.