Installation step 4, Gauge setup – Bully Dog 40390 PCH with Pyrometer Lead User Manual
Page 12
11
installation Step 4
STEP 4: SETTing THE PyromETErS uP To viEw on THE DEviCE
Once the Pyrometer Probe Kit is completely installed it is an easy two step process to dipslay pyrometer
temps on the Bully Dog Triple Dog GT, Watchdog, or PMT.
1. Start up the Bully Dog device in use and navigate from the Main Screen into the main menu and then
into the Gauge Setup Menu.
2. Once in the Gauge Setup Menu highlight any gauge location on the left side of the screen, then use the
up/down buttons on the right side of the device to highlight either pyro 1 or pyro2. Simply highlight
the particular pyrometer to display in that location.
Once the pyrometer temperatures are displayed in any gauge location navigate back out to the main
screen of the device and prepare to perform the Pyrometer Calibration Procedure to determine a safe
temperature ceiling for that vehicle which will also help determine a defueling level for diesel vehi-
cles.
®
go back
Speed
Boost
rPm
Coolant
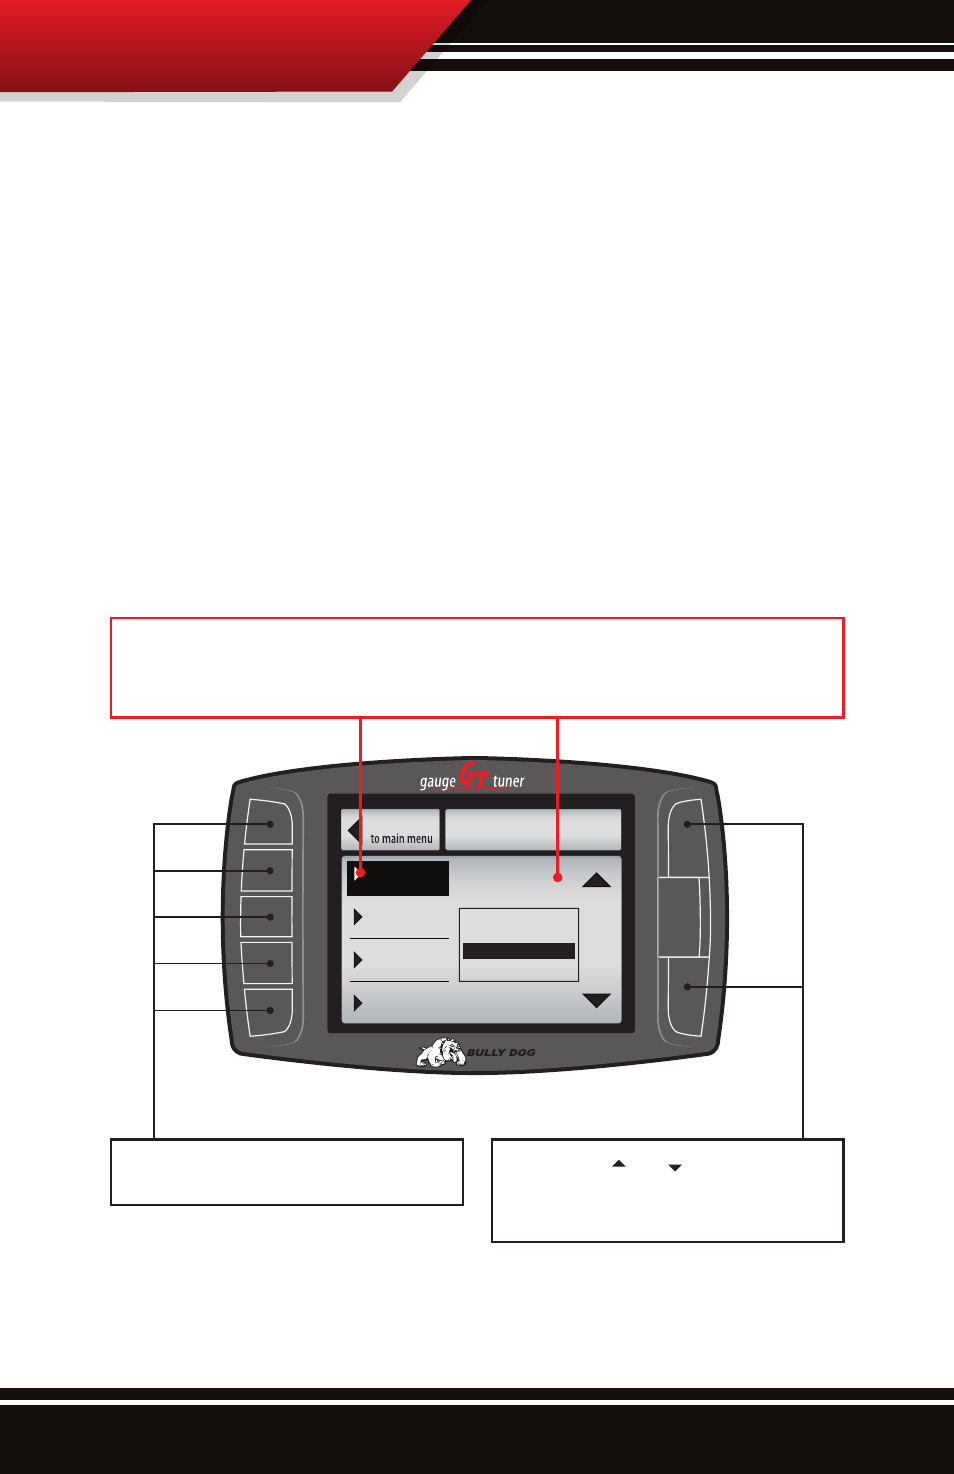
gAugE SETuP
gauge 1
Use the Up & Down Arrows to
Change the Tranny Tune
Pyro 2
Speed
Boost
Set Gauge 1
Set Gauge 2
Set Gauge 3
Set Gauge 4
Notice that upon entering the gauge setup menu that, Set Gauge 1, is highlighted in black. When a gauge
location is selected it is highlighted in black on the left and it also appears above the vehicle parameter selec-
tion box.
To highlight a different gauge location press the
button adjacent that on screen gauge location.
Use the large Up Down Buttons to highlight a
particular vehicle parameter for any of the gauge
locations.