Brewer installation – Brew Express BE-112 INSTALLATION User Manual
Page 6
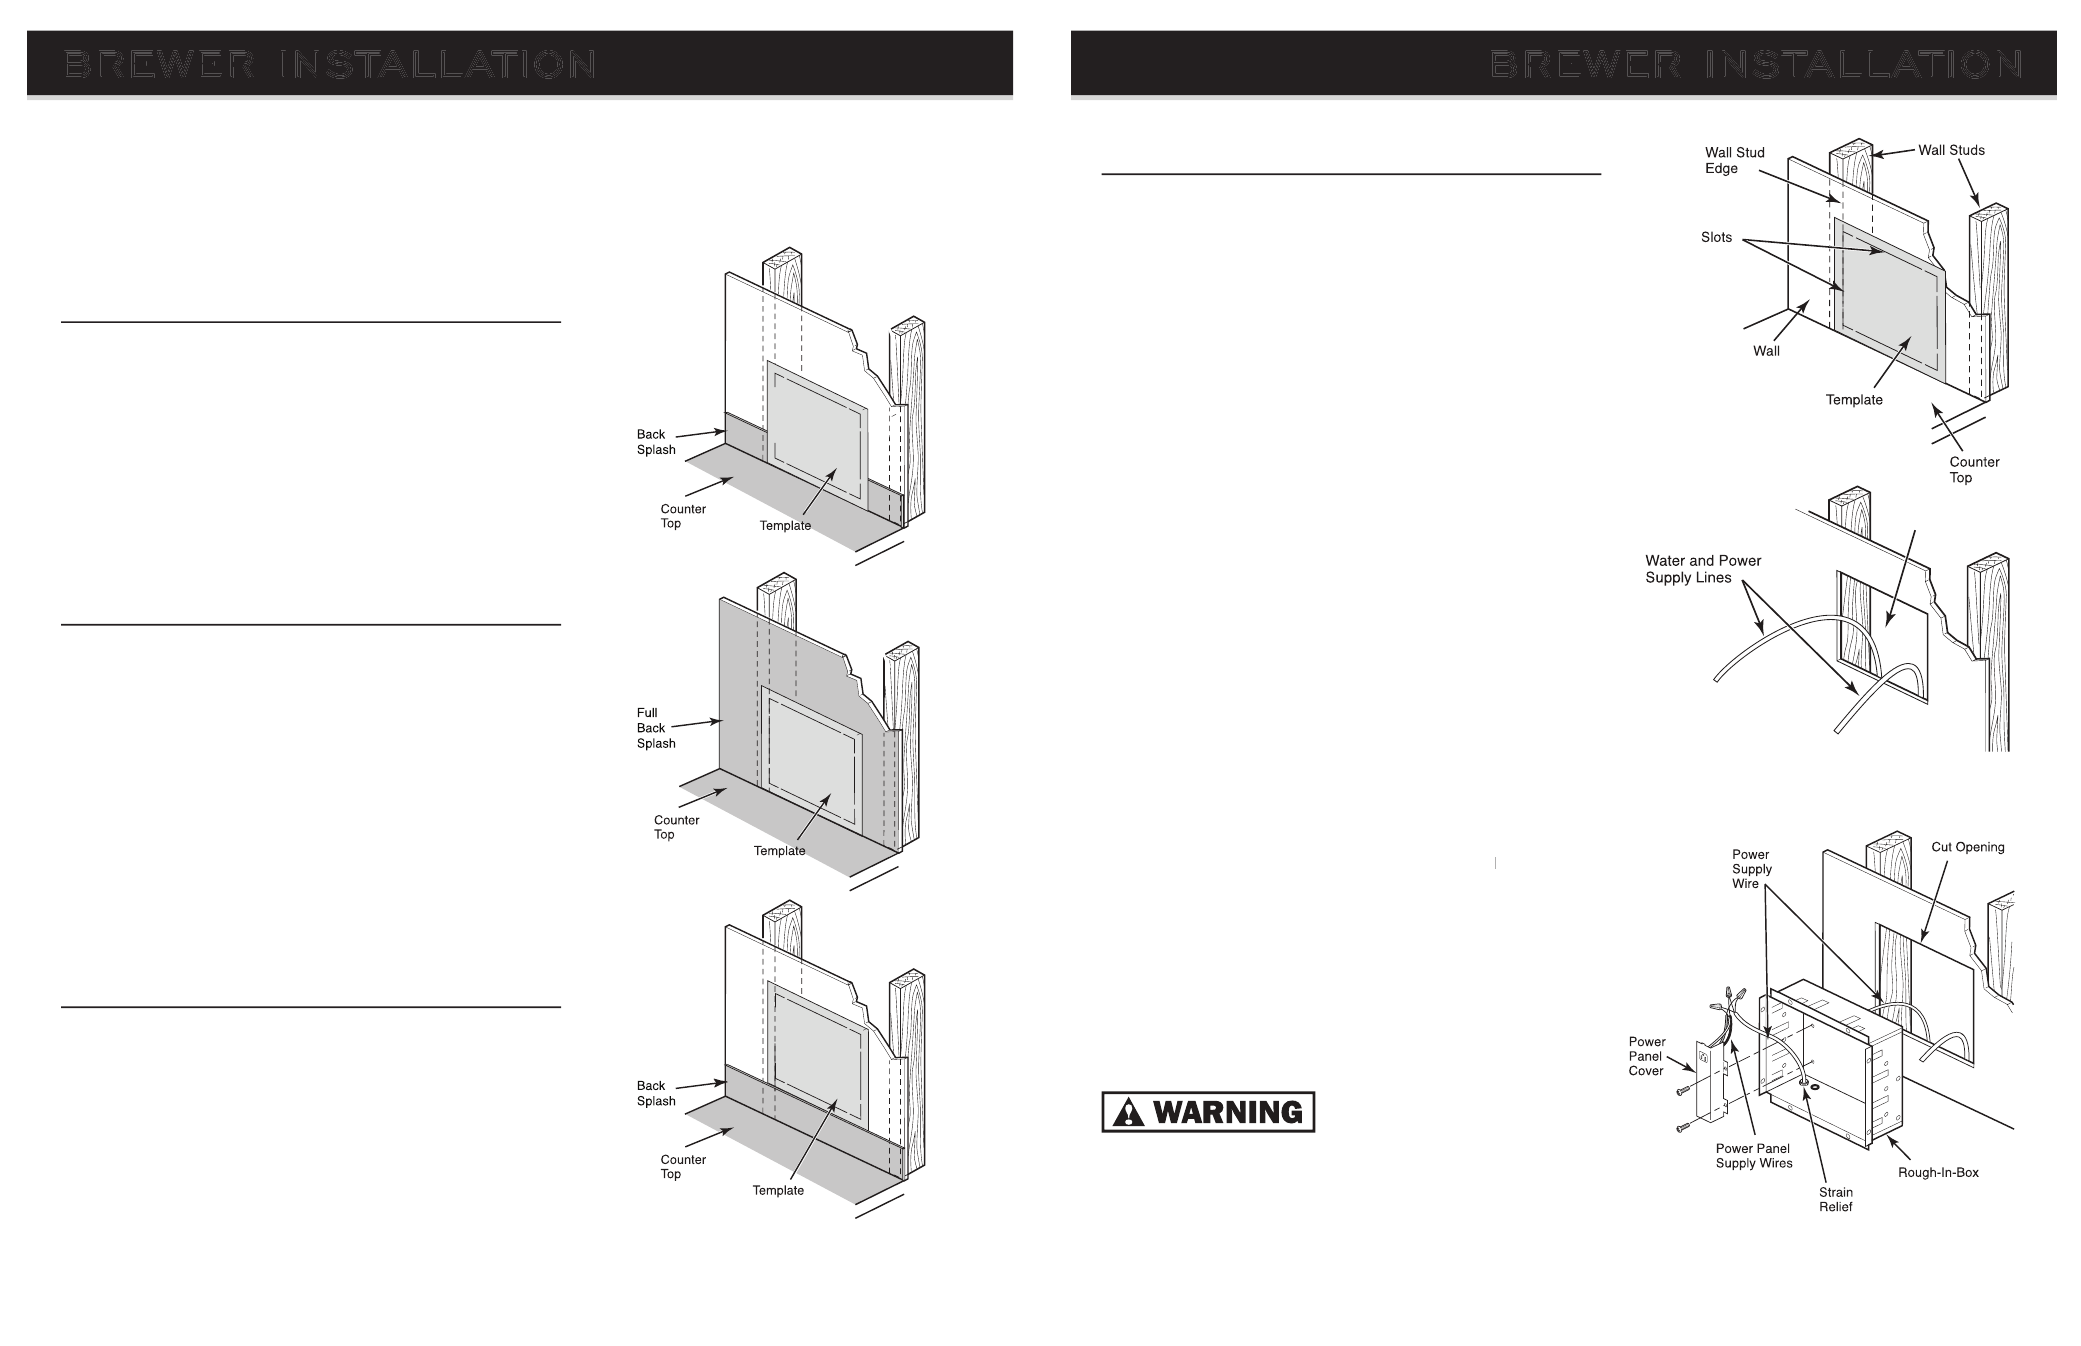
Installation of Rough-In-Box
1. Locate wall studs within the desired location of wall.
Using the template provided, Place template on wall as
shown. Slots in template should be fl ush with left or right
side of wall stud edge. The slots in the template designate
the area to be cut. The bottom of template refl ects the
bottom of the unit. See fi gure 1.
2. Use a utility knife to carefully cut inside the penciled
outline area. Start with the stud side and work outward.
DO NOT USE A SAW. Remove sheet rock piece exposing
wall cavity. Bring water and power supply lines from source
to this location. See Figure 2.
Figure 1
8
9
BREWER INSTALLATION
BREWER INSTALLATION
IMPORTANT:
If installing Unit PRIOR to cabinets, it is strongly advised to consult with cabinet maker and build-
ing contractor for exact height of counter top due to the various thicknesses of counter tops (tile
laminate, granite, etc). For best results cut hole and install unit AFTER cabinets are installed.
A. Installing BREW EXPRESS™ on Counter
It is best to install the unit so the bottom edge is just off the
counter top. In an existing home, this may require part of the
back splash to be removed. Use template provided to
determine the location to be cut out for rough-in-box.
B. Installing BREW EXPRESS™ with Full Back Splash
Use template provided to determine the location to be cut
out for rough-in-box. Ensure fi t is correct by fi rst placing
rough-in-box in cut out hole. Remove rough-in-box. Finish
installation of full height back splash to cut opening. If full
height back splash is granite or tile, it is recommended to
cut opening and install rough-in-box after surface is complete.
IMPORTANT: DO NOT COMPLETE INSTALLATION OF
ROUGH-IN-BOX BEFORE BACK SPLASH.
C. Installing BREW EXPRESS™ above Back Splash
If you prefer a continuous back splash, the unit can be installed
above the back splash. Use template provided to fi nd best fi t.
IMPORTANT: WHEN INSTALLING THE UNIT ABOVE BACK
SPLASH, BE CERTAIN THERE IS SUFFICIENT ROOM BELOW
THE CABINETS.
Figure 2
Figure 3
3. Place rough-in-box on a towel or cardboard to protect
counter surface. Bring power supply wire from source
to cut opening as previously shown in Figure 2.
Minimum 12-2 wire required. Be sure to have an
additional length of approximately 18” recommended
at rough-in-box opening for installation of box.
Remove power panel cover. Install strain relief (not
strain relief
strain relief
supplied) in hole. Run power supply wire through
strain relief and secure power supply wire (See
Supply Detail, page 10). Connect power supply wires
to power panel supply wires and secure with wire
nuts (See Wiring Detail, page 10). Connect green
wire to green wire, black to black and white to white.
Carefully reinstall power panel cover. Be certain not to
damage wires or insulation. See Figure 3.
All electrical wires and connections MUST be tucked
neatly and completely inside POWER PANEL COVER
without any exposed wiring inside rough-in box. It is
advised you contact a qualifi ed electrician.