Correct flame 3/8” - 1/2, Sketch “j, Sketch “k – Bakers Pride FC-616 User Manual
Page 10
10
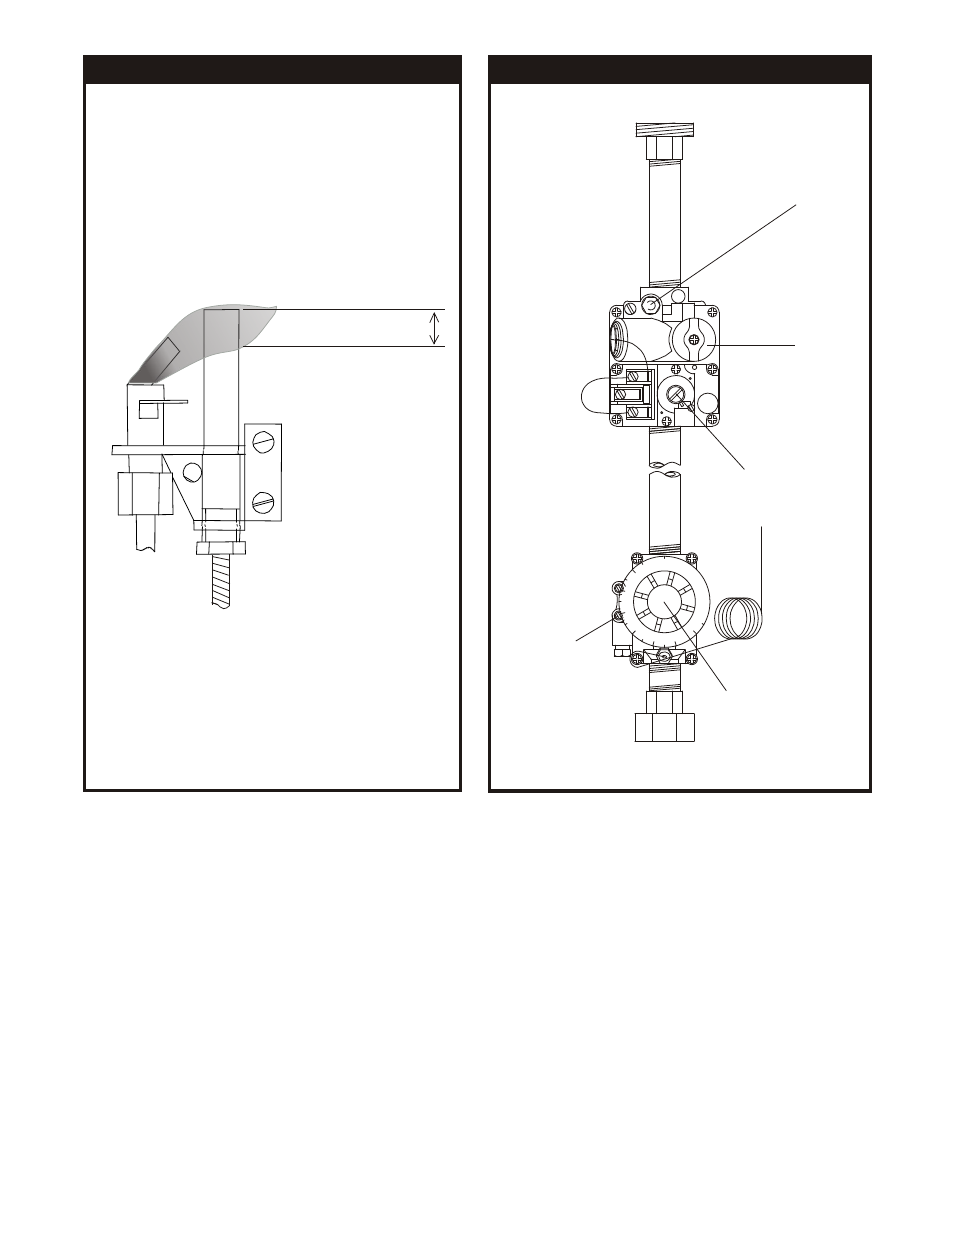
Sketch “J”
Correct Flame
3/8” - 1/2”
Sketch “K”
T
H
T
H
T
P
T
P
T
H
T
H
T
P
T
P
V
E
N
T
V
E
N
T
O
N
O
N
O
F
F
O
F
F
FF FF
PIL
OT
PIL
OT
P
PII
LL
OO
TT
5
6
0
5
6
0
0
0
6
0
0
6
5
5
0
5
5
0
5
0
0
5
0
0
45
0
45
0
40
0
40
0
350 350
3
0
0
3
0
0
IN IN
Pilot
Feed
Gas
Cock
Dial
Pressure
Regulator
Pilot
Adjust
Screw
Thermostat
B. PILOT BURNER FLAME ADJUSTMENT:
It is important to have the correct Pilot Burner Flame size as shown in (Sketch “J”). If necessary,
adjust the Pilot Burner Flame by turning the Pilot Adjustment Screw (see Sketch “K”) clockwise to
reduce or counter-clockwise to increase.
8. BURNER OPERATION:
A. MAIN BURNER:
After the pilot burner is ignited, when heat is desired, turn gas cock dial to the “ON” position and set
the thermostat dial to the desired temperature. The oven burner flame should always have a blue
appearance. That indicates a good mixture of gas and air. When using LP gas, the flame will have
a blue-yellow appearance.
B. BOOSTER BURNER:
Do not turn on the booster burner until the oven is well pre-heated and the pre-set
temperature has been reached. The oven has to be hot in order to draw fresh air in to the
booster burner.
After the pilot burner is ignited, when the booster burner flame is desired, turn gas cock dial to the
“ON” position. The booster burner is set to have a yellow flickering flame, but should not soot.