3D Robotics Remzibi’s OSD 3DR User Manual
Page 13
Updating Firmware
Your Remzibi’s OSD 3DR comes with the latest DIY Drones version of the firmware, and character set
already loaded. We recommend using the DIY Drones version firmware since this makes use of the
status LED, SW1 switch, and other features of the 3DR version Remzibi’s OSD, but if you would like to
change the firmware or update it when new firmware is released here’s how you can do this using the
First, connect your Remzibi’s OSD 3DR to your computer (see
the “Connecting your Remzibi’s OSD 3DR to your computer”
section earlier in this tutorial)
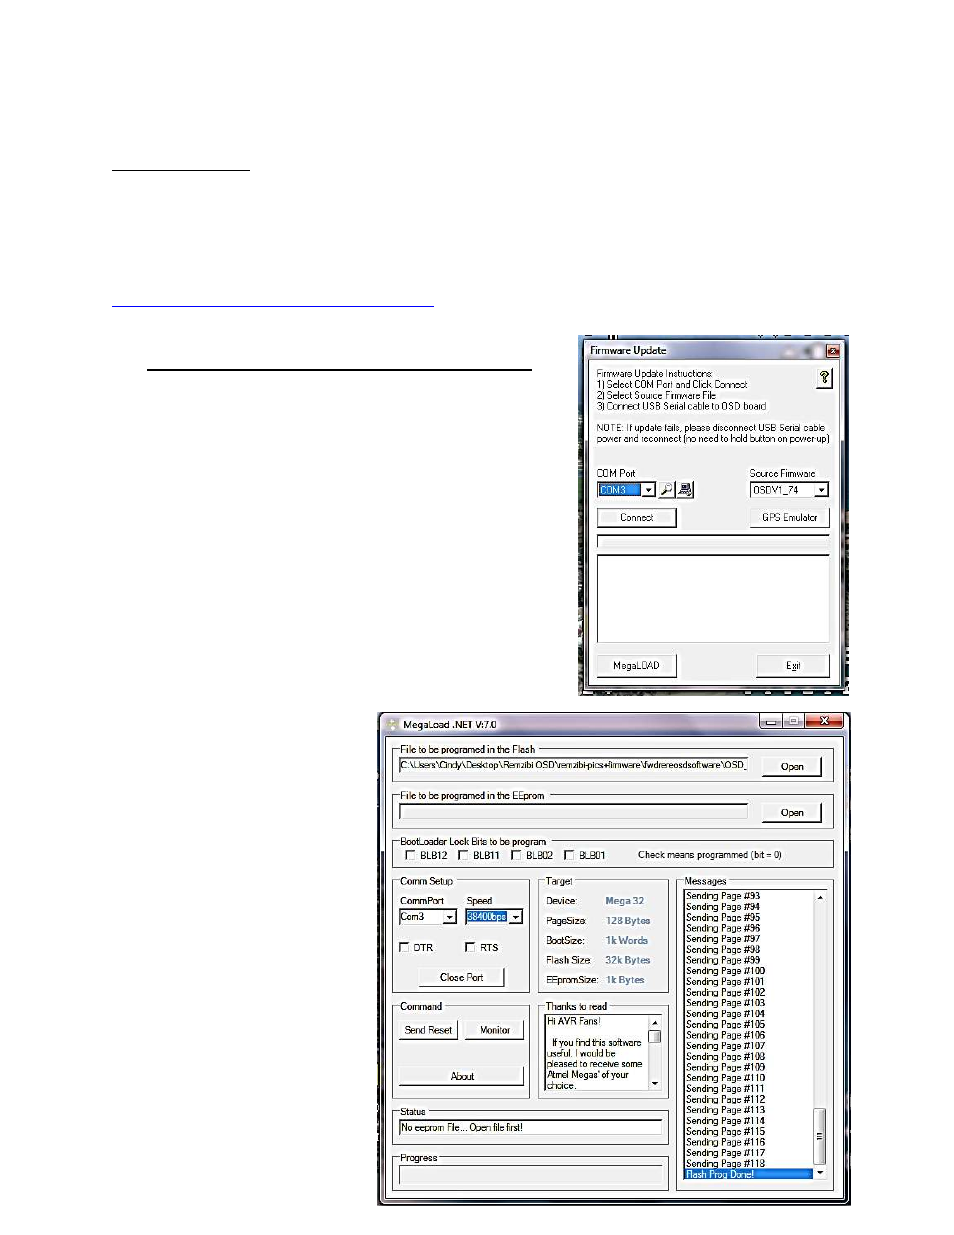
1. In the Firmware Update window, choose the source
firmware you would like to upload. If you do not see the
firmware you would like to upload in the dropdown
menu, you can search for it in the next window.
2. click on MegaLOAD
3. In the MegaLOAD window, you may see a file under File
to be programed in the Flash. You can either upload this
firmware, or you can search for a different firmware by
clicking Open and searching for the File to be
programmed in the Flash.
4. Select the COM port
5. Set the Speed to 38400bps
6. Press the reset button on
the Remzibi’s OSD 3DR to
reset
the
board.
The
firmware will automatically
be uploaded. If the upload
fails or does not begin
immediately, try resetting
the board again.
7. When the firmware is being
uploaded, you will see
pages being sent in the
Messages box, and once it
is finished, it will read
“Flash Prog done!”