Assembly: with bench-mount base – Wood’s Powr-Grip POSF1P9AC User Manual
Page 6
Rev 11.0/12-13
4
POS-1P9AC: #35120
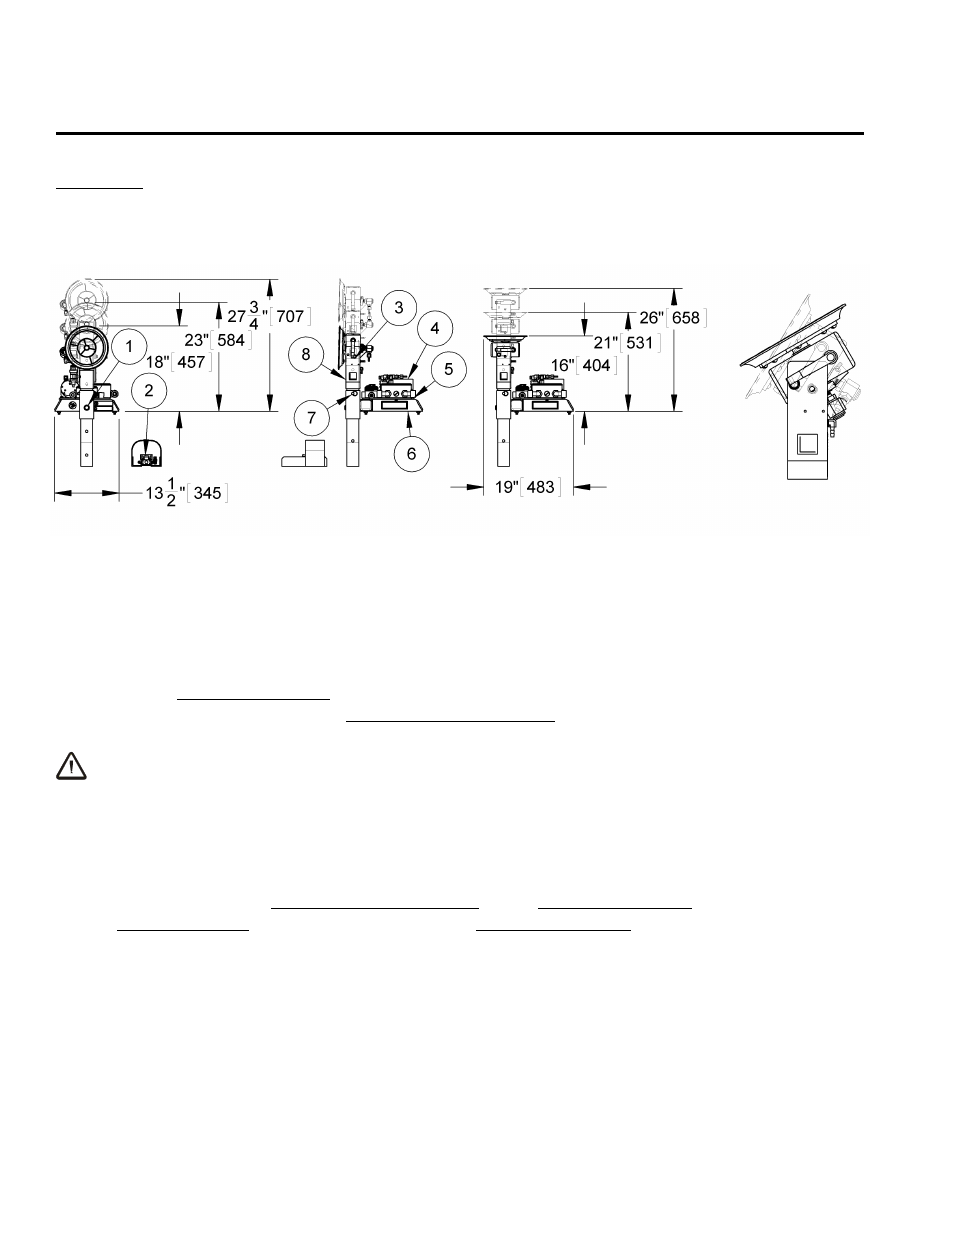
ASSEMBLY: WITH BENCH-MOUNT BASE
Note: Components featured in the following instructions for assembling the product are
underlined on their first appearance in each step.
1) Open the shipping containers and carefully remove the product’s components, taking care to
avoid damaging the vacuum pad (see OPERATION illustrations).
Standard POSB1P9AC shown.
1 SOCKET TUBE BOLT
3 HEAD ADJUSTMENT BOLT
6 BENCH-MOUNT BASE
2 VACUUM RELEASE PEDAL
4 POWER UNIT
7 COTTERLESS HITCH PIN
5 POWER UNIT SCREWS (4x)
8 HEAD WITH EXTENSION TUBE
2) Fasten the bench-mount base near the edge of an appropriate support platform (e.g., table or
bench), so that the tilt/rotation head with extension tube can slide up or down freely in the
socket tube of the base (see step 3).
WARNING: Always securely fasten base to support platform before attaching
load.
The base must be fastened securely to the platform to prevent the product from tipping
forward when loaded. Remove the rubber end plugs in the base tubes to access the
mounting holes.
3) Install the tilt/rotation head with extension tube in the bench-mount base as follows: Identify
the socket tube bolt (with flat washer) and the cotterless hitch pin; if these parts are installed
in the base’s socket tube, remove them. Slide the extension tube into the socket tube as
illustrated. Set the head height by sliding the extension tube up or down until the side holes
align in both tubes at the height desired for using the product; then push the cotterless hitch
pin through the holes until the retaining ball emerges on the far side of the socket tube.
Secure the extension tube by inserting the socket tube bolt with a flat washer into the front
hole of the socket tube and through the extension tube; then thread the bolt into the rear
wall of the socket tube and tighten it securely.